Articles
Tutorials
Interactive Guides
How to integrate JFrog pipelines with Jira and Bitbucket

Jeff Fry
Jeff Fry, Senior Technical Alliance Manager at JFrog
Step-by-step instructions on how to create JFrog pipelines with Bitbucket and Jira
Time
10 minute read
Audience
You work on projects within Jira and want to track the progress of bugs and features in your software builds
Prerequisites
You have a Jira account and a Jira project. Get started with Jira here.
You have created a Bitbucket Cloud account. Login or get started with Bitbucket here.
You have access to your JFrog Cloud instance. Register for an account here.
You have installed the JFrog Platform: Artifactory App for Jira. Register for an account here.
You have followed the instructions to configure your JFrog Cloud instances with the app and tested the connectivity
You're familiar with the basics of Jira issues, Bitbucket, and JFrog
Step 1: Get the example code
- Go to https://bitbucket.org/jefffjfrog/atlassian-open-devops-tutorial
- Fork this repository to your Bitbucket workspace
Step 2: Set up JFrog pipelines for Jira
- Next, follow these instructions to create a Jira API Token
- Copy this Jira API Token
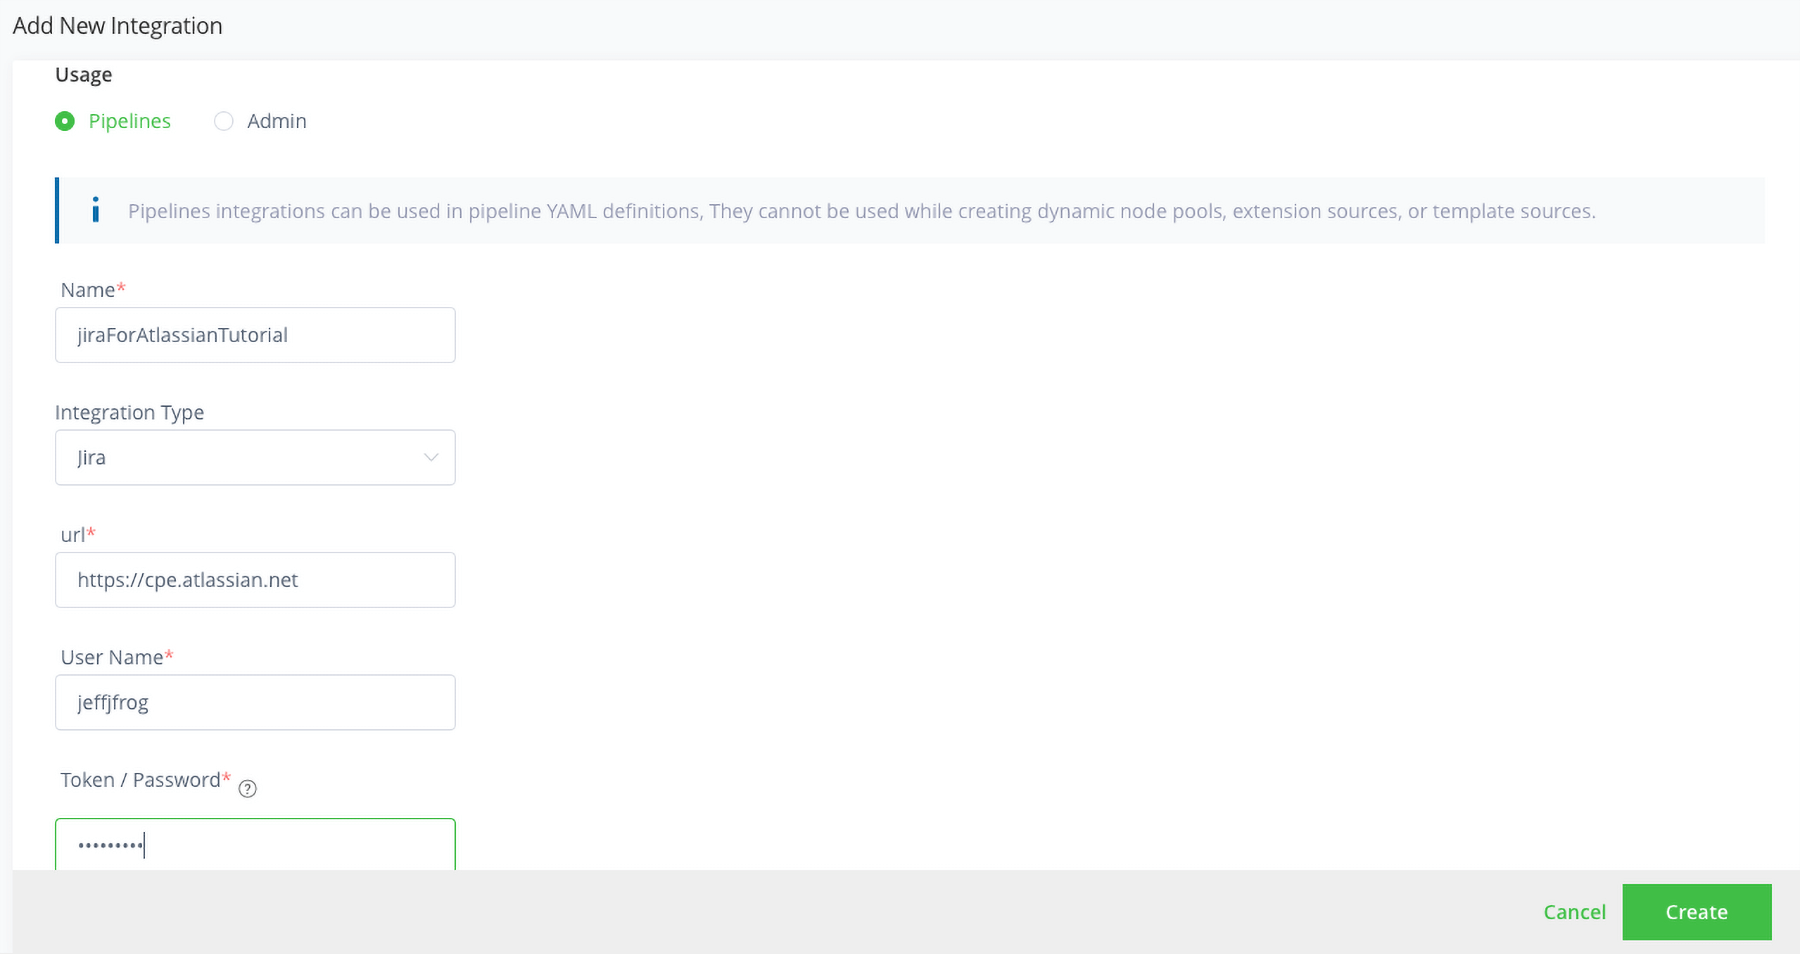
- In your JFrog Platform instance, set up the Jira integration by following these instructions
- Choose Jira for the Integration Type
- Call the Integration jiraForAtlassianTutorial
- Specify the Jira server API endpoint as the URL
- Specify your Jira User Name
- Paste your Jira API Token for Token
- Click Create to create the Jira integration
Step 3: Set up JFrog pipelines for Artifactory
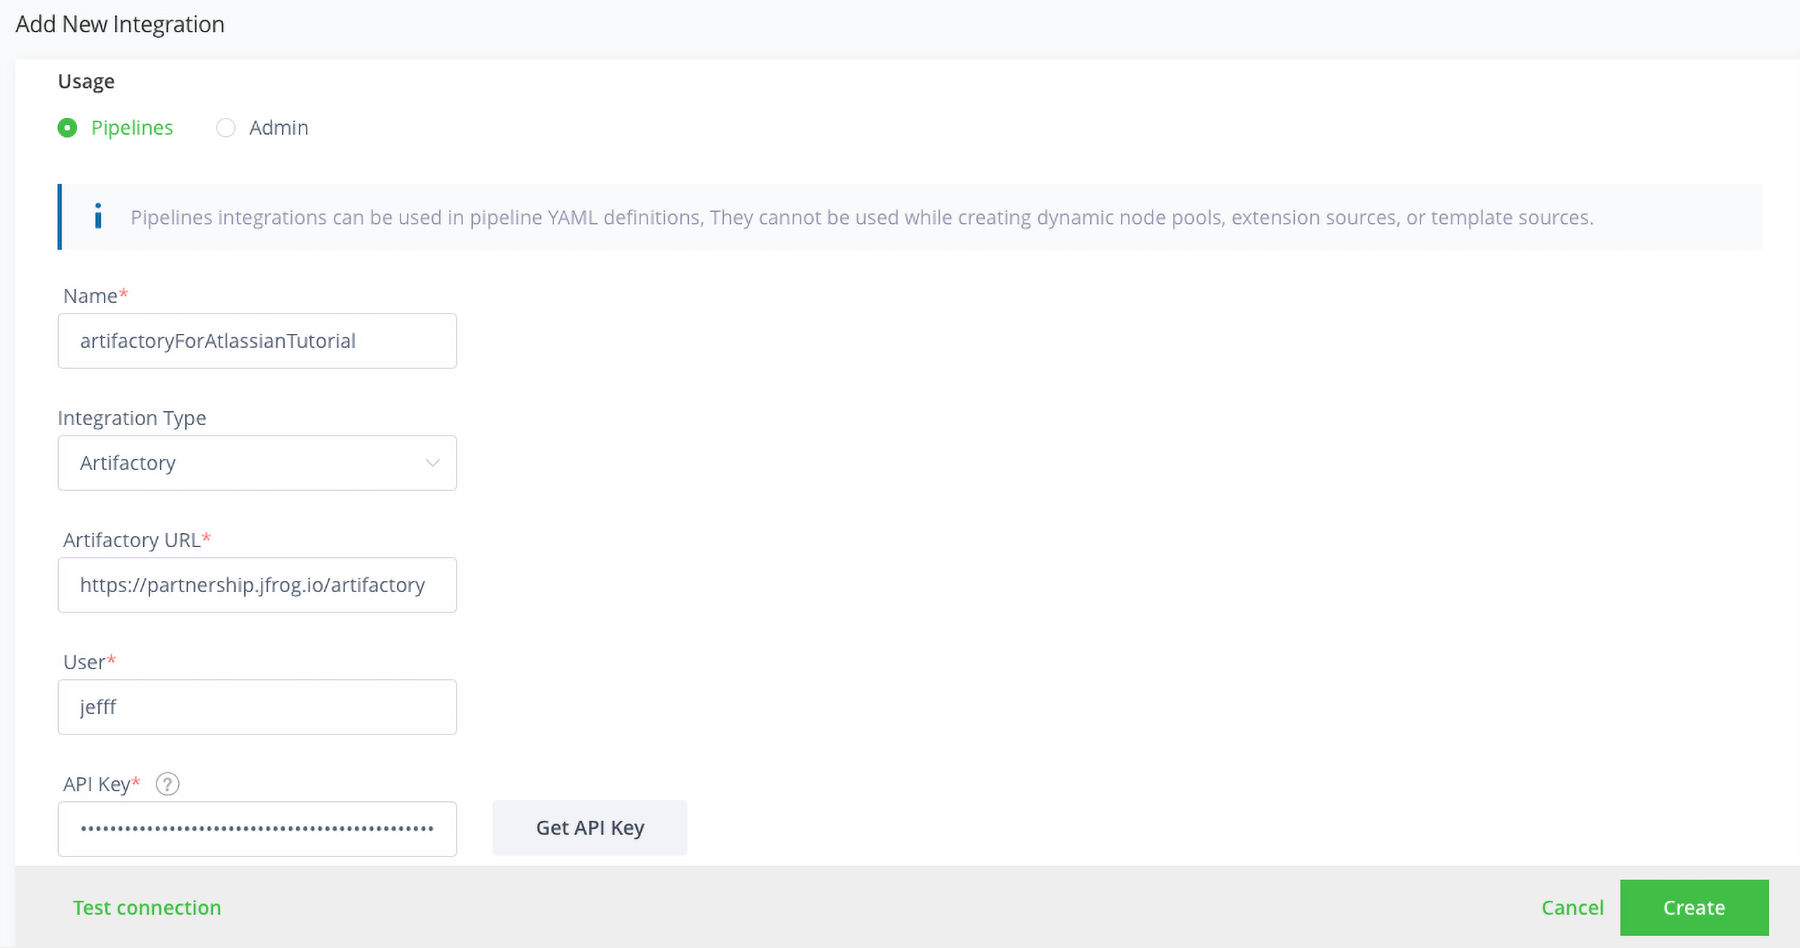
- Create an Artifactory integration with the same instructions from Step 3
- Choose Artifactory for the Integration Type
- Call the Integration artifactoryForAtlassianTutorial
- Use the provided Artifactory URL and User name
- Generate an API key using the Get API Key button
- Click Create to create the Artifactory integration
Step 4: Set up JFrog pipelines for Bitbucket
- Follow these instructions to create a Bitbucket app password
- Copy your Bitbucket app password
- Create a Bitbucket integration with the same instructions from Step 4
- Choose Bitbucket for the Integration Type
- Call the Integration bitbucketForAtlassianTutorial
- Specify your Bitbucket User Name
- Paste your Bitbucket App password for Token
- Click Create to create the Bitbucket integration
Step 5: Build the example code
- In your JFrog Platform instance, add the example code by following these instructions using From YAML
- Specify bitbucketForAtlassianTutorial for the SCM Provider integration
- Specify
/atlassian-open-devops-tutorial for the repository name - Use the default values for the remaining fields
- Click Create Source
- After a few seconds, JFrog Pipelines will attempt to build the example application in your atlassian-open-devops-tutorial repository. It will fail due to an issue with the Dockerfile.
- Go to your Jira project and view the new issue titled Atlassian tutorial failed build
Step 6: Fix the Dockerfile
- From your browser, go to your Bitbucket forked repository atlassian-open-devops-tutorial
- Edit the Dockerfile
- Delete the line that says “This line is not recognized and will cause the build to fail!”
- Commit this change and include the Jira issue number in the commit message
- JFrog Pipelines will attempt to build the example application in your atlassian-open-devops-tutorial repository again. But this time it will succeed.
Step 7: View the fix in Jira and JFrog Artifactory
- Now go back to your Jira issue
- Notice that the ticket now references a build
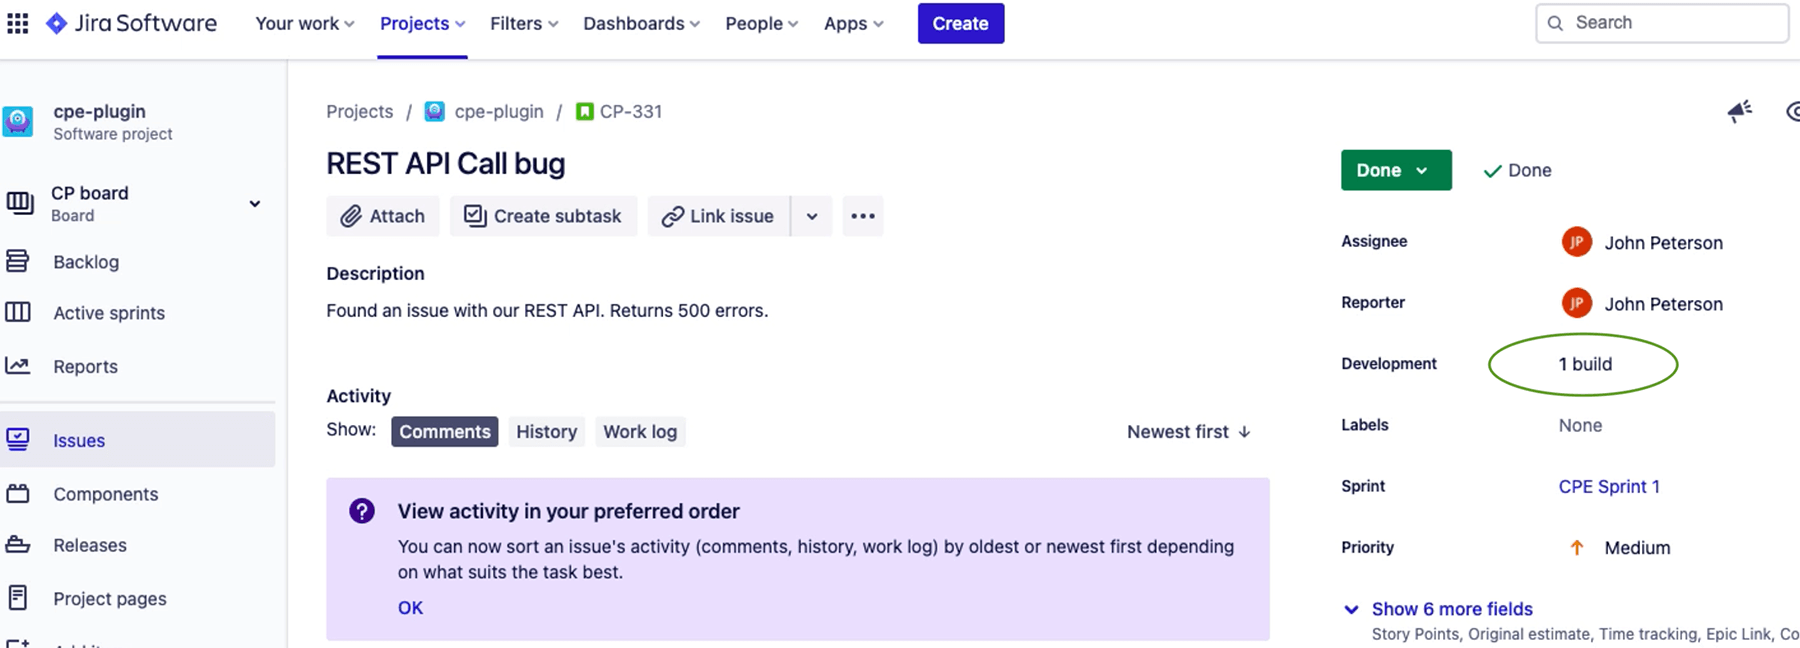
- Click on the build
- This will bring up a dialog that shows the JFrog pipeline and the build number. You can click on this to be taken directly to the build in JFrog Cloud.
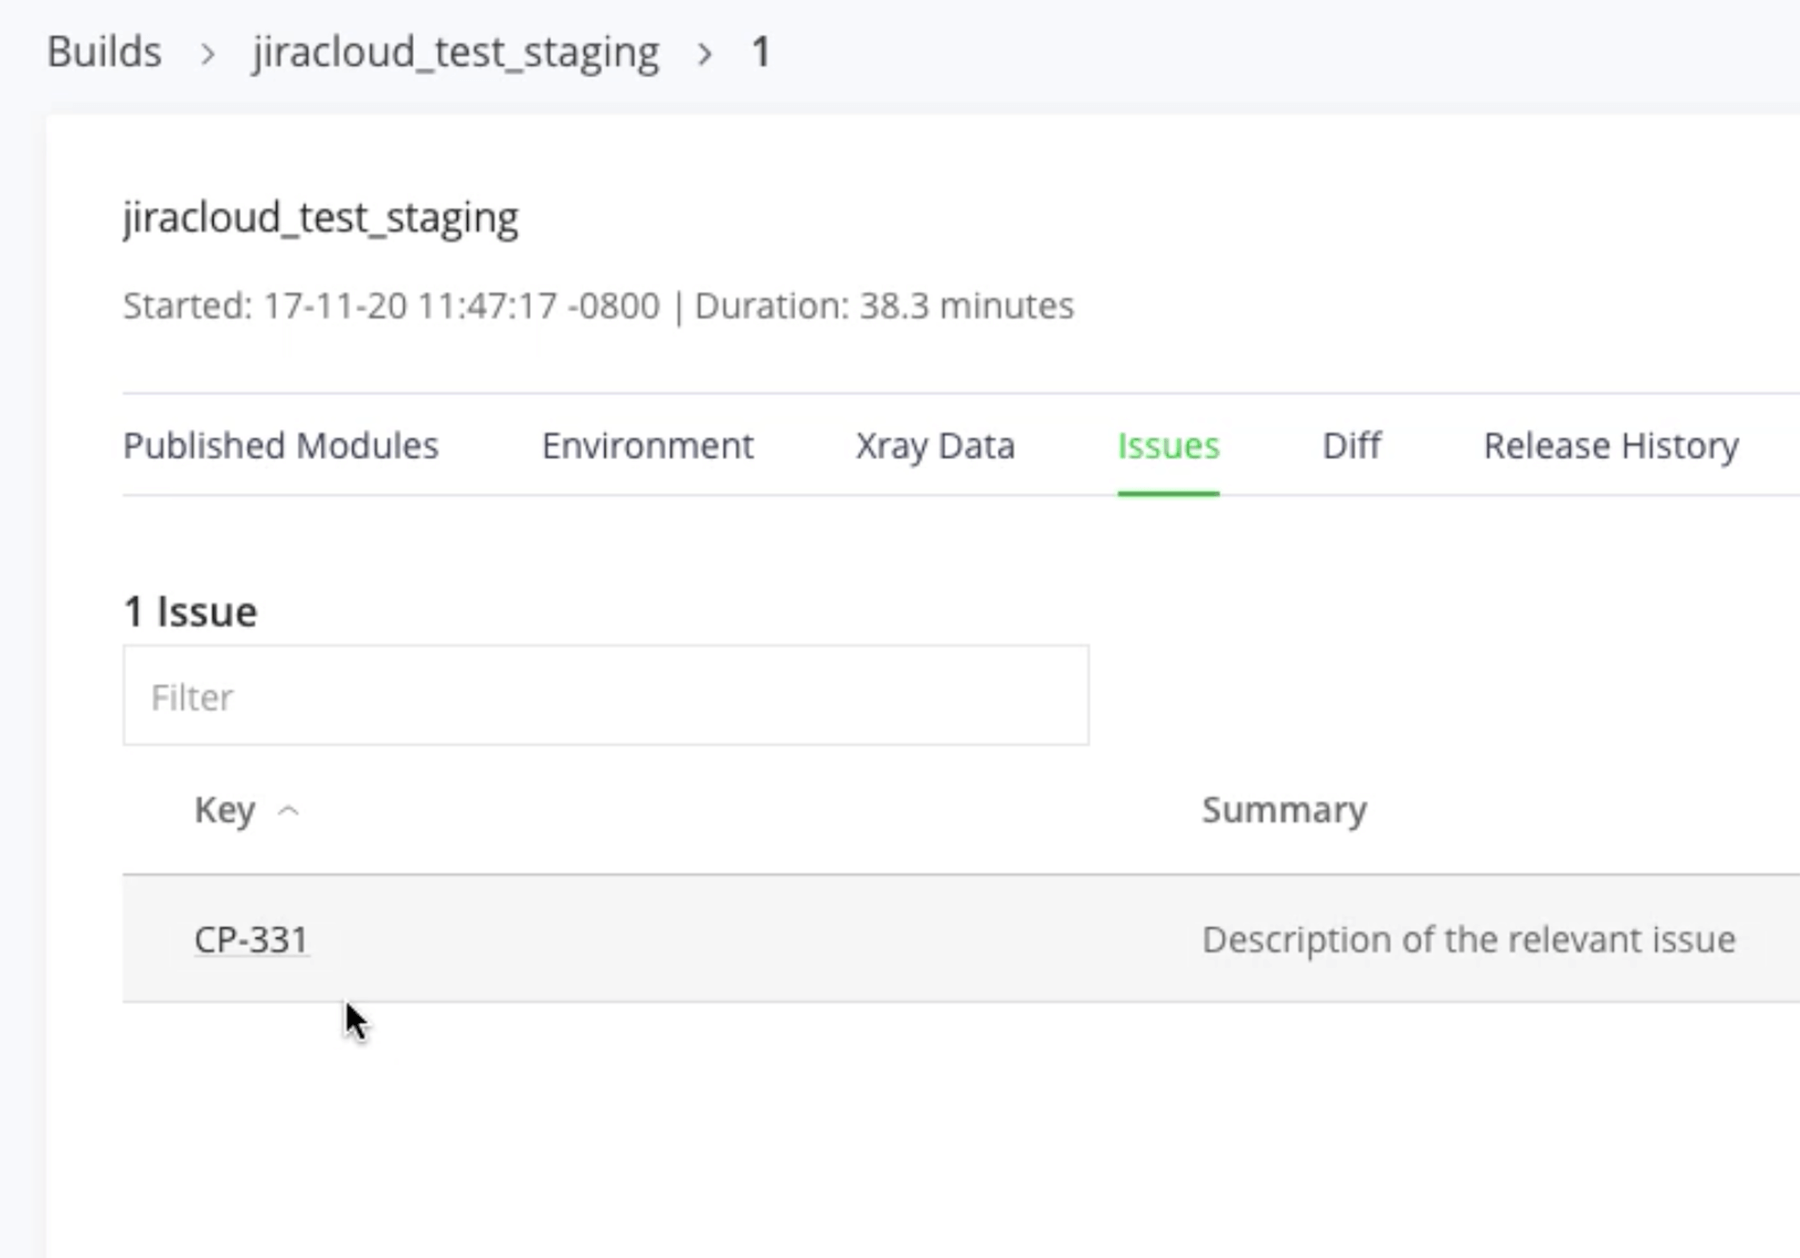
- In JFrog Artifactory, click on the Issues tab in the build view.
- Notice that this issue is now referenced with this build
Share this article
Next Topic
Recommended reading
Bookmark these resources to learn about types of DevOps teams, or for ongoing updates about DevOps at Atlassian.
DevOps community

DevOps learning path
