Articles
Tutorials
Interactive Guides
How to install LaunchDarkly for Jira integration

Matt DeLaney
Product Marketing Manager, LaunchDarkly
This tutorial details how to install the LaunchDarkly for Jira integration and how to connect feature flags to your team's Jira issues.
*Note: This integration is for Jira Cloud only.
Time
8-minute read.
Audience
You have a Jira account and basic proficiency in Jira. Get started with Jira here.
You have basic proficiency with LaunchDarkly. Get started with LaunchDarkly here.
Prerequisites
- You’ve installed the LaunchDarkly for Jira app via the Atlassian Marketplace in your Jira Cloud instance
- You have an API access token with
writerpermissions. To learn more, read API access tokens. - You can also give the access token a custom role allowing it to control webhooks. In the custom role policy, Allow the Jira integration to access the
webhook/*resources with thecreateWebhookanddeleteWebhookactions.
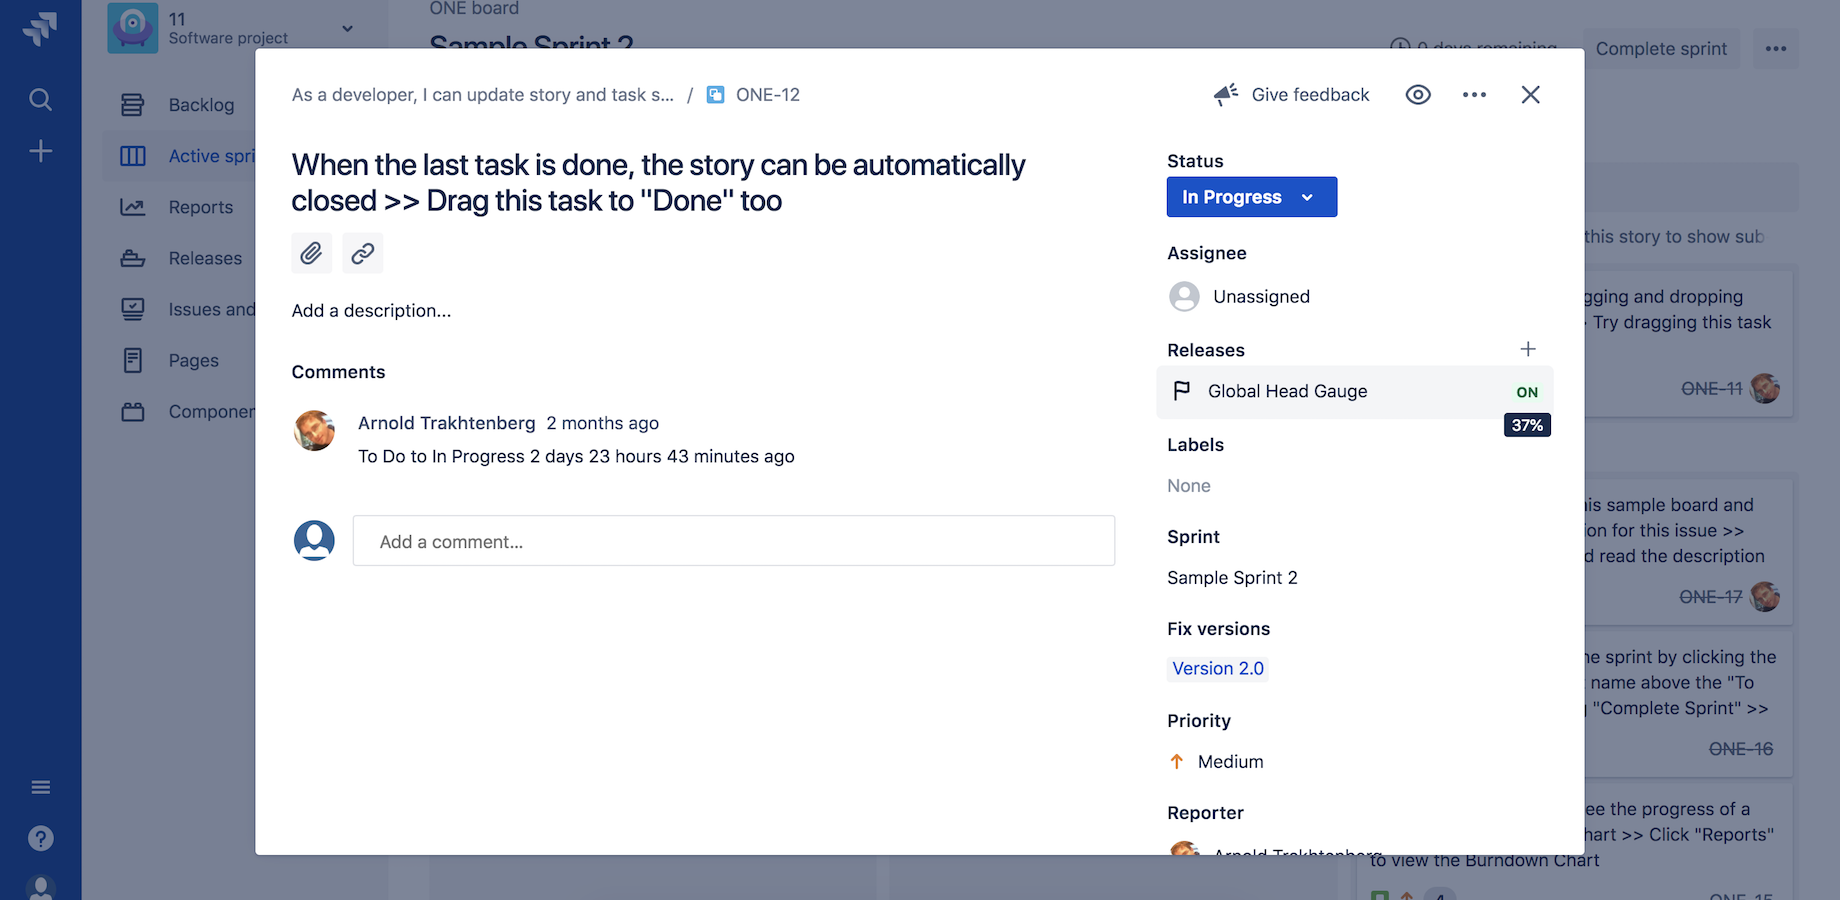
Teams may already use Jira and LaunchDarkly to manage software releases. Integrating these two solutions streamlines communication across teams and provides better visibility into the status of a feature rollout. The LaunchDarkly for Jira integration displays feature flag statuses on Jira issues so people can get the info they need faster and reduce context switching.
Step 1: Configure the integration
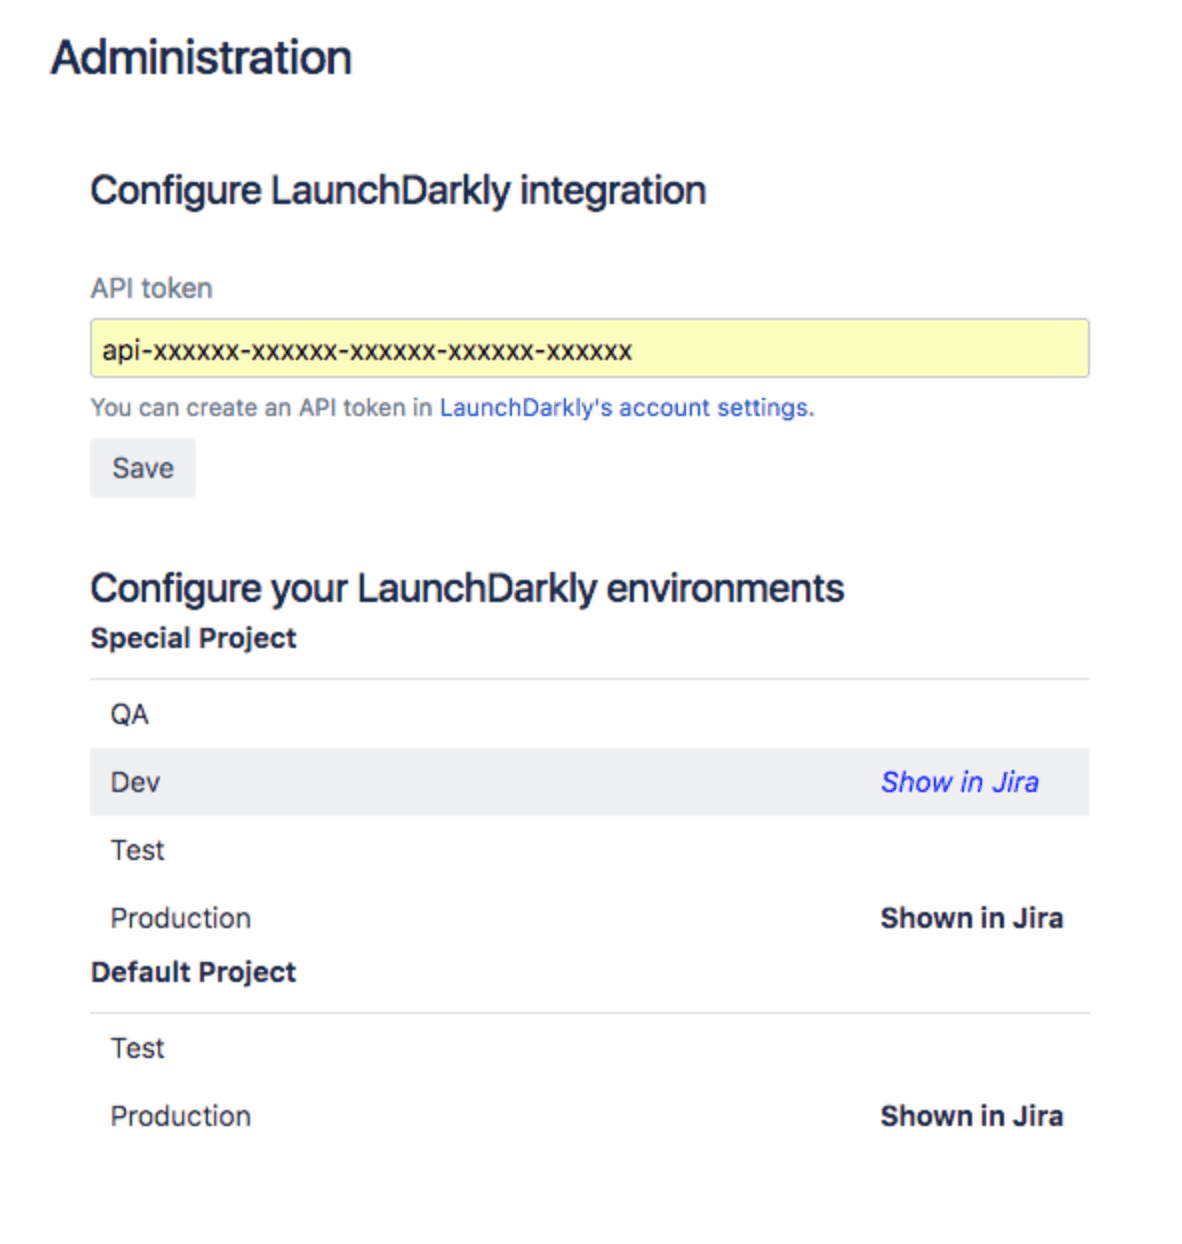
Once you’ve created an API access token, use it to configure the Jira integration for your LaunchDarkly account.
- Navigate to your Jira instance's app management page and click the Configuration button for the LaunchDarkly app
- Set your API key
- Select which environment the app will track for each of your LaunchDarkly projects. By default, the app will track your production environments.
After you have set up the LaunchDarkly for Jira app, a Releases panel appears when you view issues on the Active sprints board.
If no flags are associated with an existing Jira issue, you can add one with a button. If you already have one or more flags associated with a Jira issue, the rollout status of each connected feature flag on each Jira issue appears.
Now that the Jira app is configured, you can connect feature flags to Jira issues.
Step 2: Create a new feature flag from a Jira issue
To create a new feature flag with Jira issues:
- Navigate to your Jira issue's feature flag panel
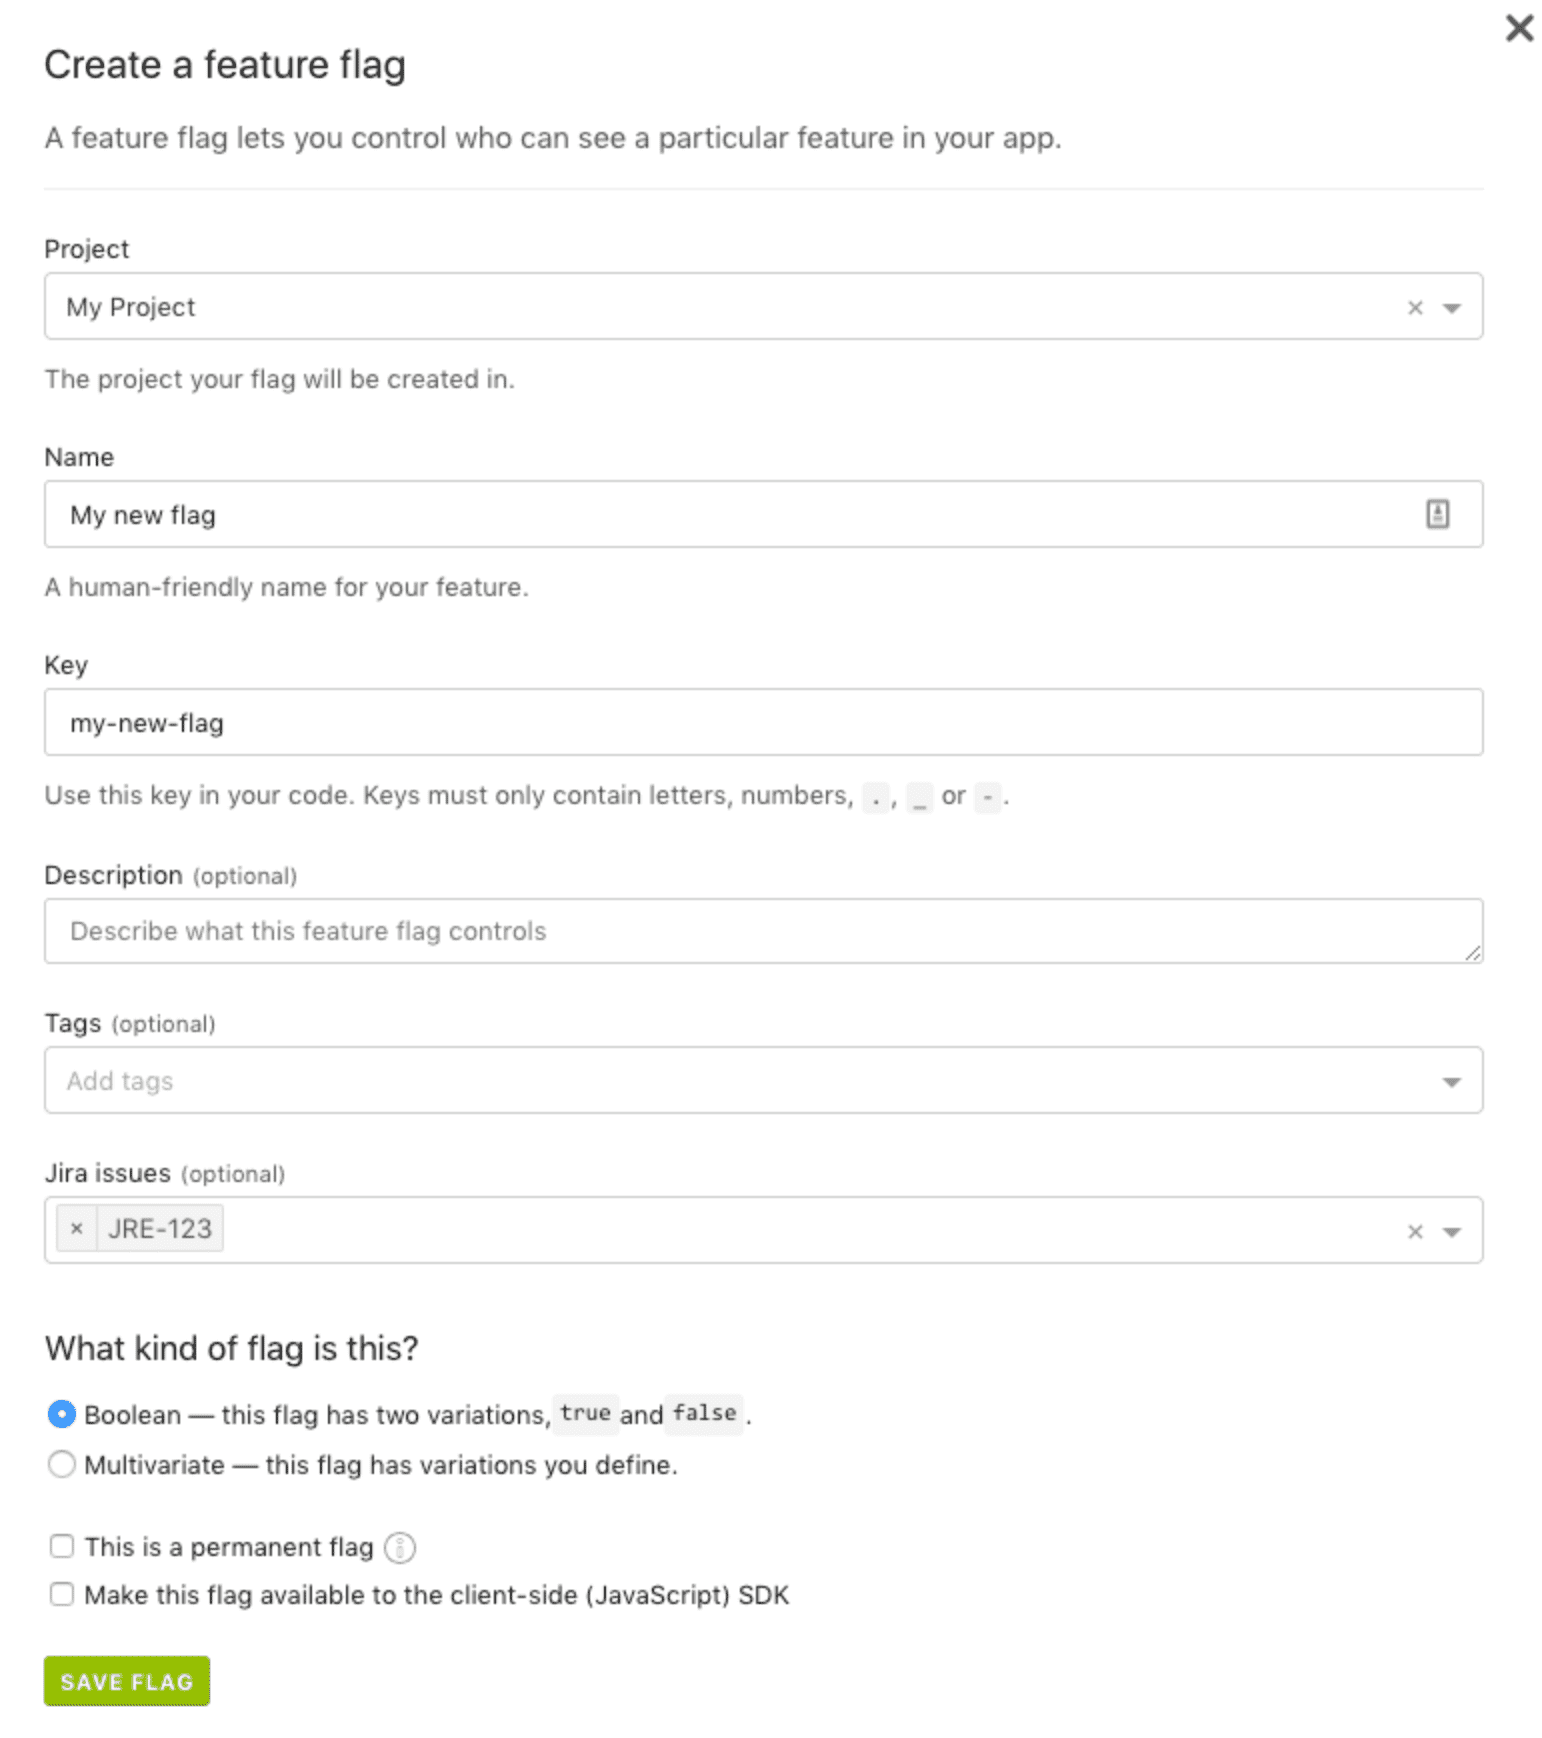
- Click Add feature flag, then select the Create feature flag option. The LaunchDarkly flag creation page opens.
- In the feature flag creation page, the Jira issue is pre-populated.
Step 3: Connect an existing feature flag to a Jira issue from LaunchDarkly
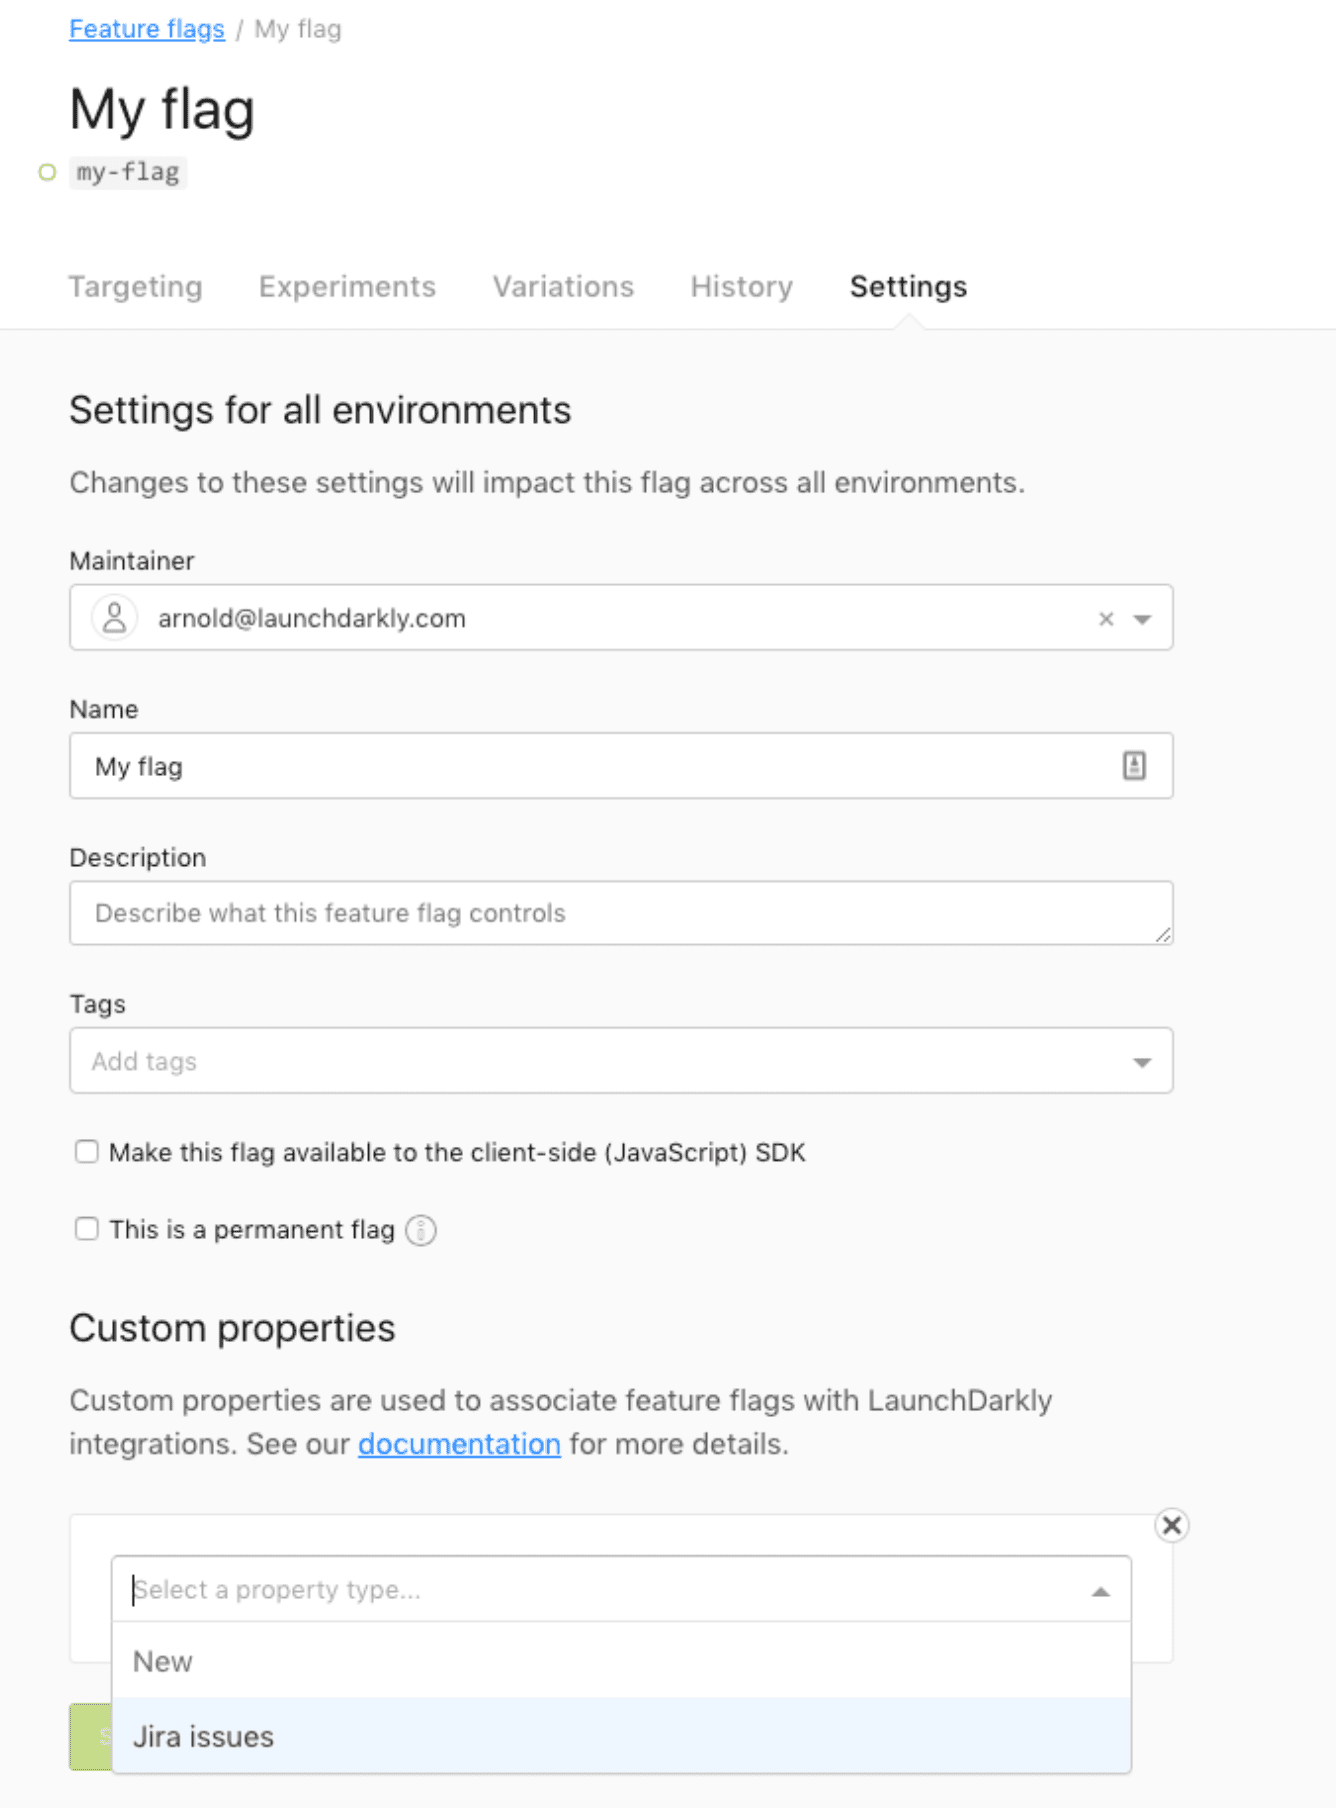
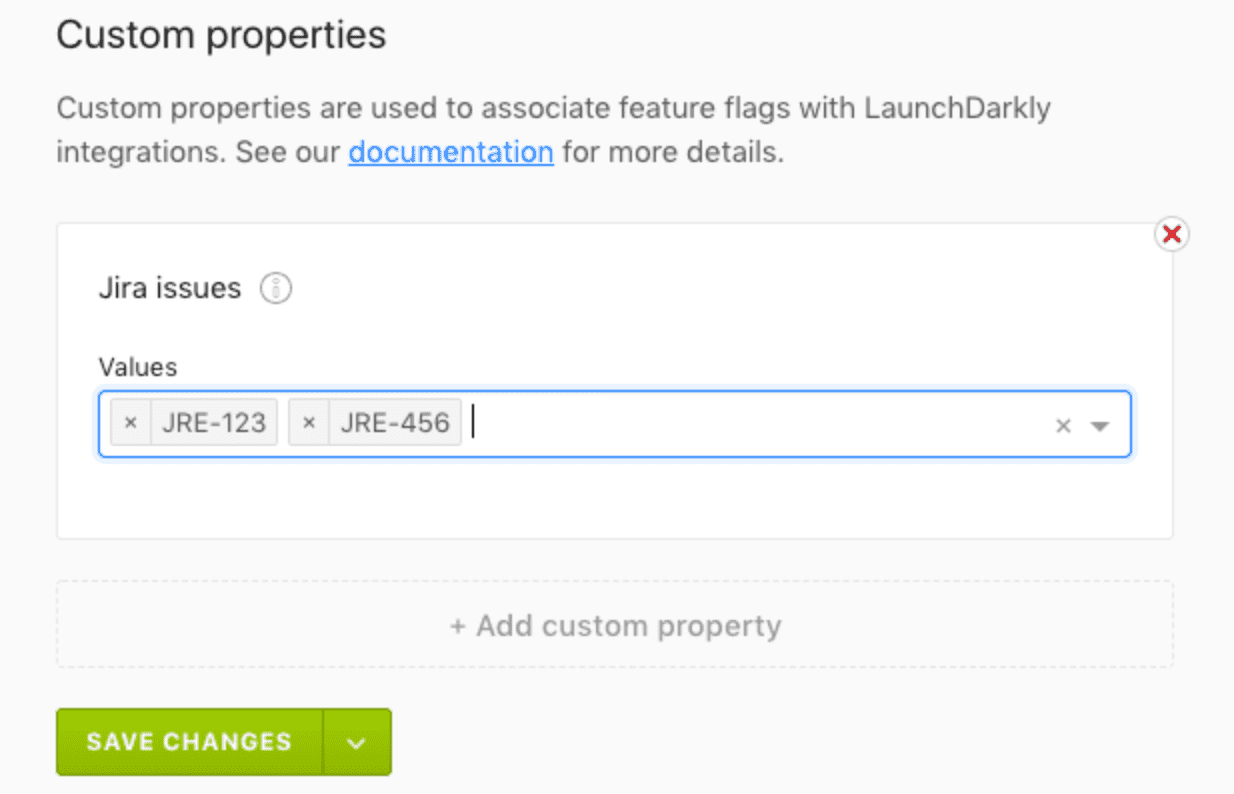
If you have already created a feature flag for your Jira issue, you can add a Jira issue to your existing flag by creating a custom property for your flag.
- Navigate to the flag's Settings page
- Name the custom property Jira issues
-
Enter a list of Jira issue keys as the property value. You can list multiple issues if applicable.
-
Click Save Changes.
This is how to connect your Jira and LaunchDarkly accounts, create a new feature flag from a Jira issue, and link an existing feature flag to a Jira issue.
Move fast confidently
The LaunchDarkly for Jira integration gives you greater control and visibility into all aspects of a feature release. Now you can feel confident as a result of knowing what's happening with your releases at all times.
Atlassian’s Open DevOps allows you to build the DevOps toolchain you want, thanks to integrations with leading vendors and marketplace apps. To learn more, check out our DevOps integrations.
Share this article
Next Topic
Recommended reading
Bookmark these resources to learn about types of DevOps teams, or for ongoing updates about DevOps at Atlassian.

DevOps community

DevOps learning path
