Articles
Tutorials
Interactive Guides
How to create a Jira issue from an automated mabl test

Thomas Lavin
Product manager, mabl
This tutorial details how to create a Jira issue, such as a story or bug, from a failed mabl test. It also covers how to attach the critical diagnostic information mabl collects to create a single source of truth.
Time
10 minute read
Audience
You’re an experienced Jira user who has created issues and bug reports before.
Prerequisites
You have an existing mabl account. Get started here.
You have a Jira account and created a Jira project (scrum or kanban). Get started here.
You have installed the mabl app for Jira Cloud. Here’s a video on how to do so.
Step 1. Start with a failing test
Mabl alerts you to failures as soon as they happen. There are multiple ways to easily receive failure alerts depending on your team’s needs. This tutorial begins from within mabl.
From mabl
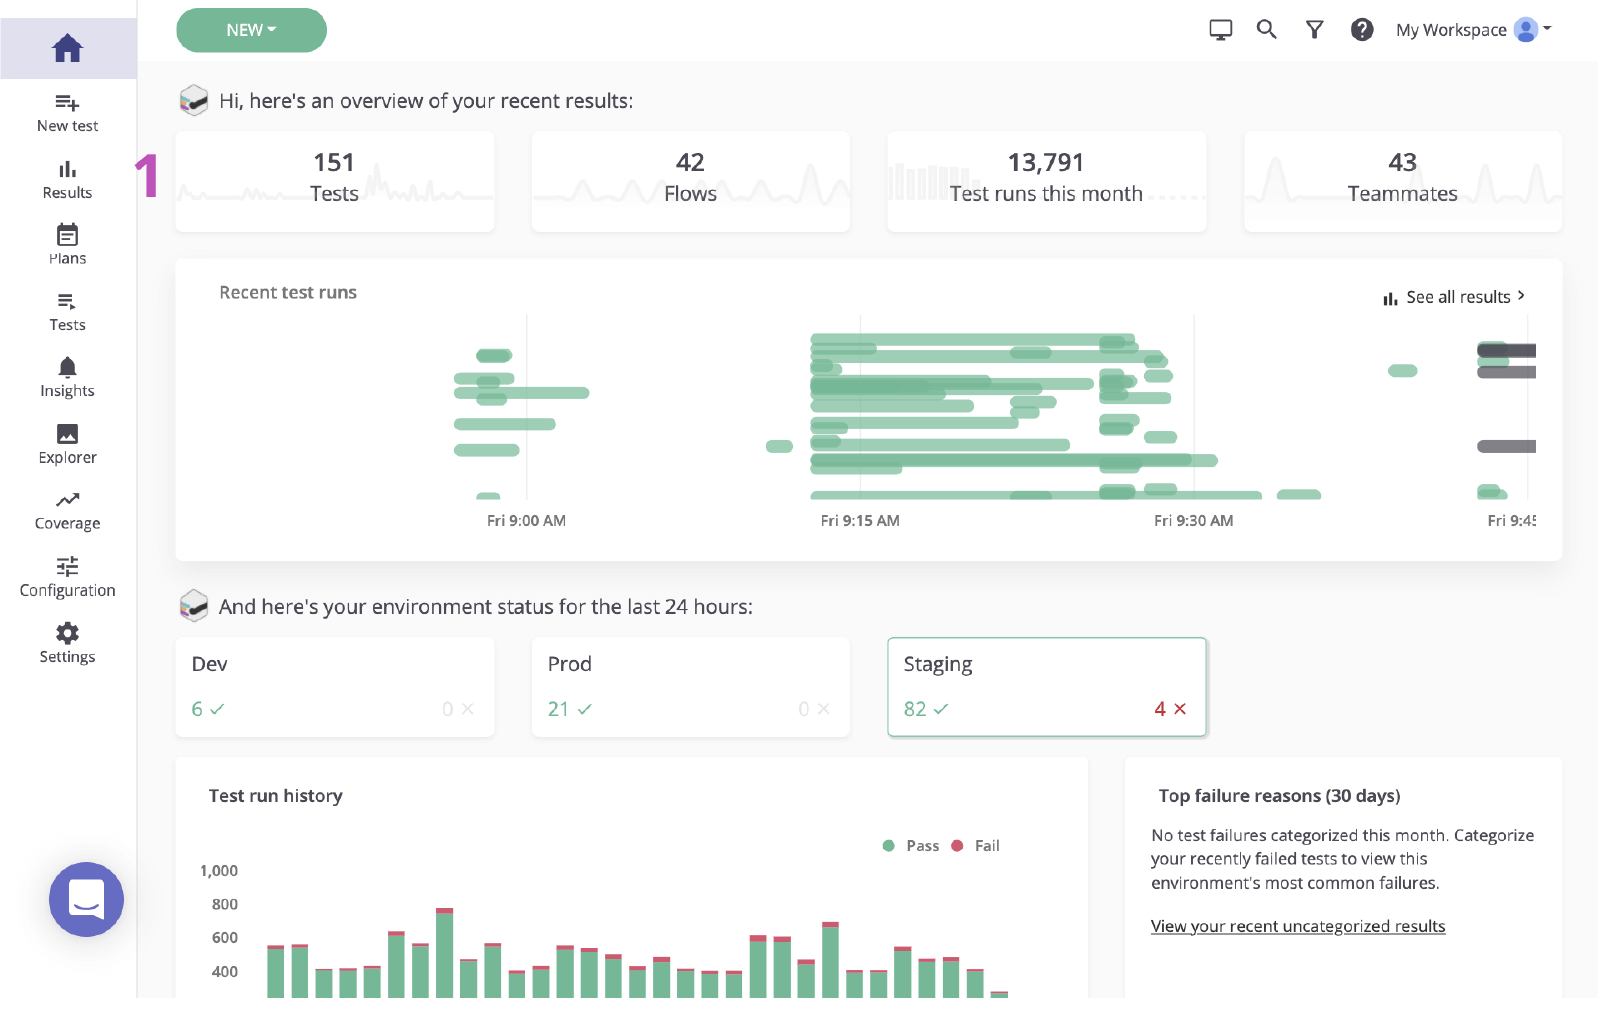
1. Click to visit the results page from the main dashboard.
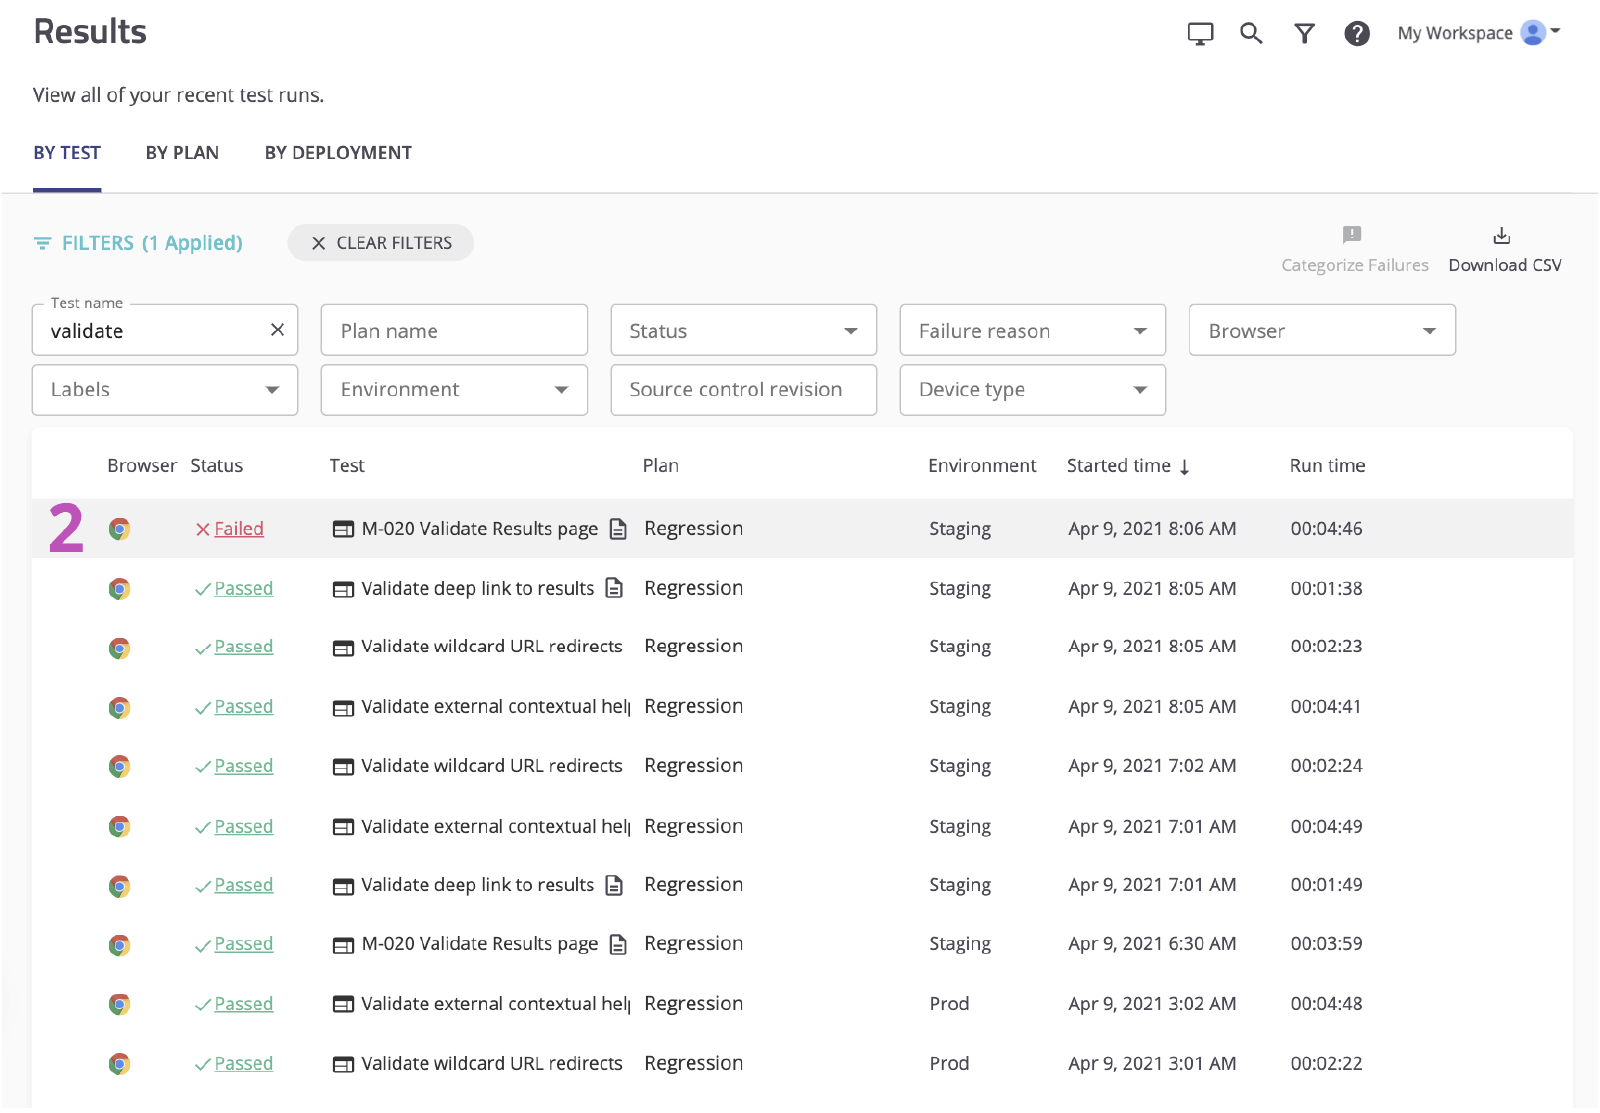
2. Click the status of the failing test to review the failure.
Step 2. Identify the root cause
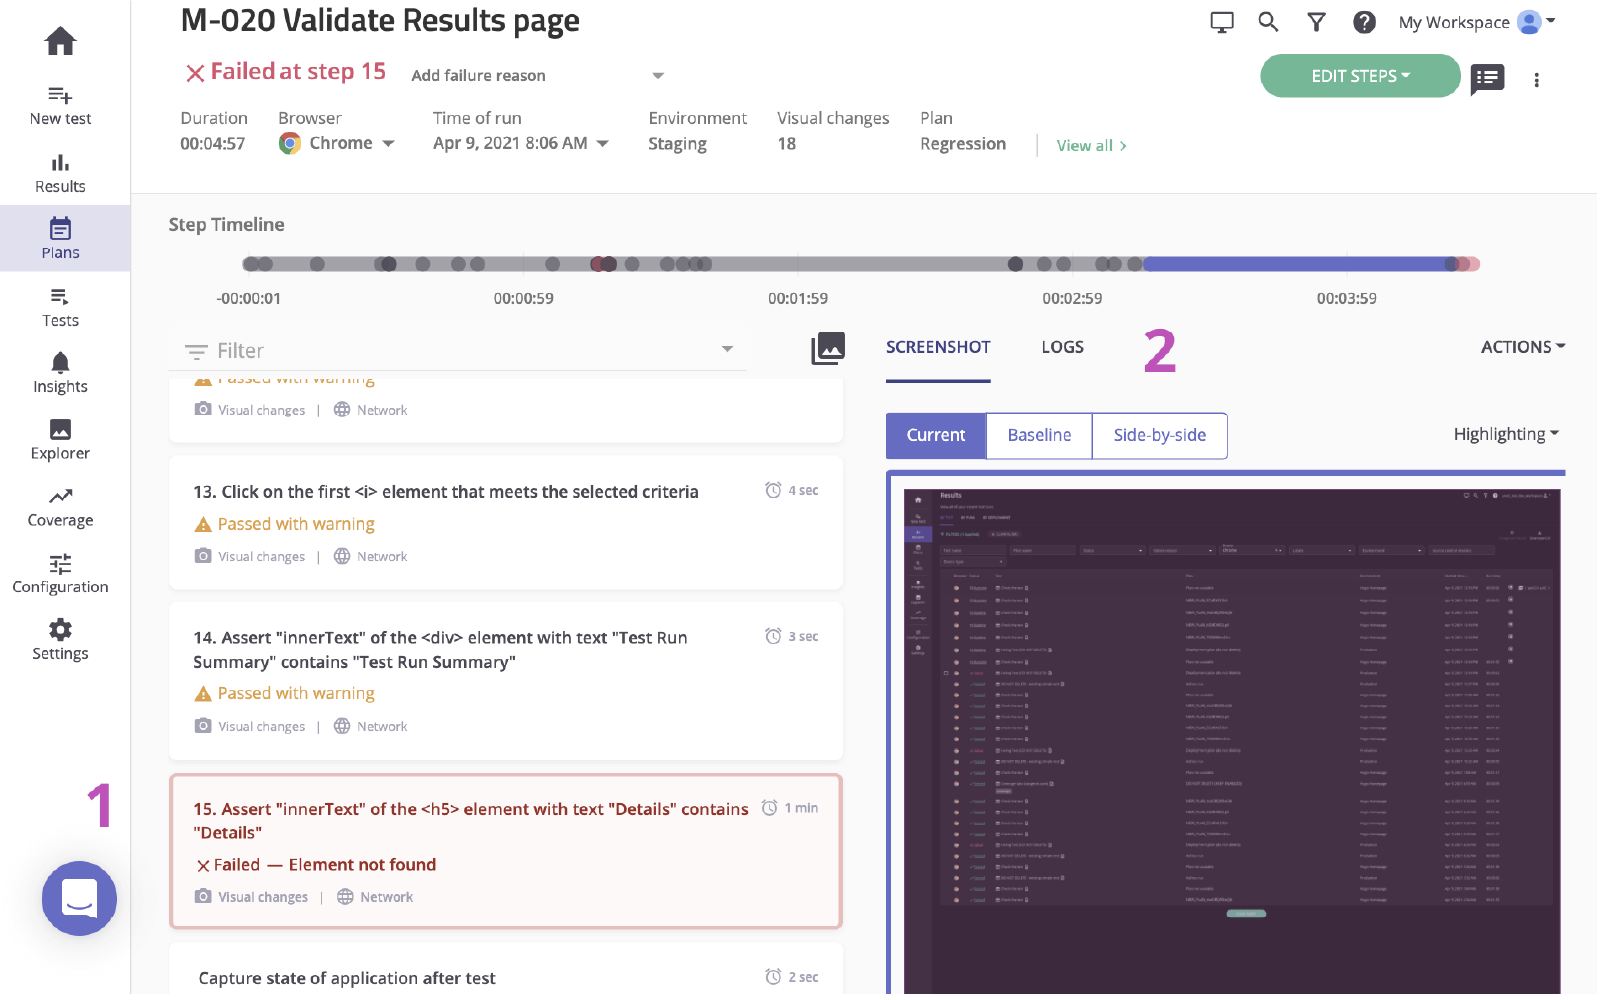
Before creating an issue in Jira based on a failure, it’s important to identify the root cause. Mabl reports failures and provides rich diagnostic data including context that uncovers the root cause as quickly as possible. This includes artifacts such as screenshots, HAR files, the DOM, and even step traces.
1. Examine the failed step.
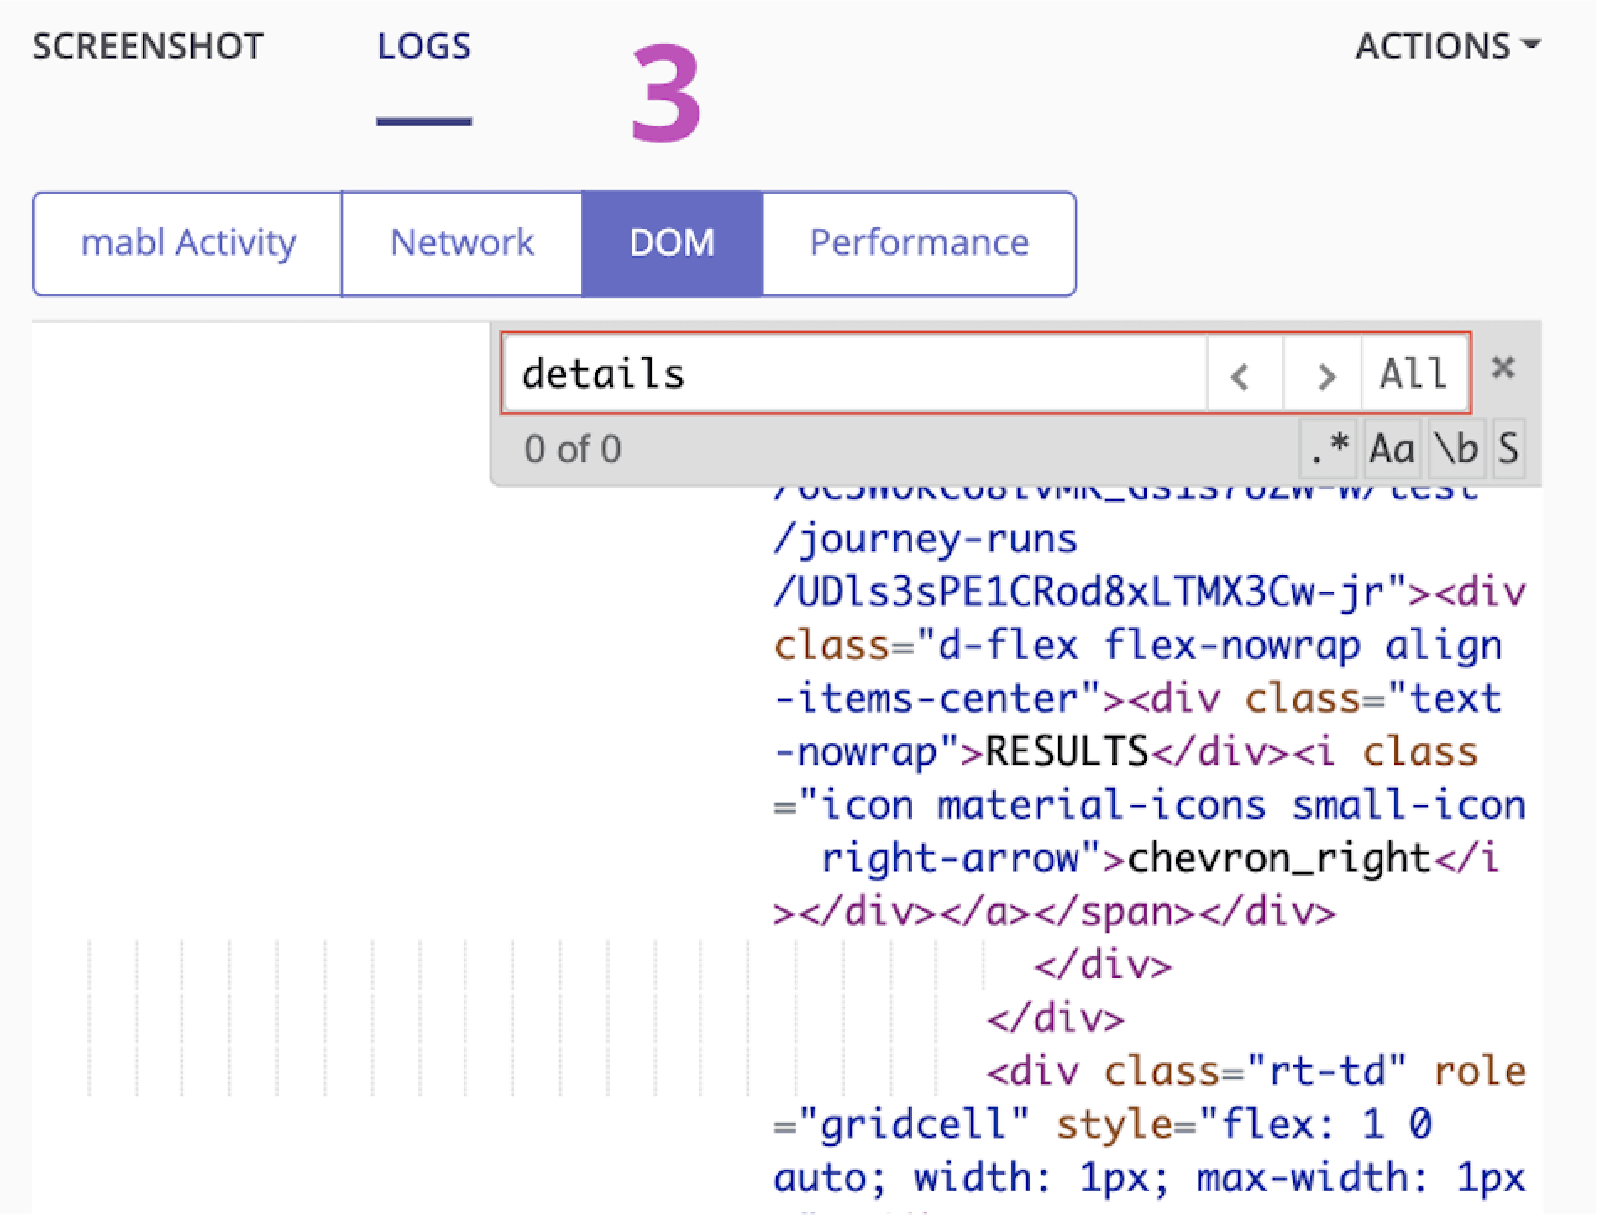
2. Check for any changes using diagnostic information, like screenshots or the DOM snapshot.
3. Verify the cause. In this case, the element doesn’t appear in the DOM.
Step 3. Send to Jira
In a couple of clicks, you can create a Jira ticket based on the test run you just investigated. This Jira ticket serves as your team’s single source of truth. Mabl automatically attaches diagnostic information to give everyone access to the same context.
1. Add to Jira button.
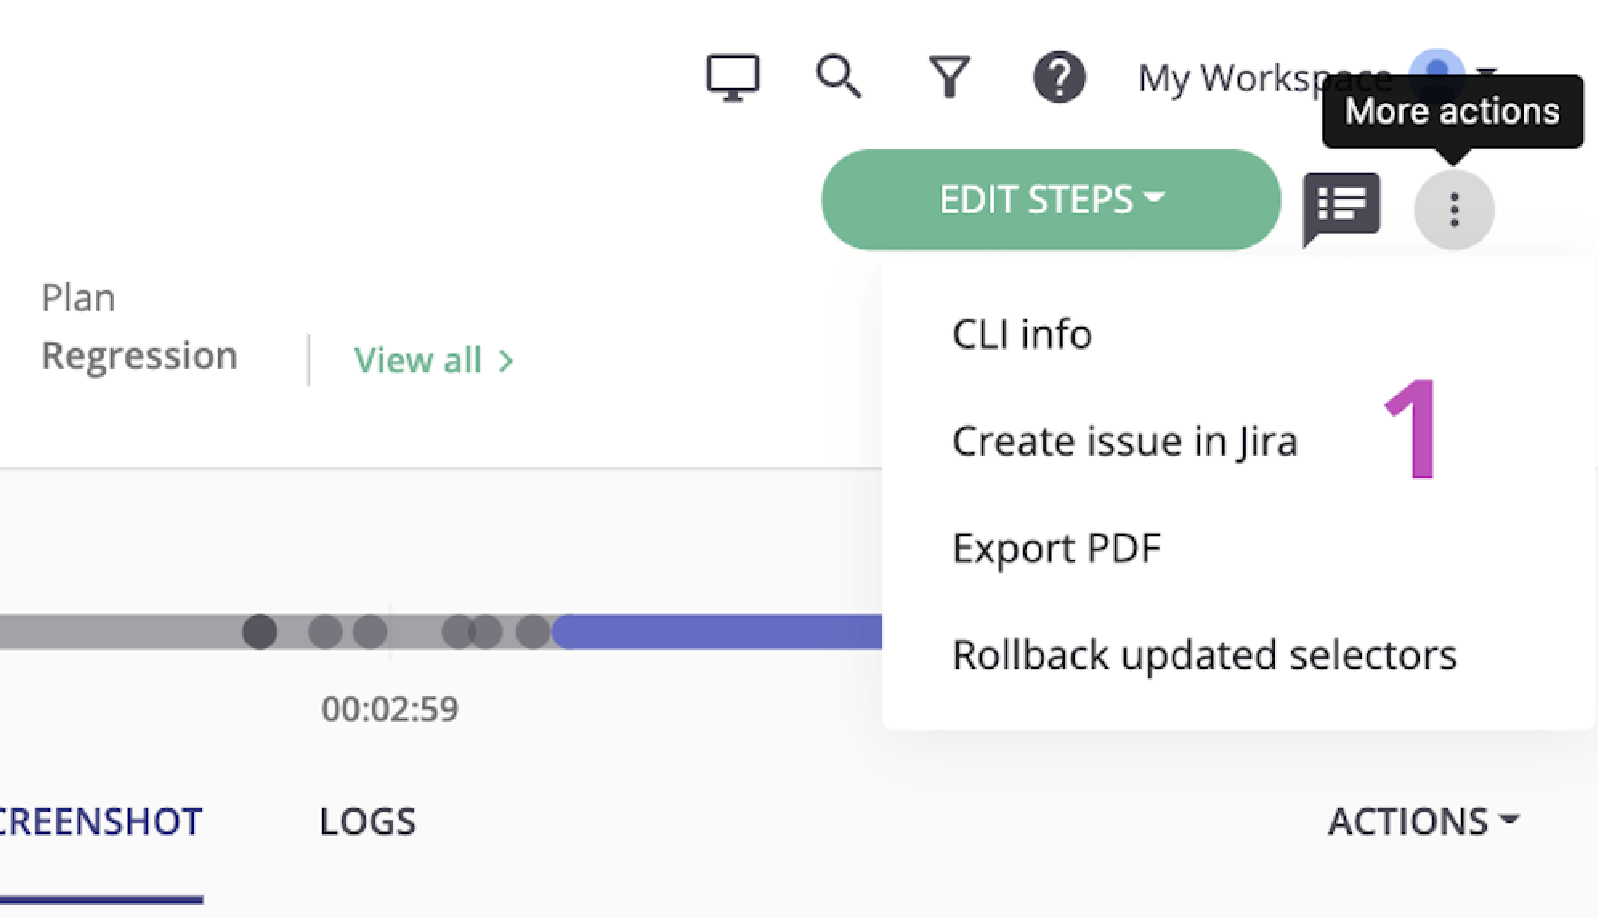
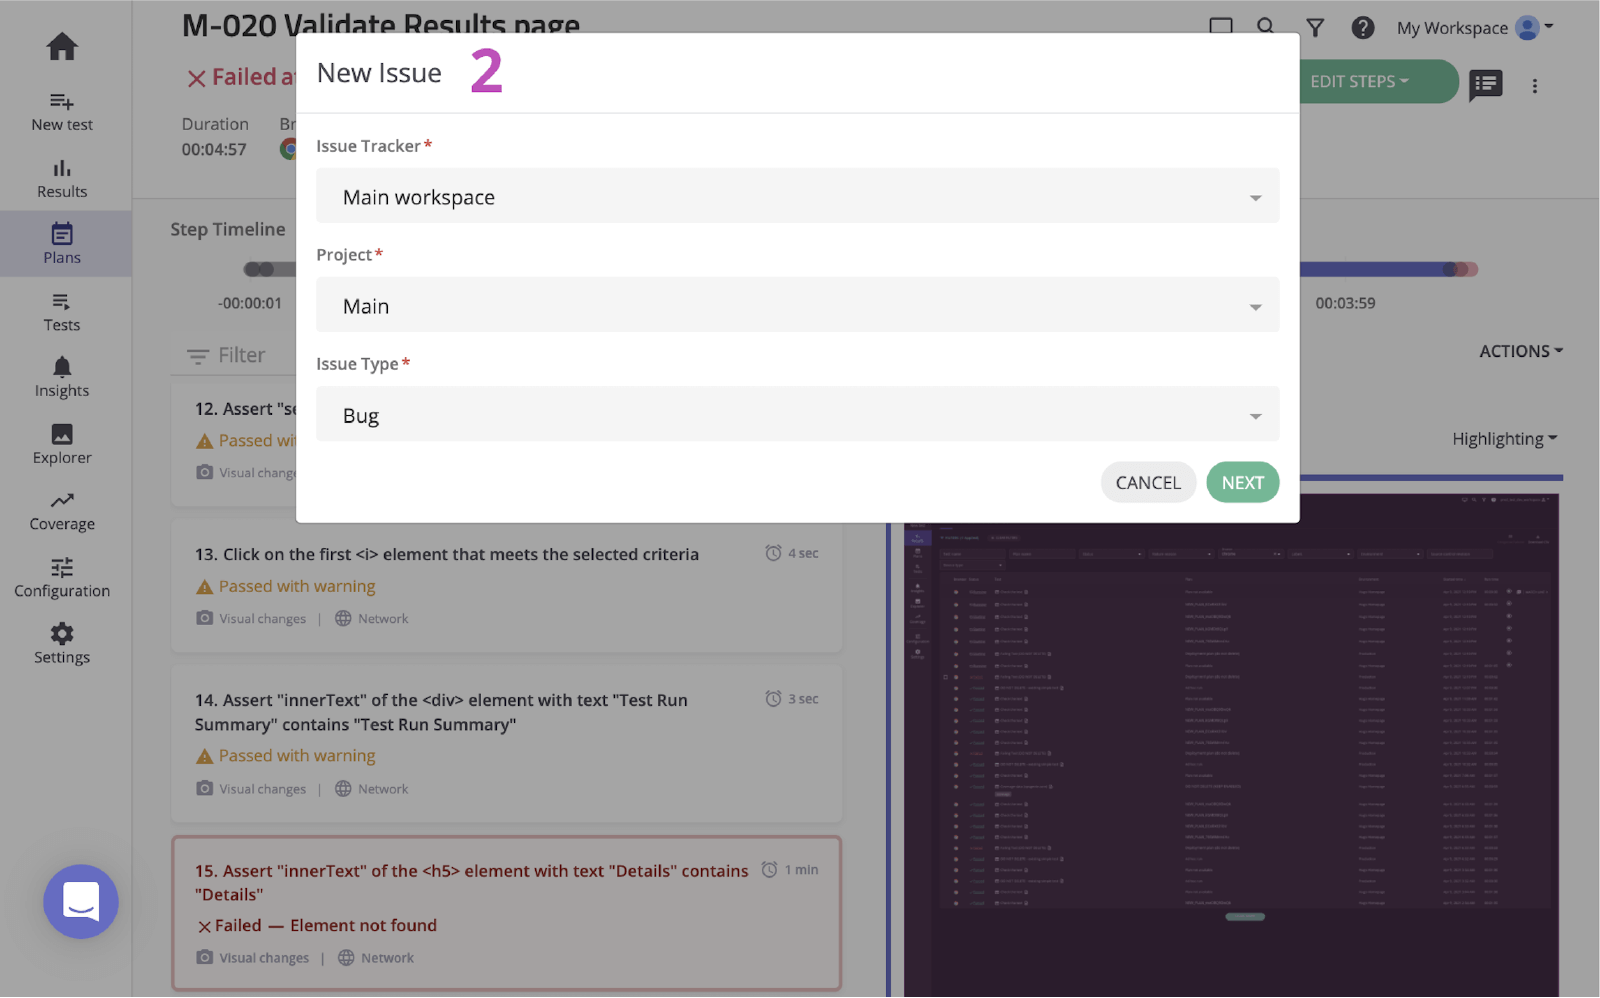
2. Select the project you’d like to create and the issue type.
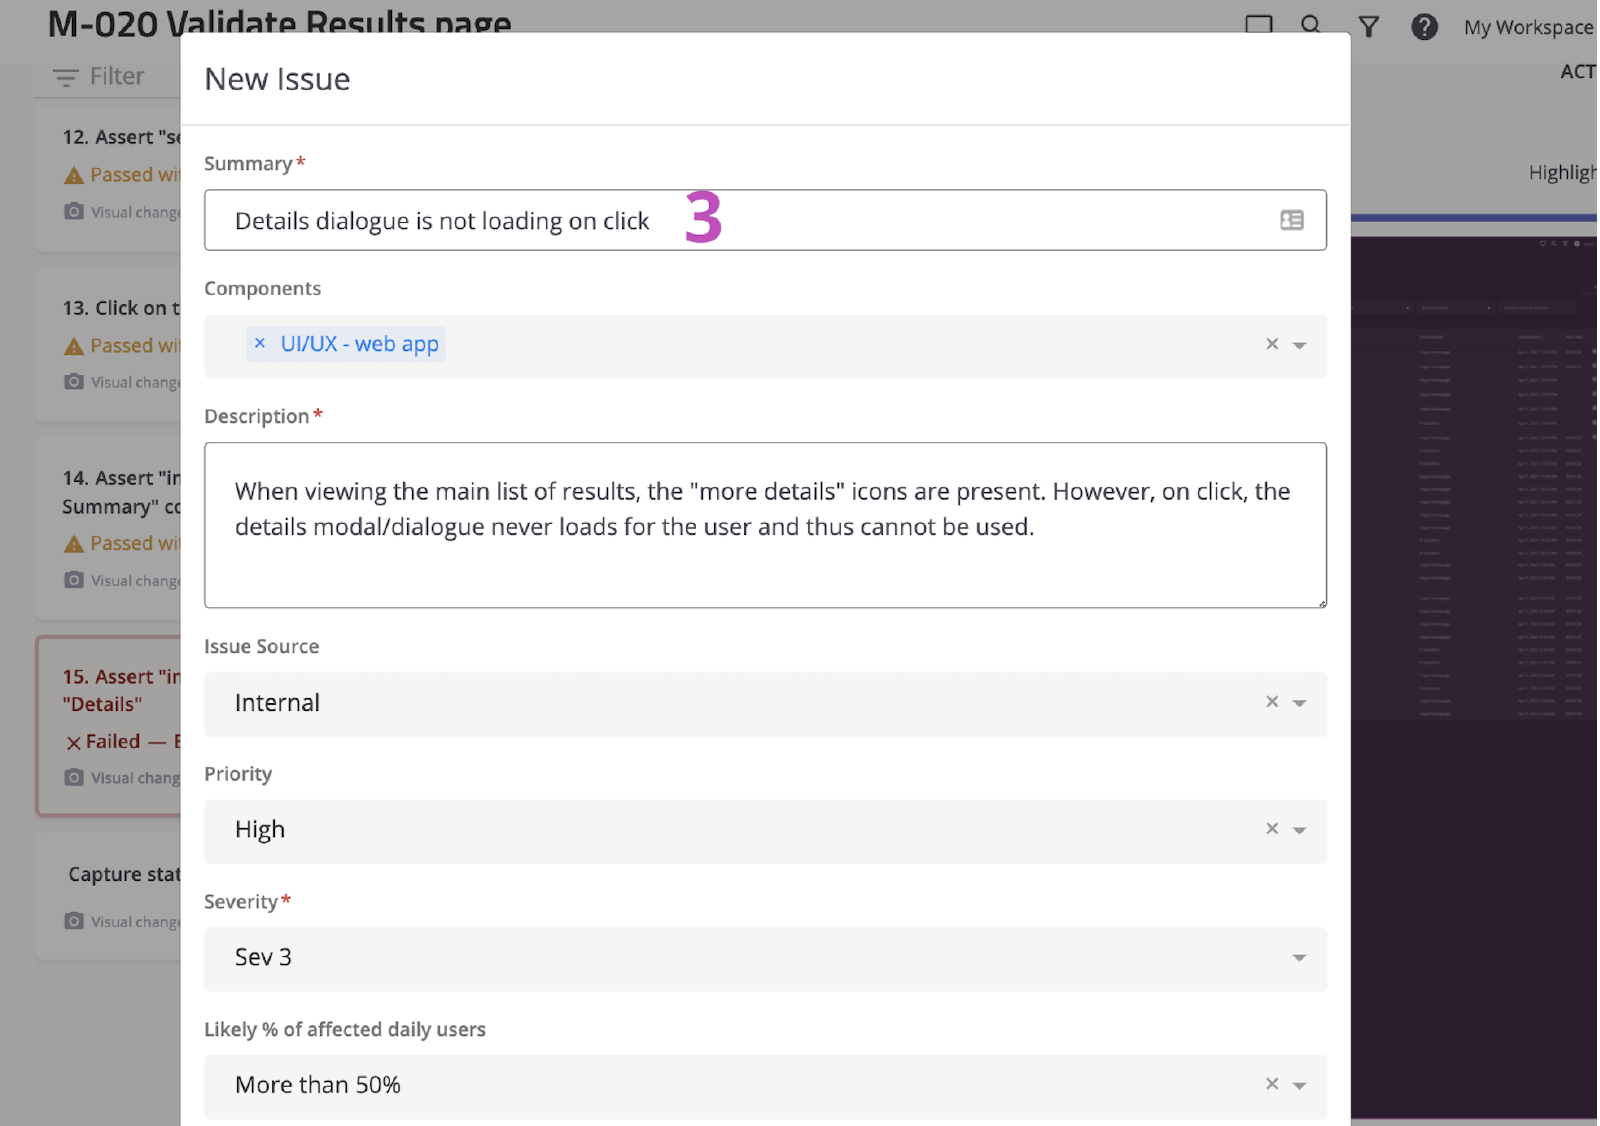
3. Give it a summary, a description, and any additional details.
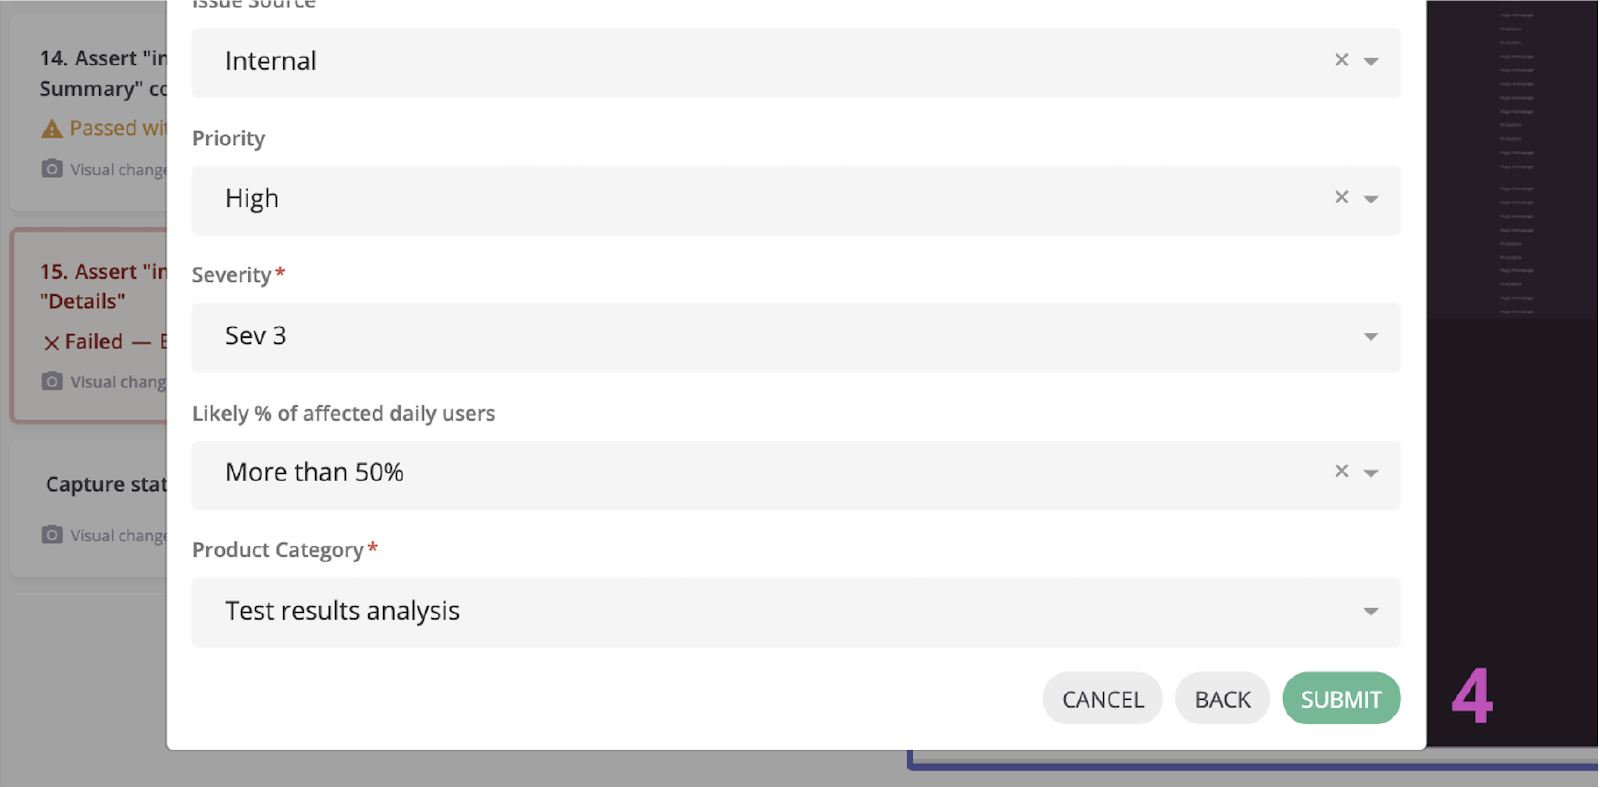
4. Save. Then click the newly-created issue to open it within Jira.
Step 4. Implement a fix
Once the issue is identified, it’s common to check the diagnostic information mabl added and verify the issue locally. With the mabl CLI or desktop app, you can quickly kick off a headless run of the same test that caught the bug.
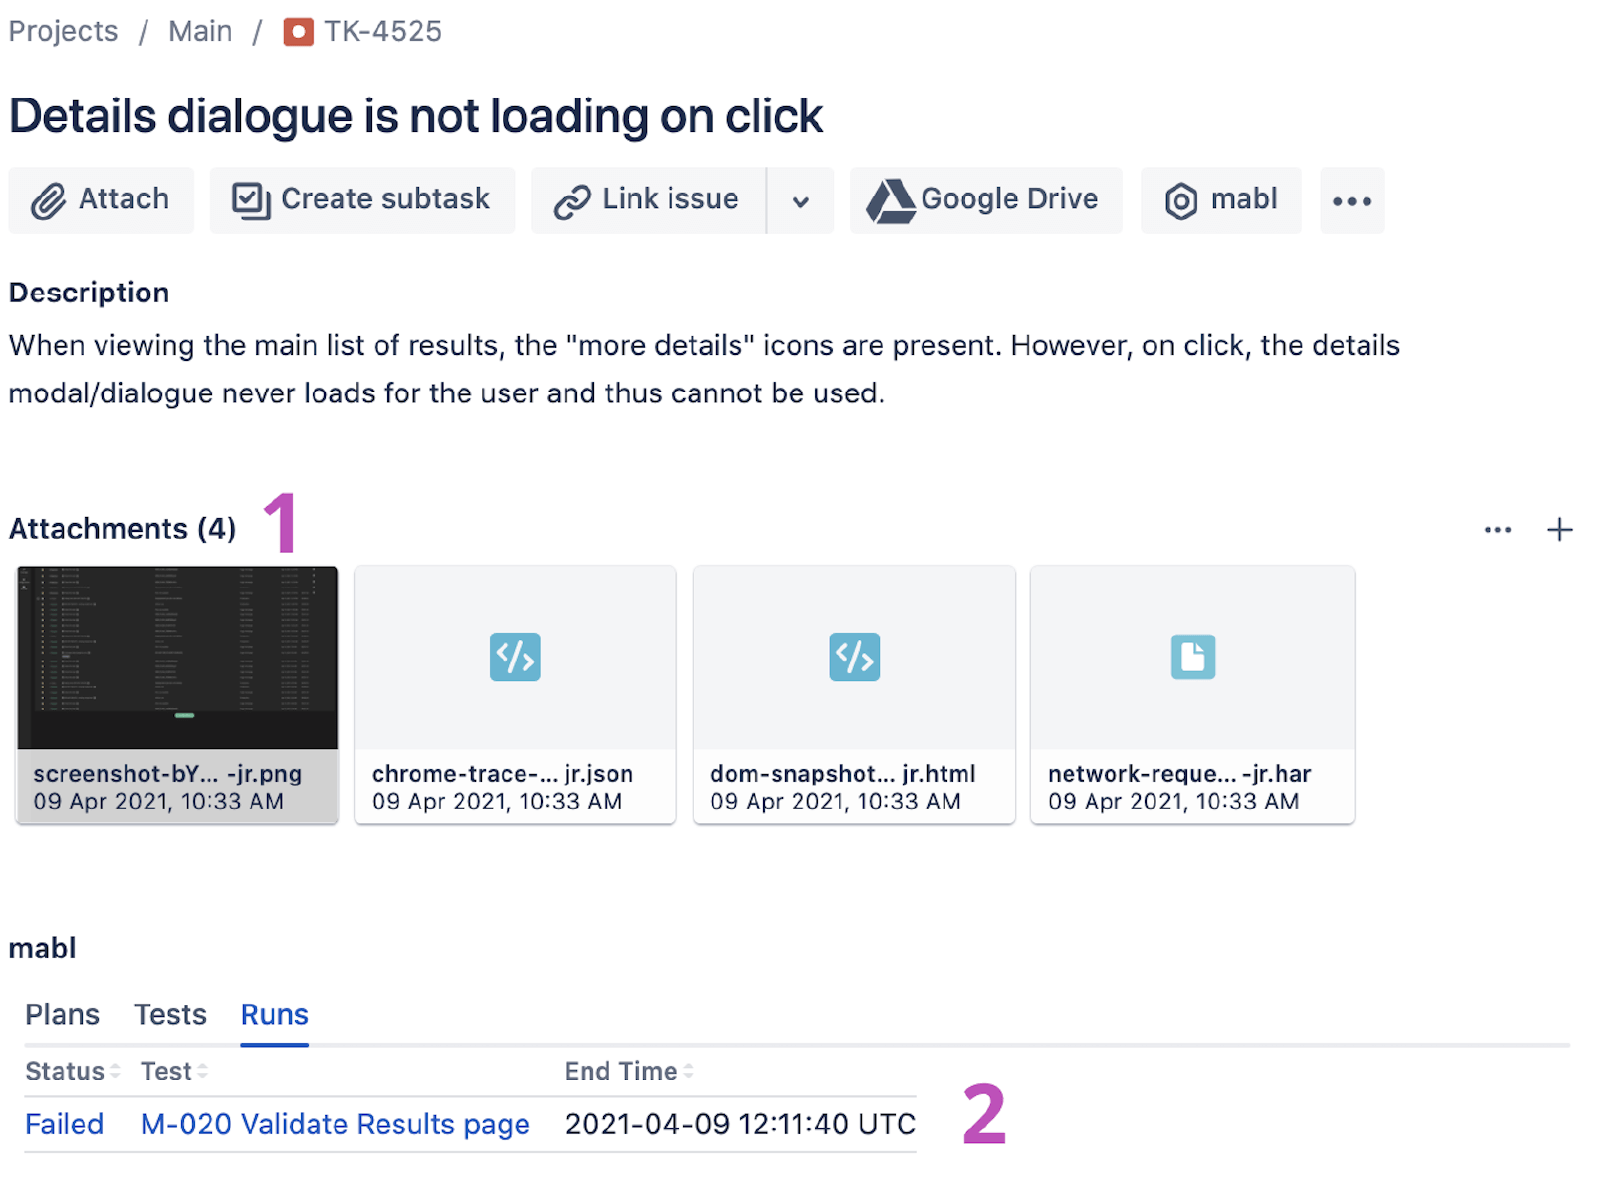
1. Check that all diagnostic information is attached.
From the CLI
2. Use the linked test run to grab the test run ID, ending with `-jr`.
3. Open and run the CLI with the `$ mabl tests run --run-id

4. Start implementing the fix.
From the desktop app
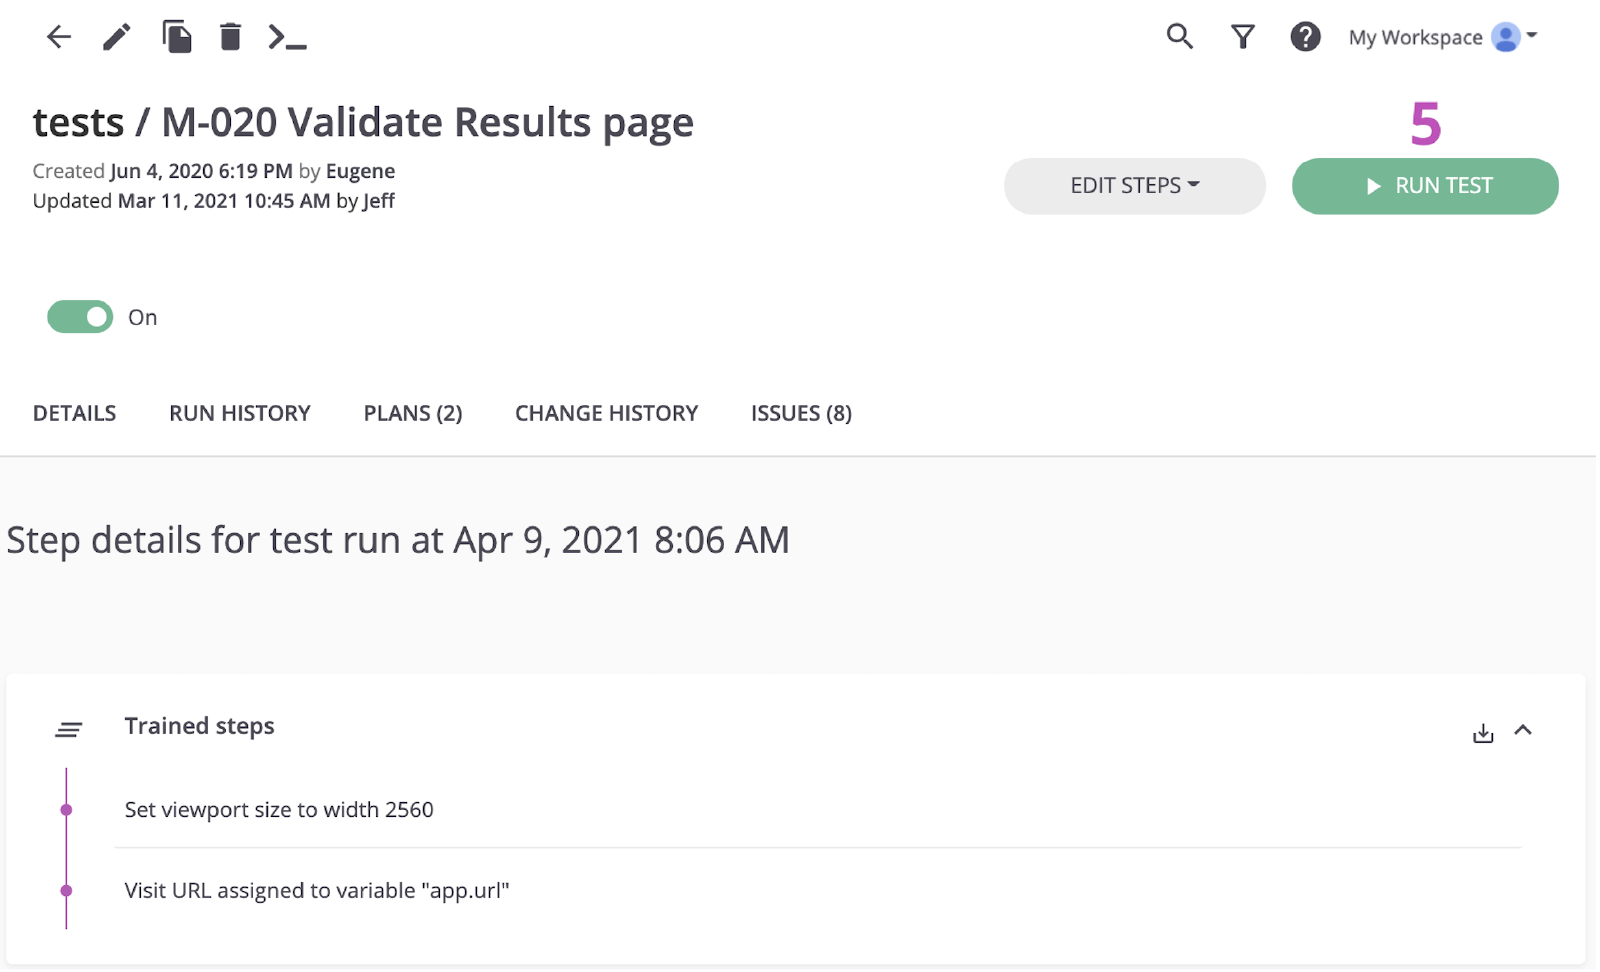
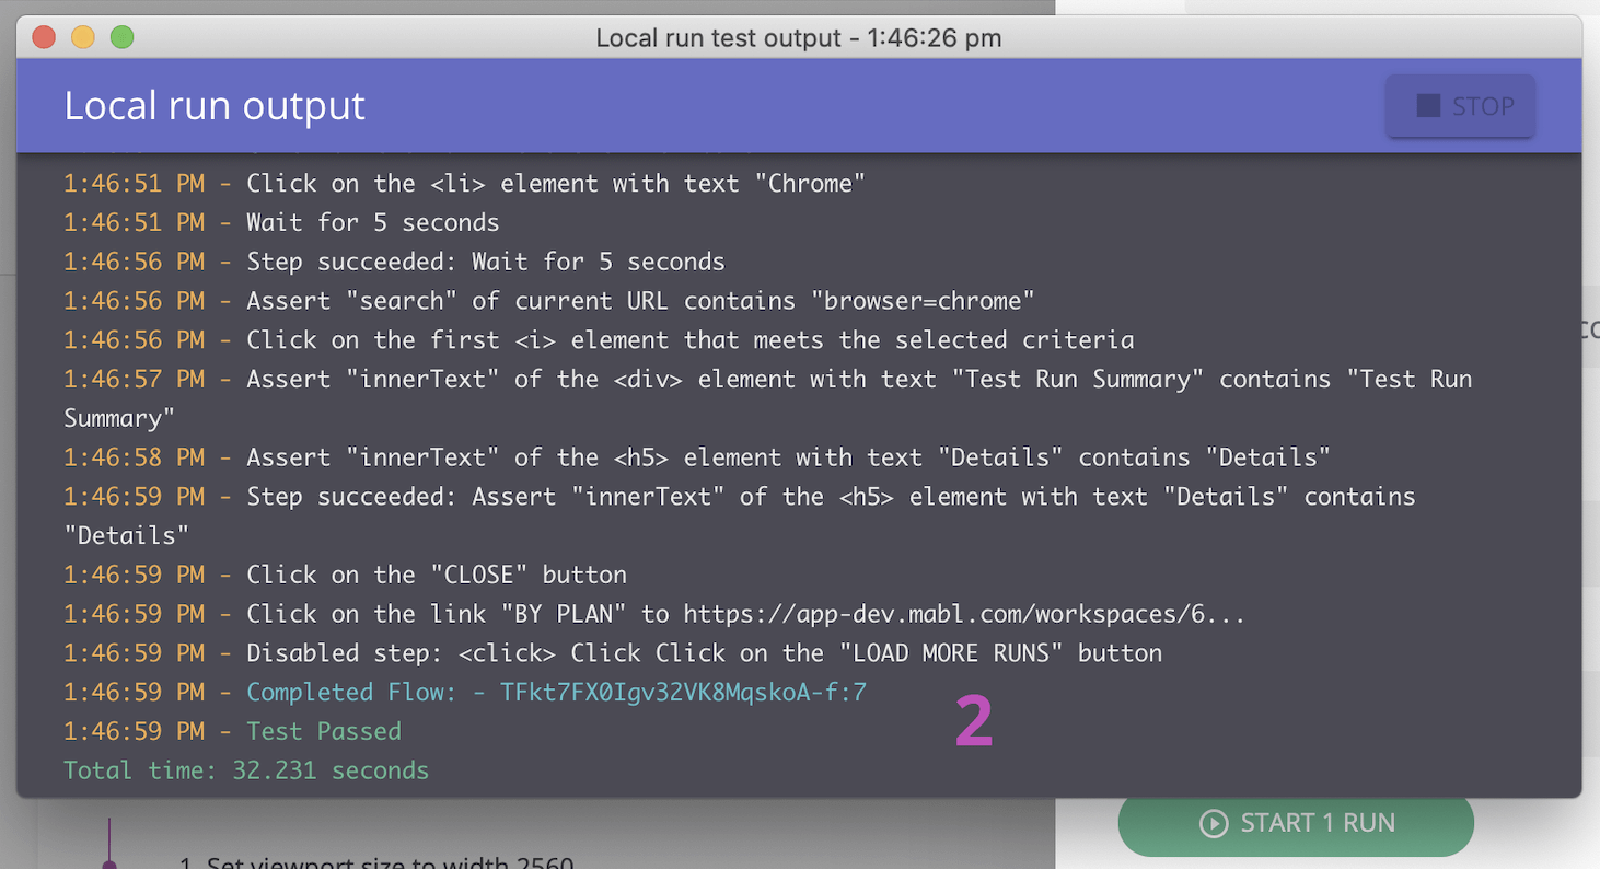
5. Find and open the test in the mabl desktop app, then click Run Test on the right and add any additional parameters to the test run, such as the specific environment or a set of credentials.
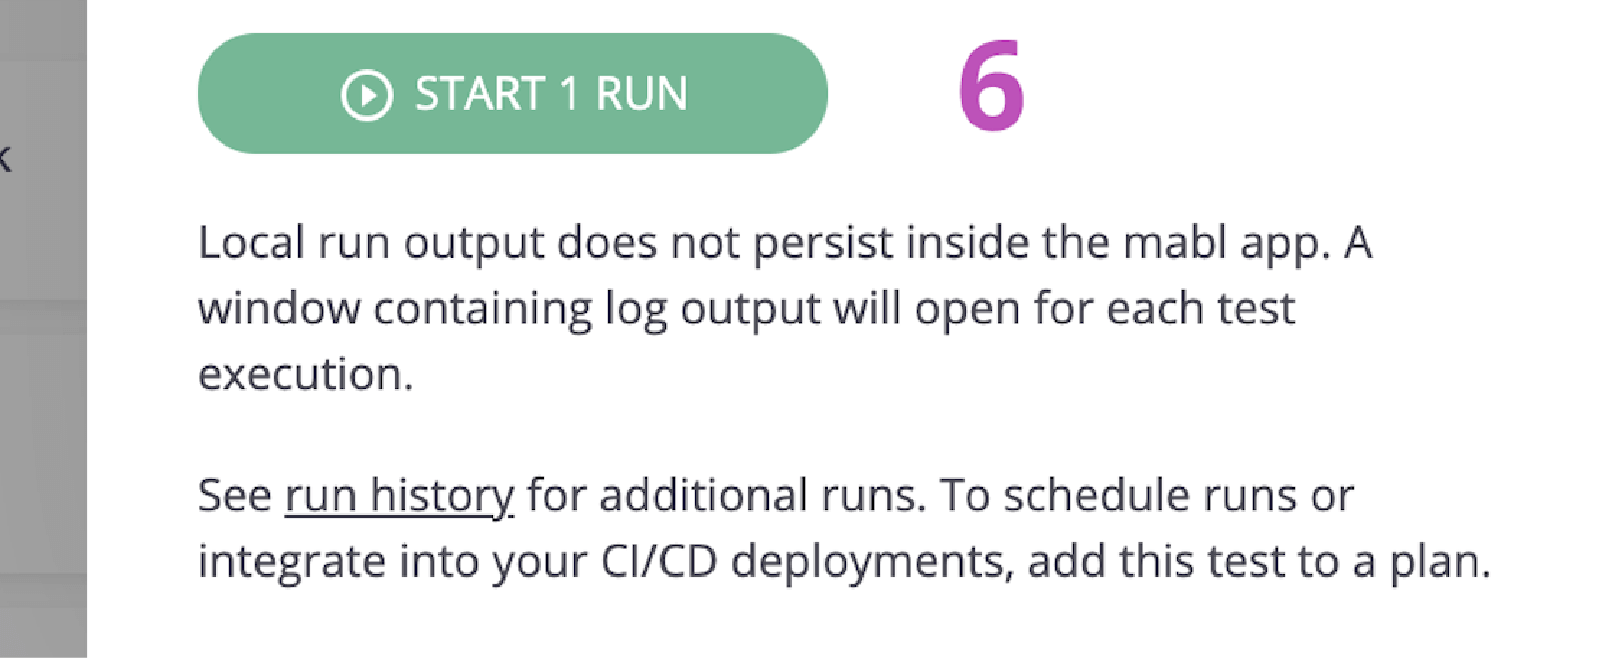
6. Click Start 1 Run to kick off a test locally and confirm the failure.
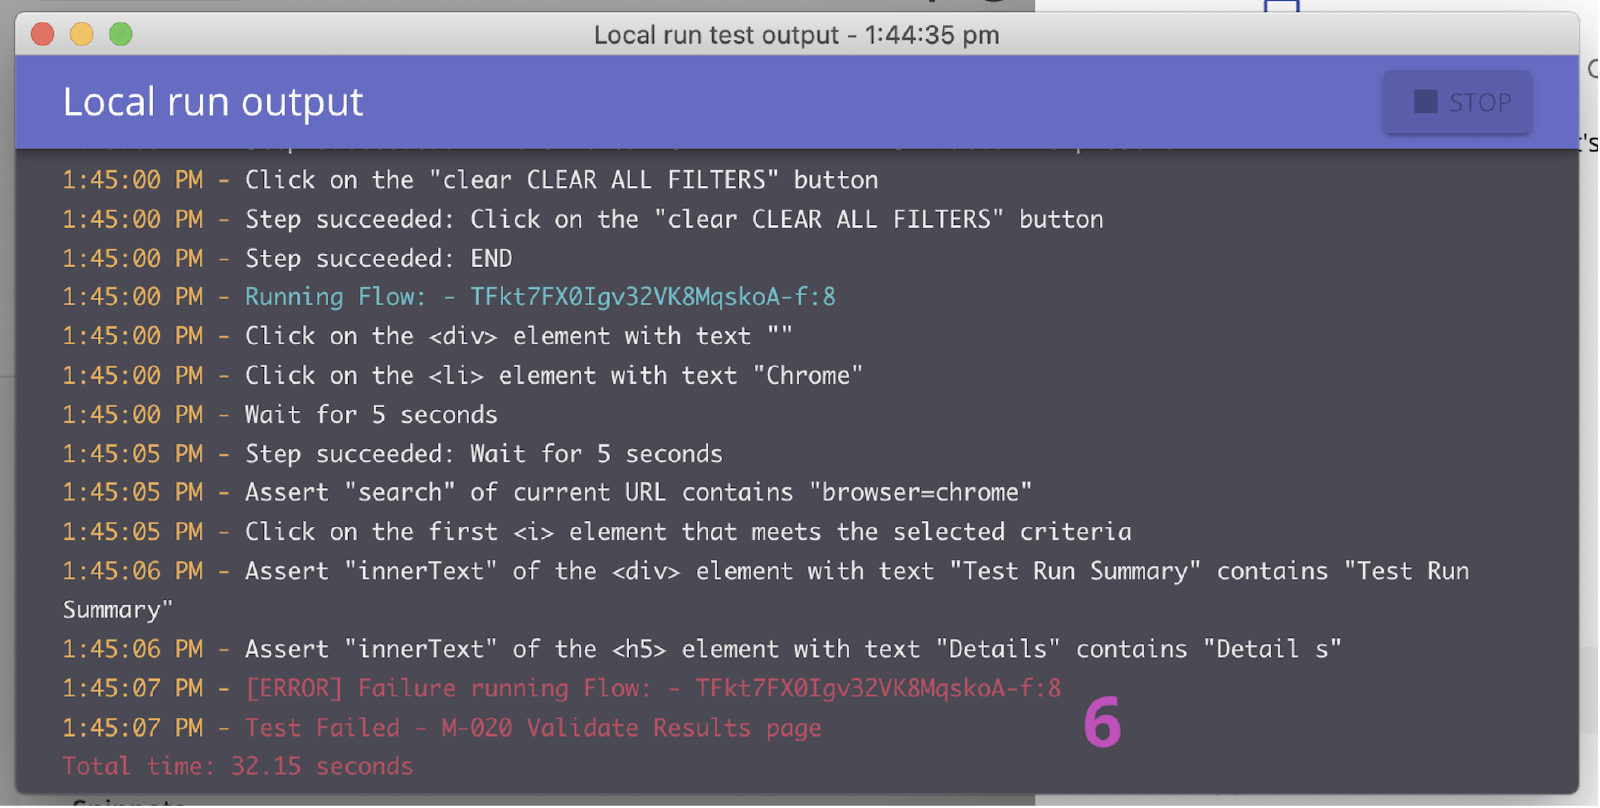
7. Start implementing the fix.
Step 5. Validate the fix
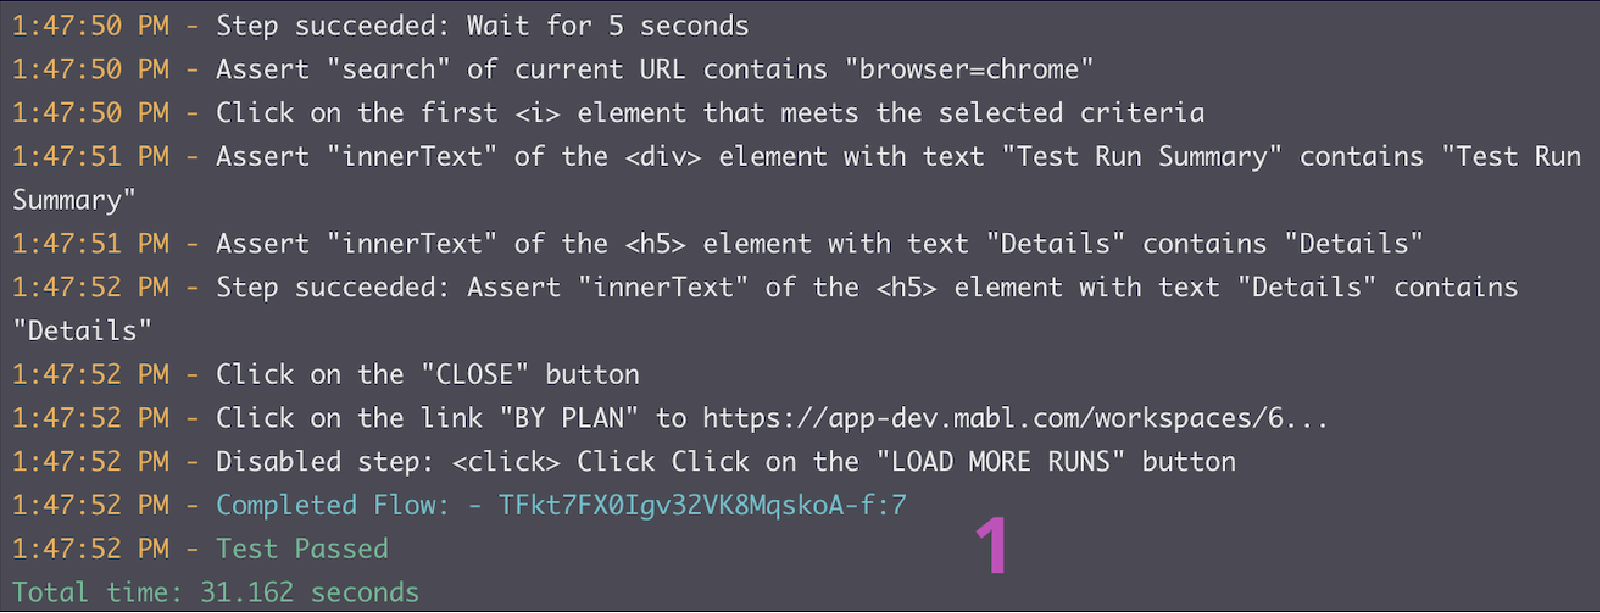
Once a fix is in place, you can use the mabl CLI to run a test locally against a local build. Within a short amount of time, you can verify if the changes resolved the issue. Additionally, as the changes move across the pipeline, you can continue to run mabl tests on each build.
From the CLI
1. Repeat steps 5.2 and 5.3 to verify that your changes pass the test.
From the desktop app
2. Repeat steps 5.5 and 5.6 to verify that your changes pass the test.
3. Monitor as it moves across the pipeline.
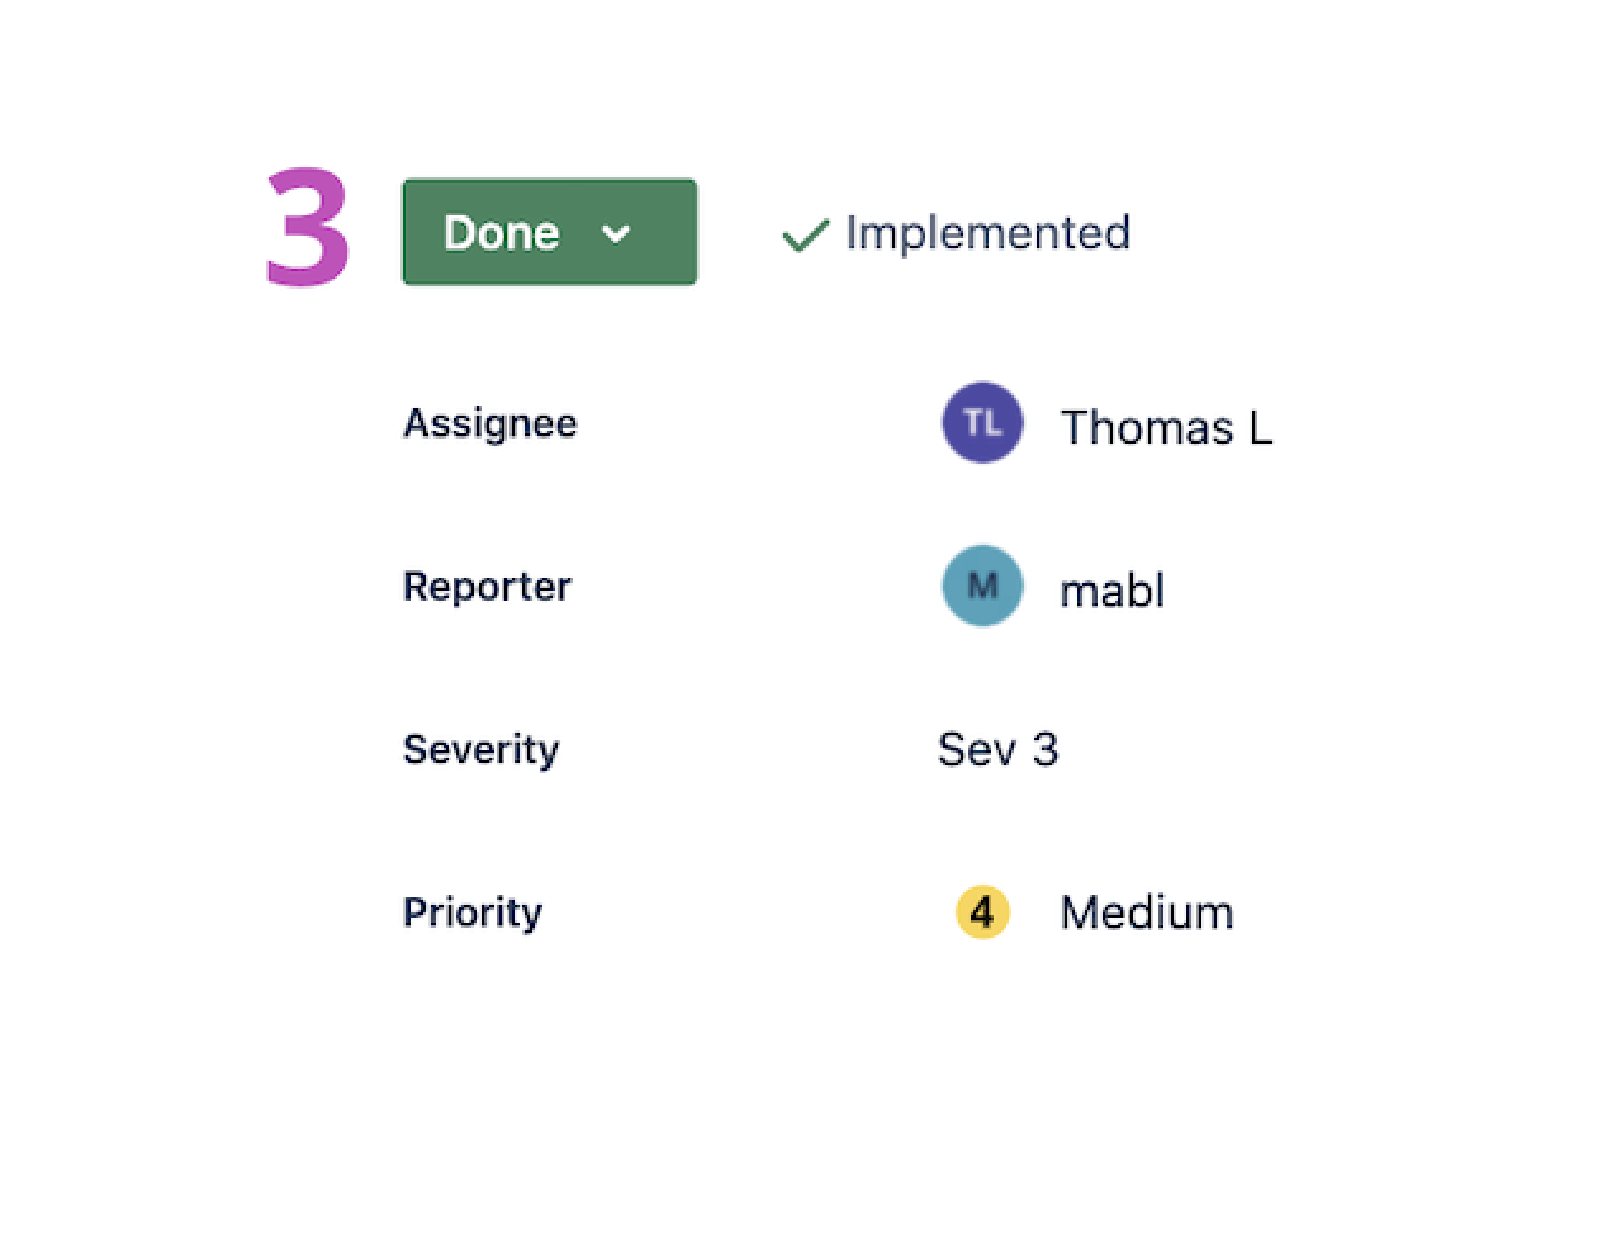
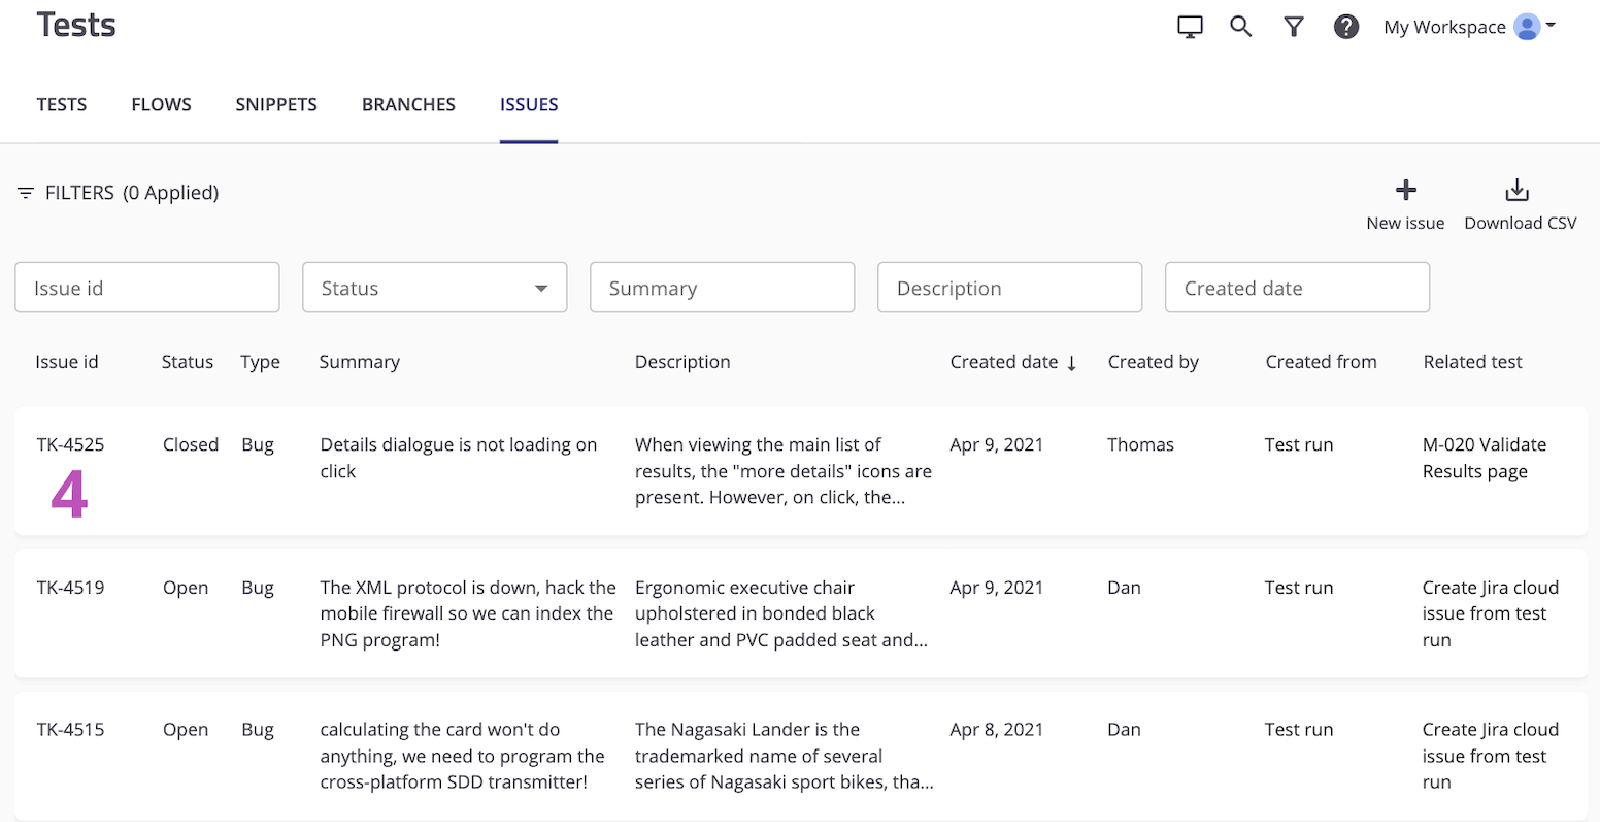
4. Mabl will close out an issue automatically within the app when the issue is closed.
See more integrations for Atlassian Open DevOps.
Share this article
Next Topic
Recommended reading
Bookmark these resources to learn about types of DevOps teams, or for ongoing updates about DevOps at Atlassian.

DevOps community

DevOps learning path
