Articles
Tutorials
Interactive Guides
Jira and Datadog: how to integrate your ticketing and monitoring systems

Datadog
Datadog is the essential monitoring and security platform for cloud applications.
This tutorial provides step-by-step instructions on how to integrate Jira and Datadog in order to automatically create issues from Datadog alerts and incidents.
Time:
10 minute read. Complete in less than a day
Audience:
You currently use Jira and Datadog
Prerequisites:
You are an existing Datadog customer. Get the Datadog for Jira integration here.
If you’re new to Datadog, get started with Datadog here.
You have a Jira Software account. Get started with Jira here.
Section 1: Integrate Jira and Datadog
Step 1: Configure Jira
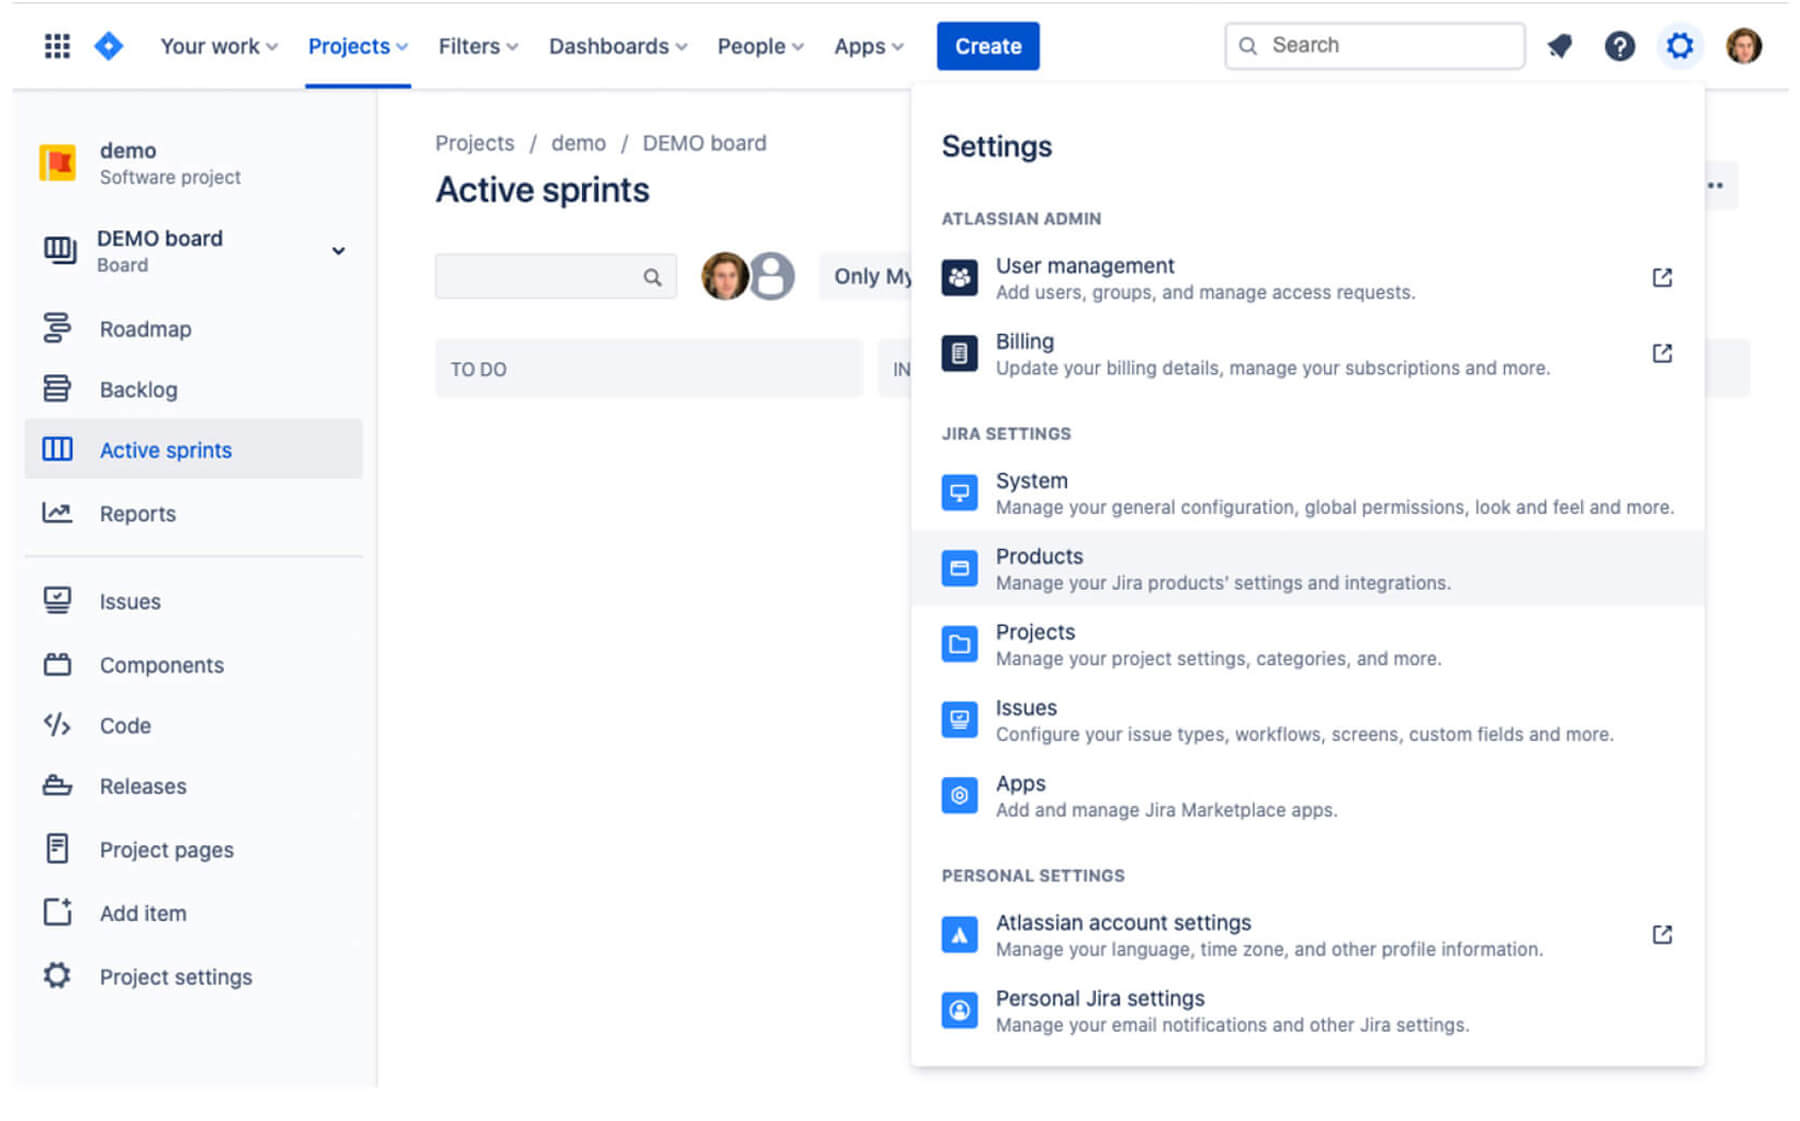
Navigate to your Jira account and click on the settings gear icon. Then select Products.
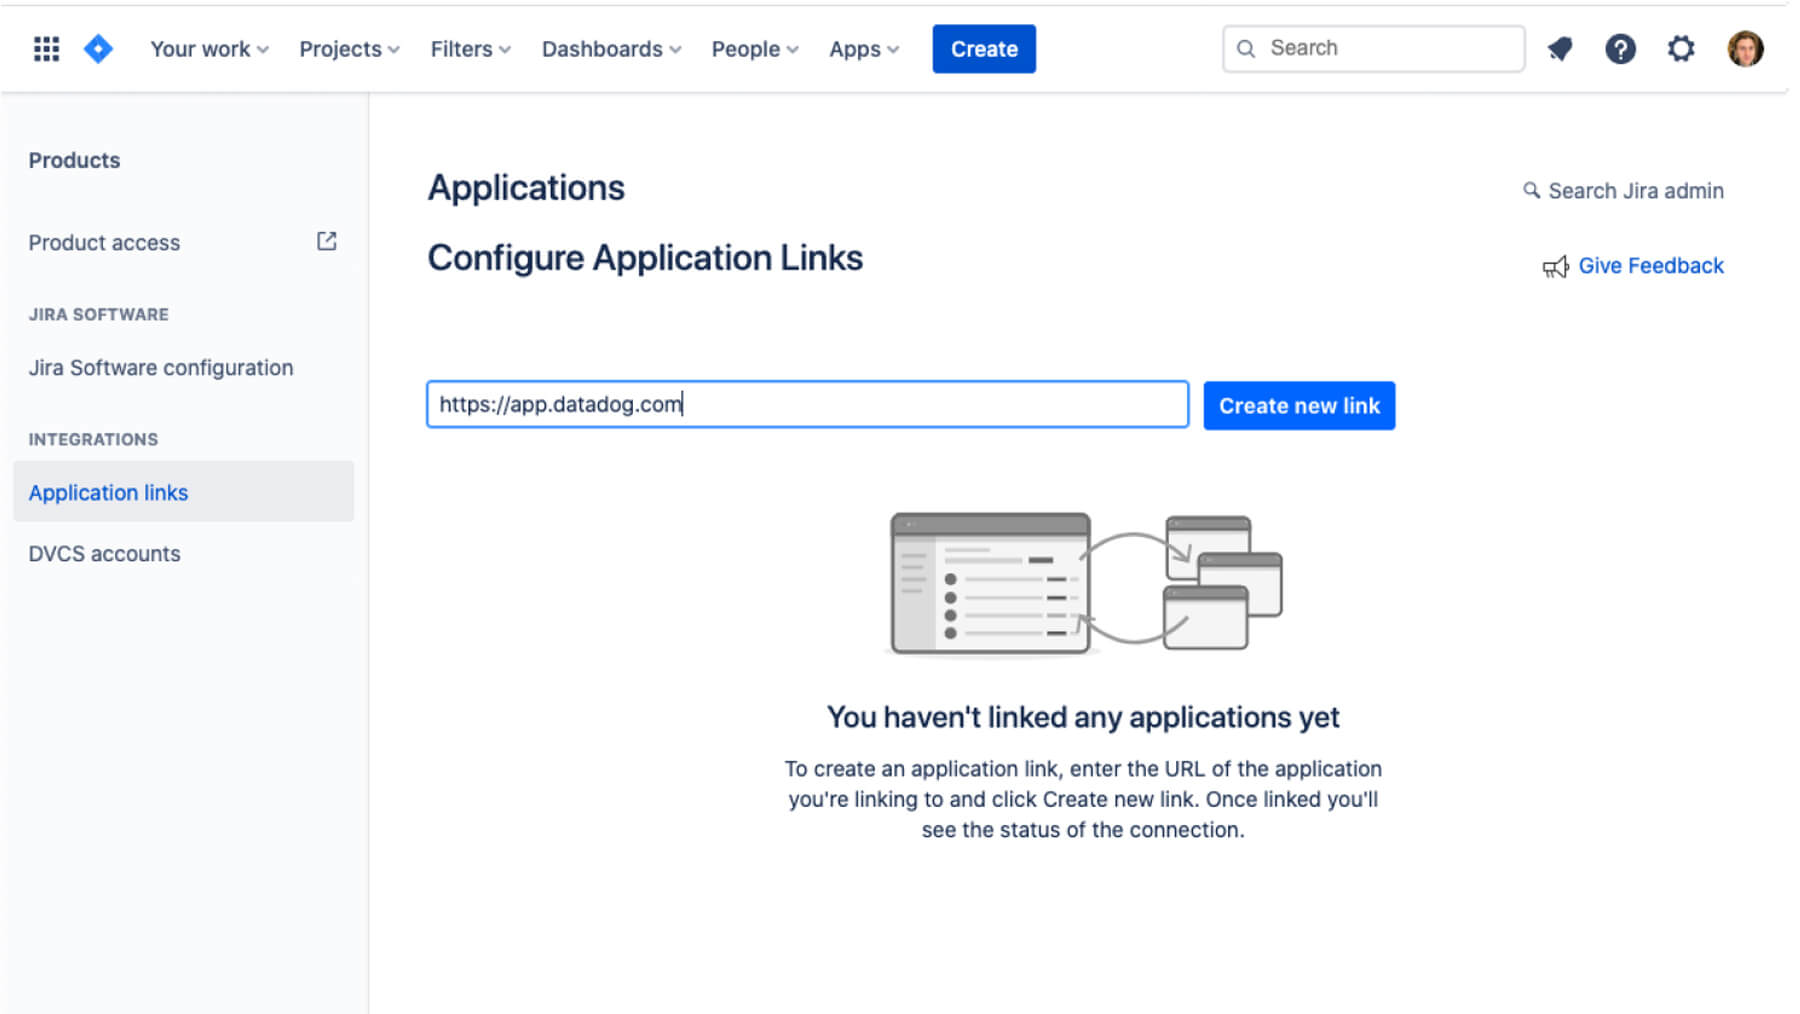
Under Integrations in the left side menu, select Application links. Enter the URL https://app.datadoghq.com/ and click Create new link.
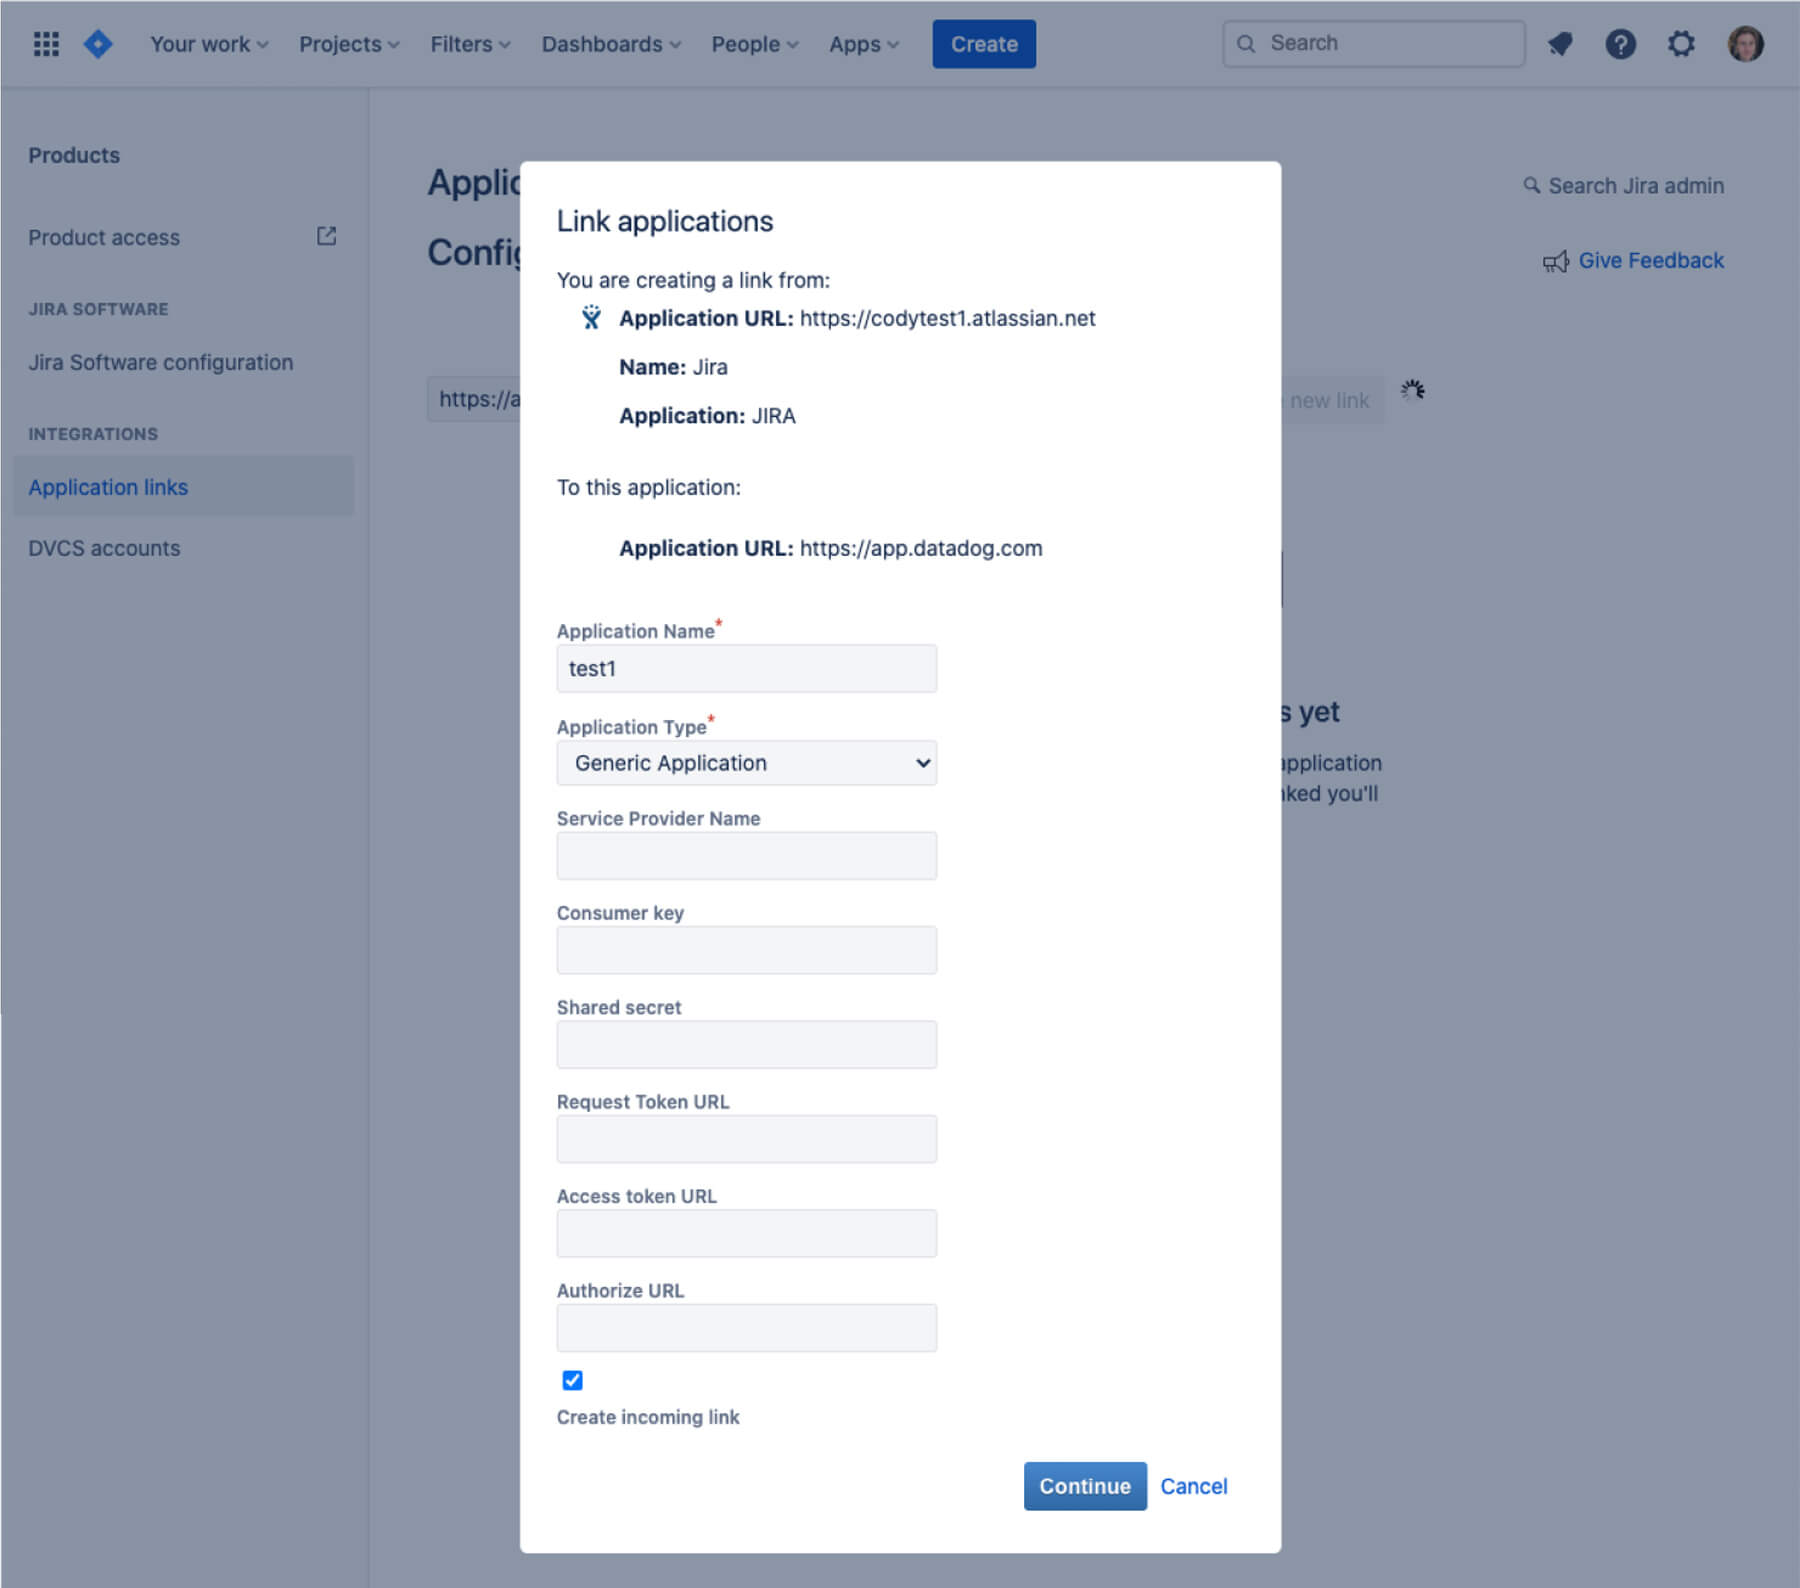
This will prompt you to fill out a form. The Application Name can be set to anything, Application Type set to Generic Application, and Create incoming link checked. Then click Continue.
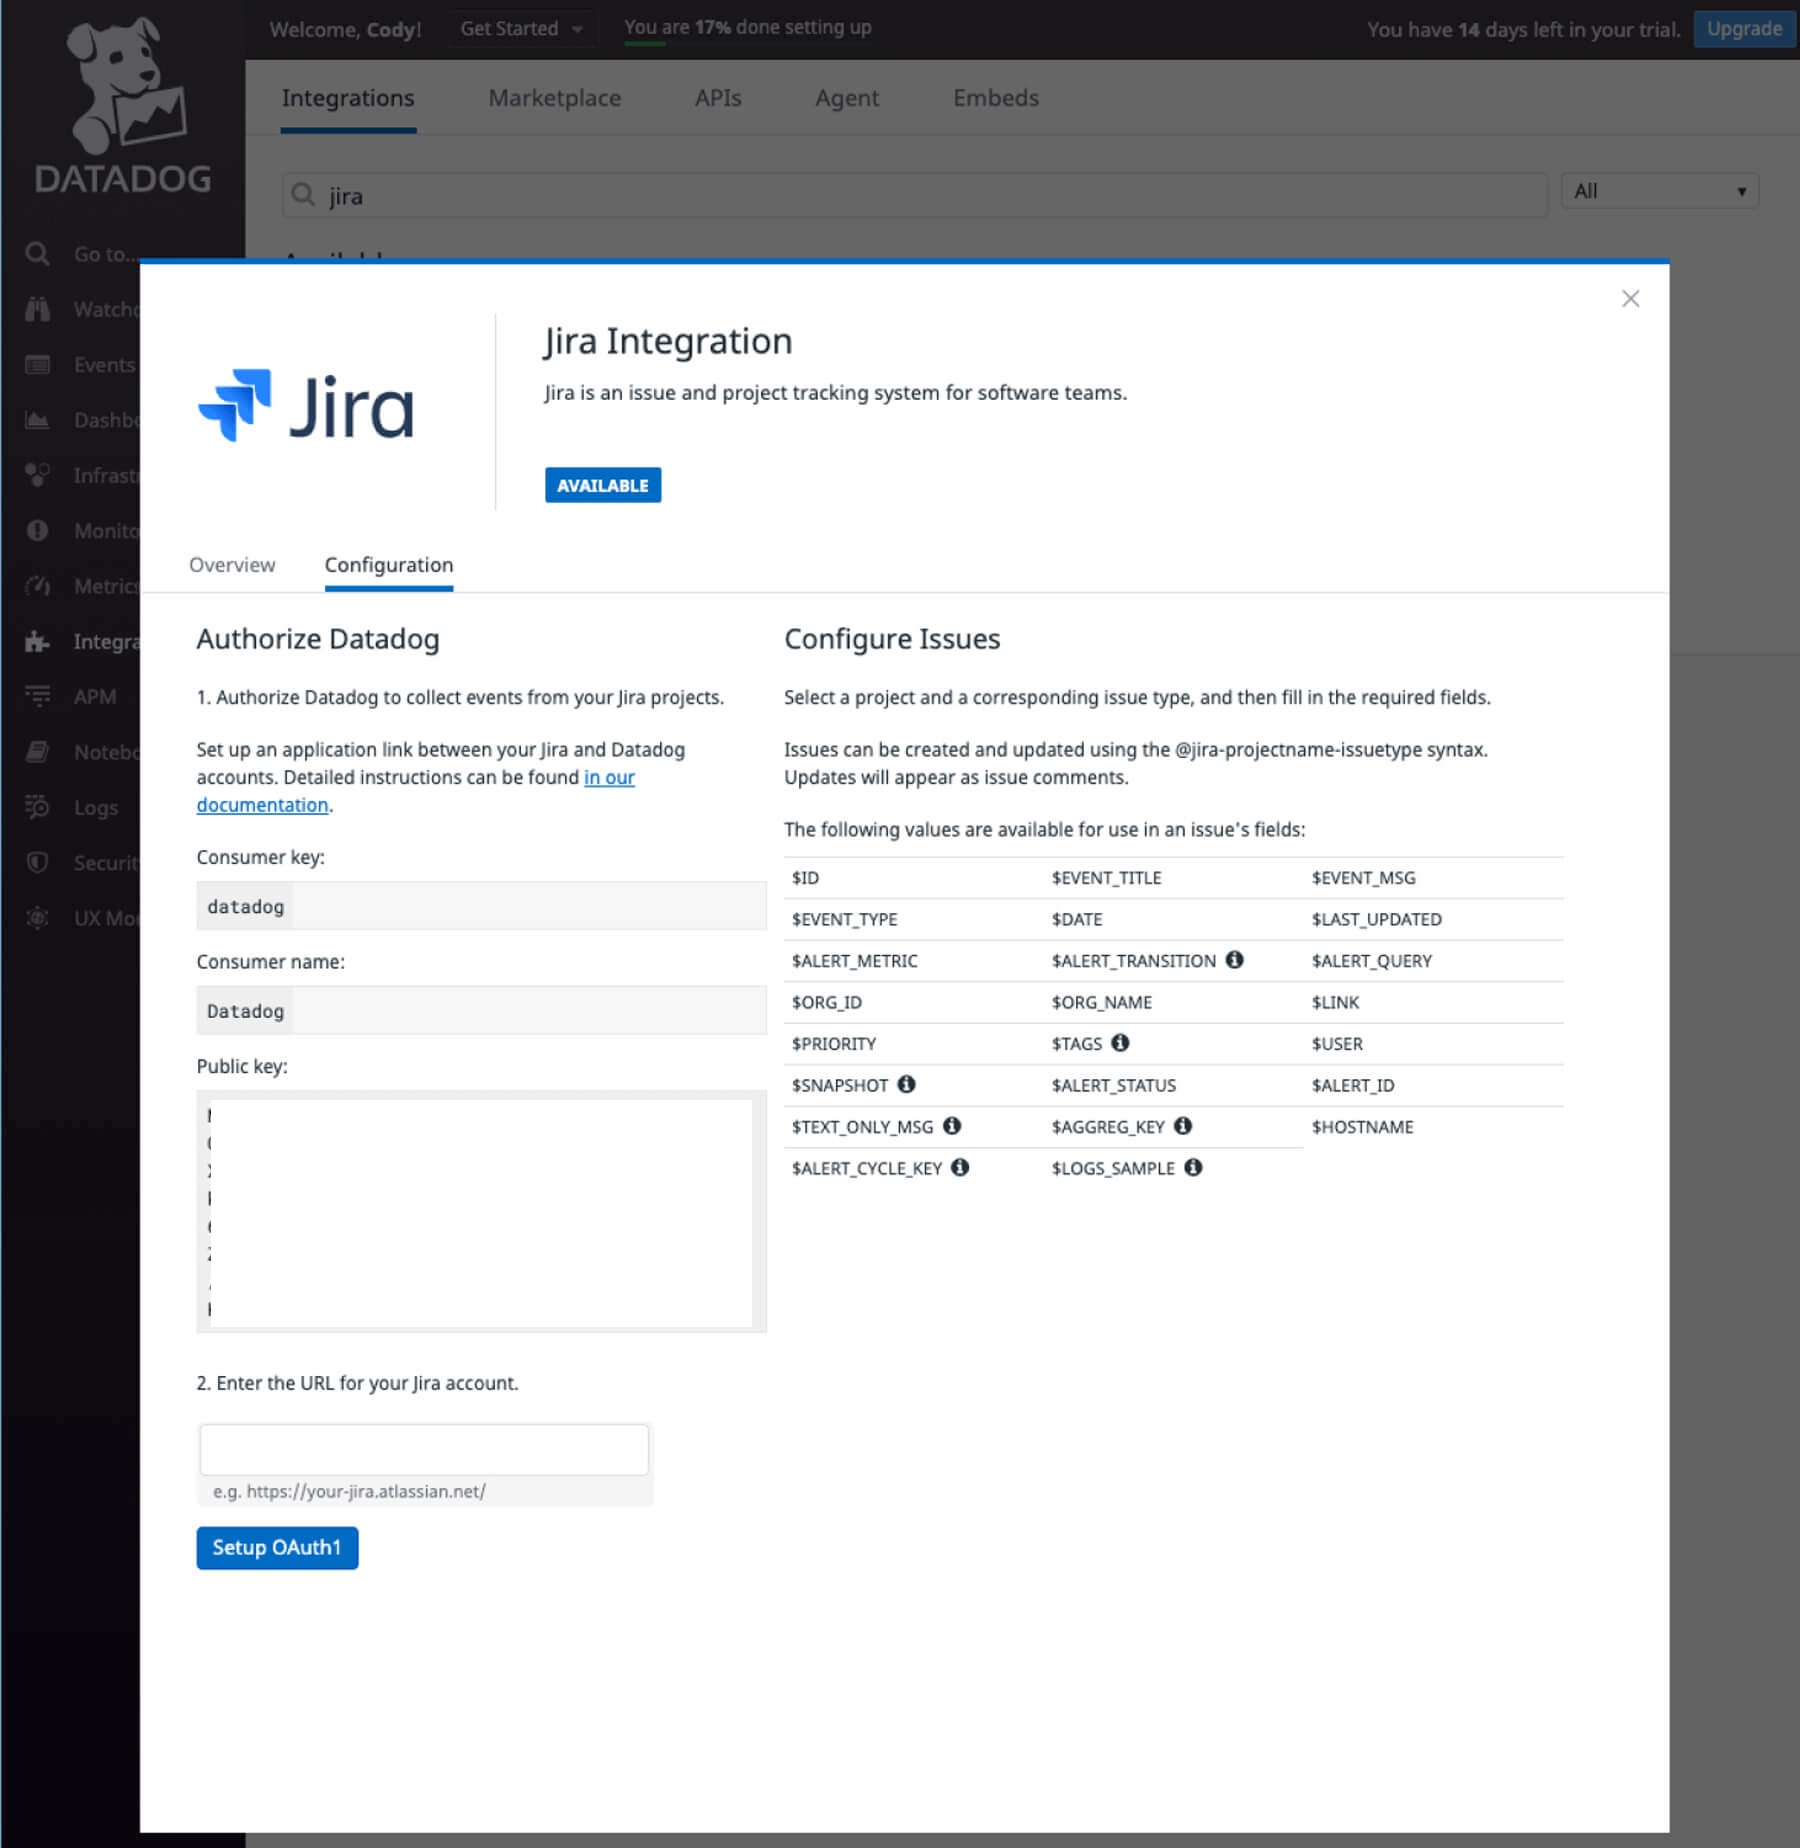
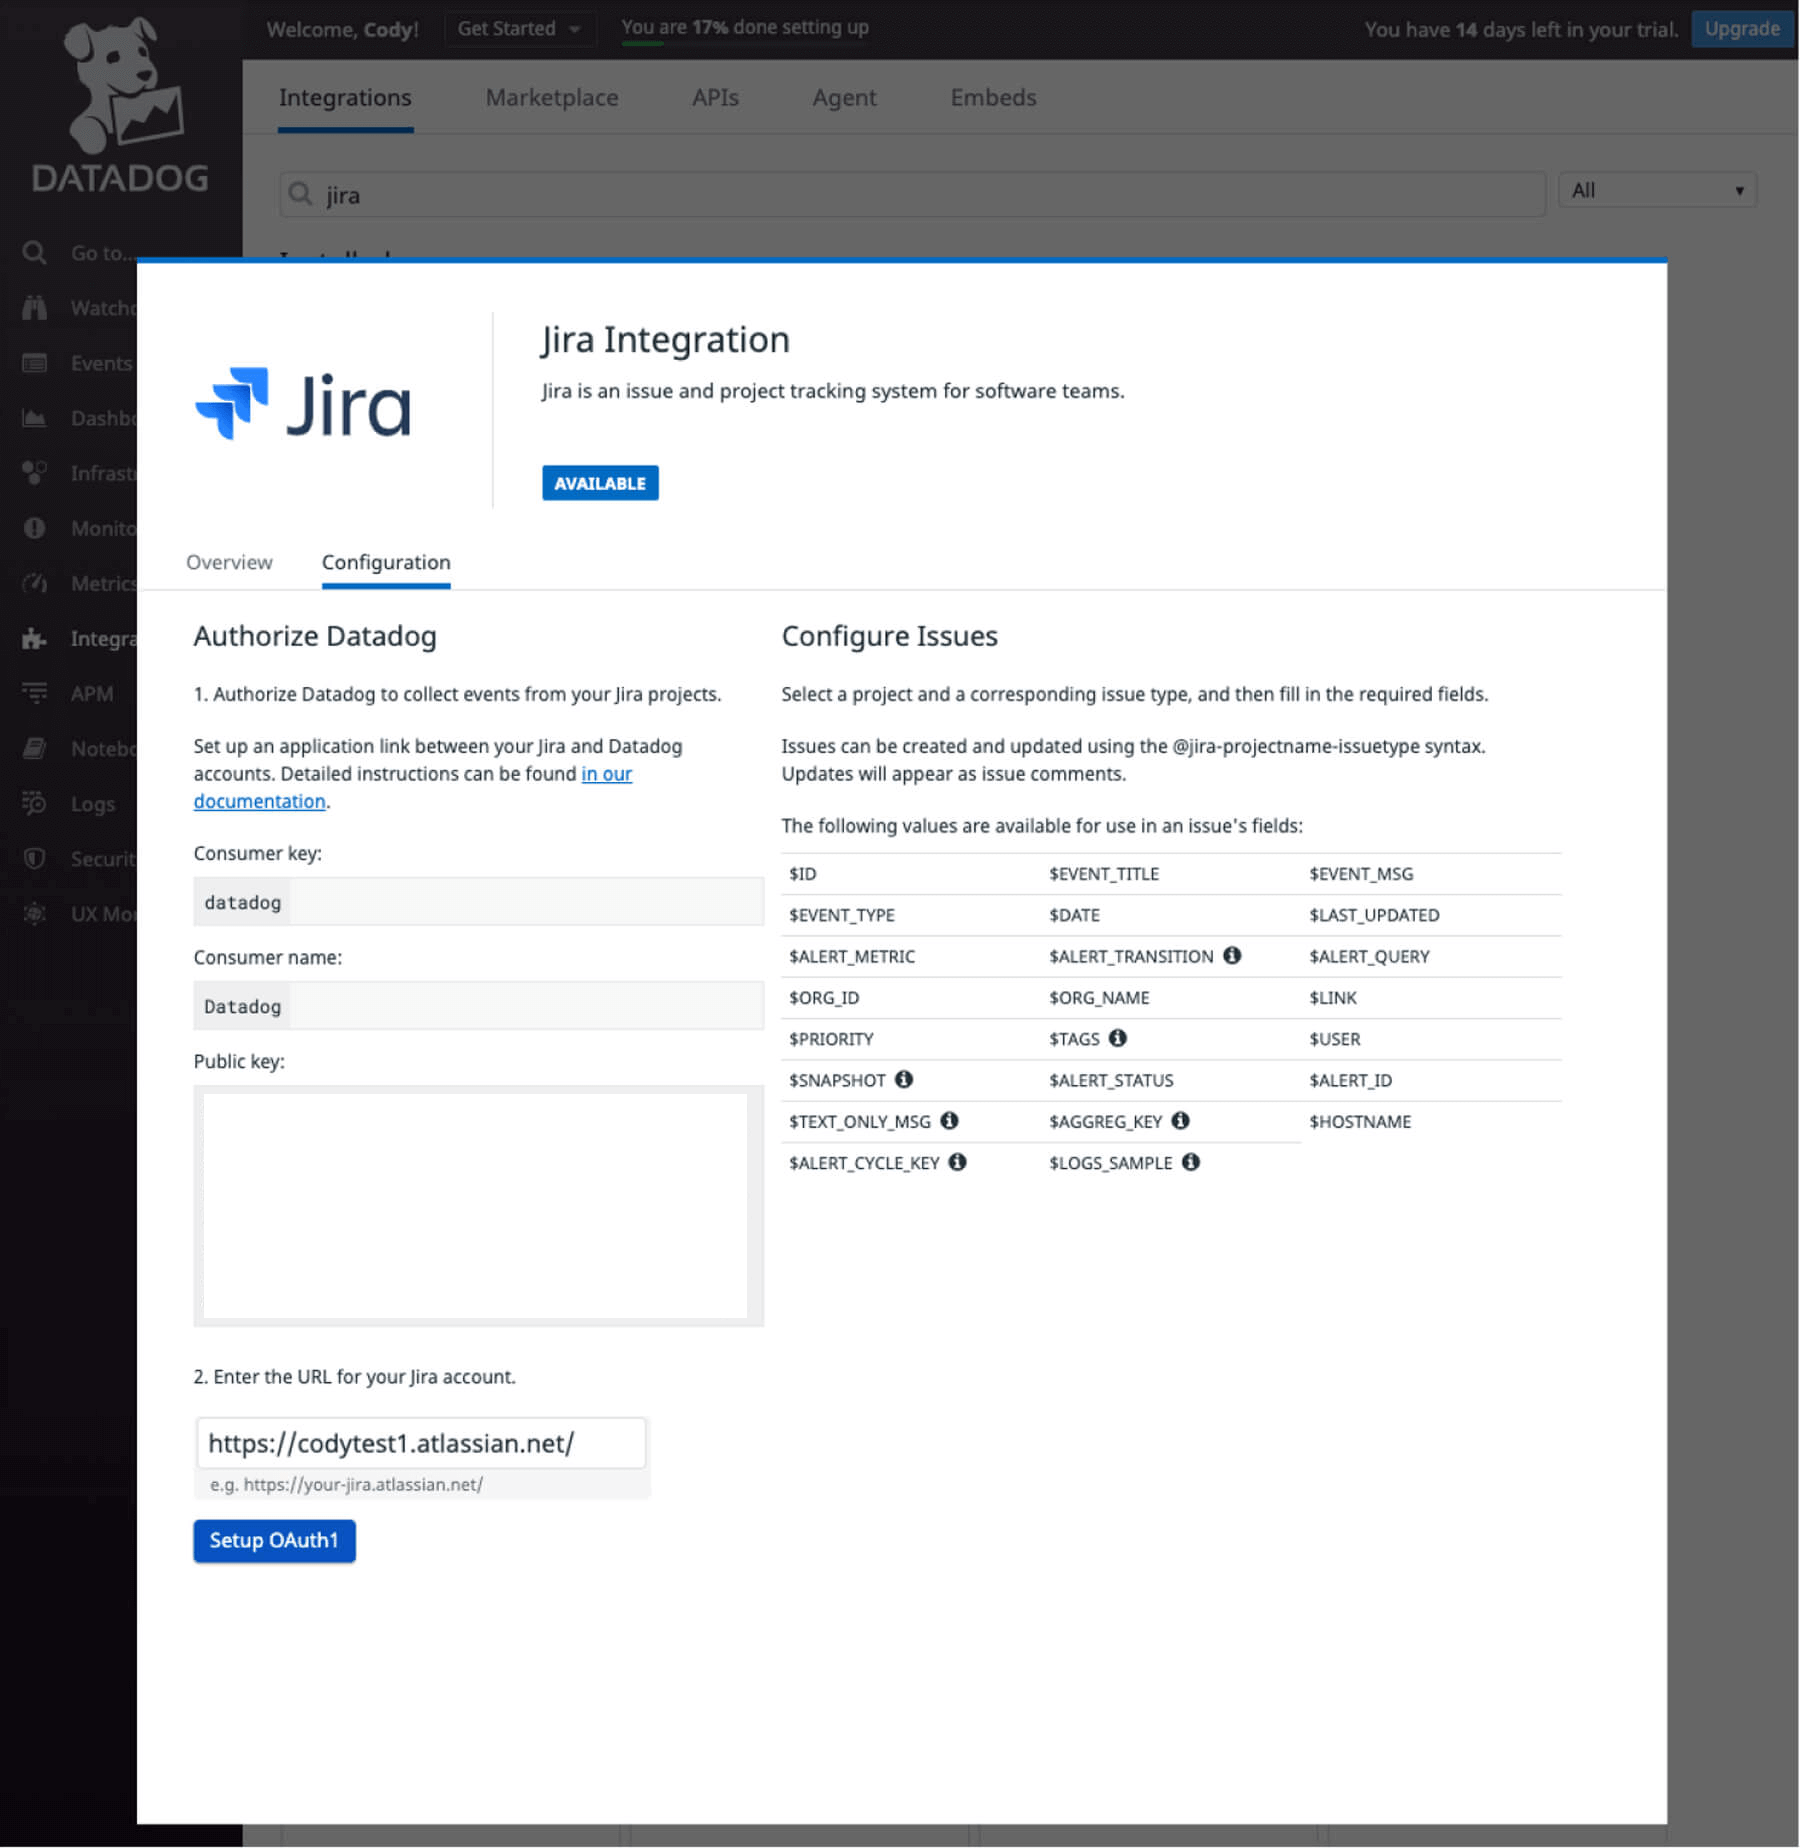
On the next form fill in the consumer key, consumer name, and public key with the information listed in the Datadog Jira Integration tile. Once those are filled in, click Continue.
Step 2: Datadog Configuration
Within the Jira Integration Tile, enter the URL for your Jira account then click Setup OAuth1.
Step 3: Custom Issue Configuration
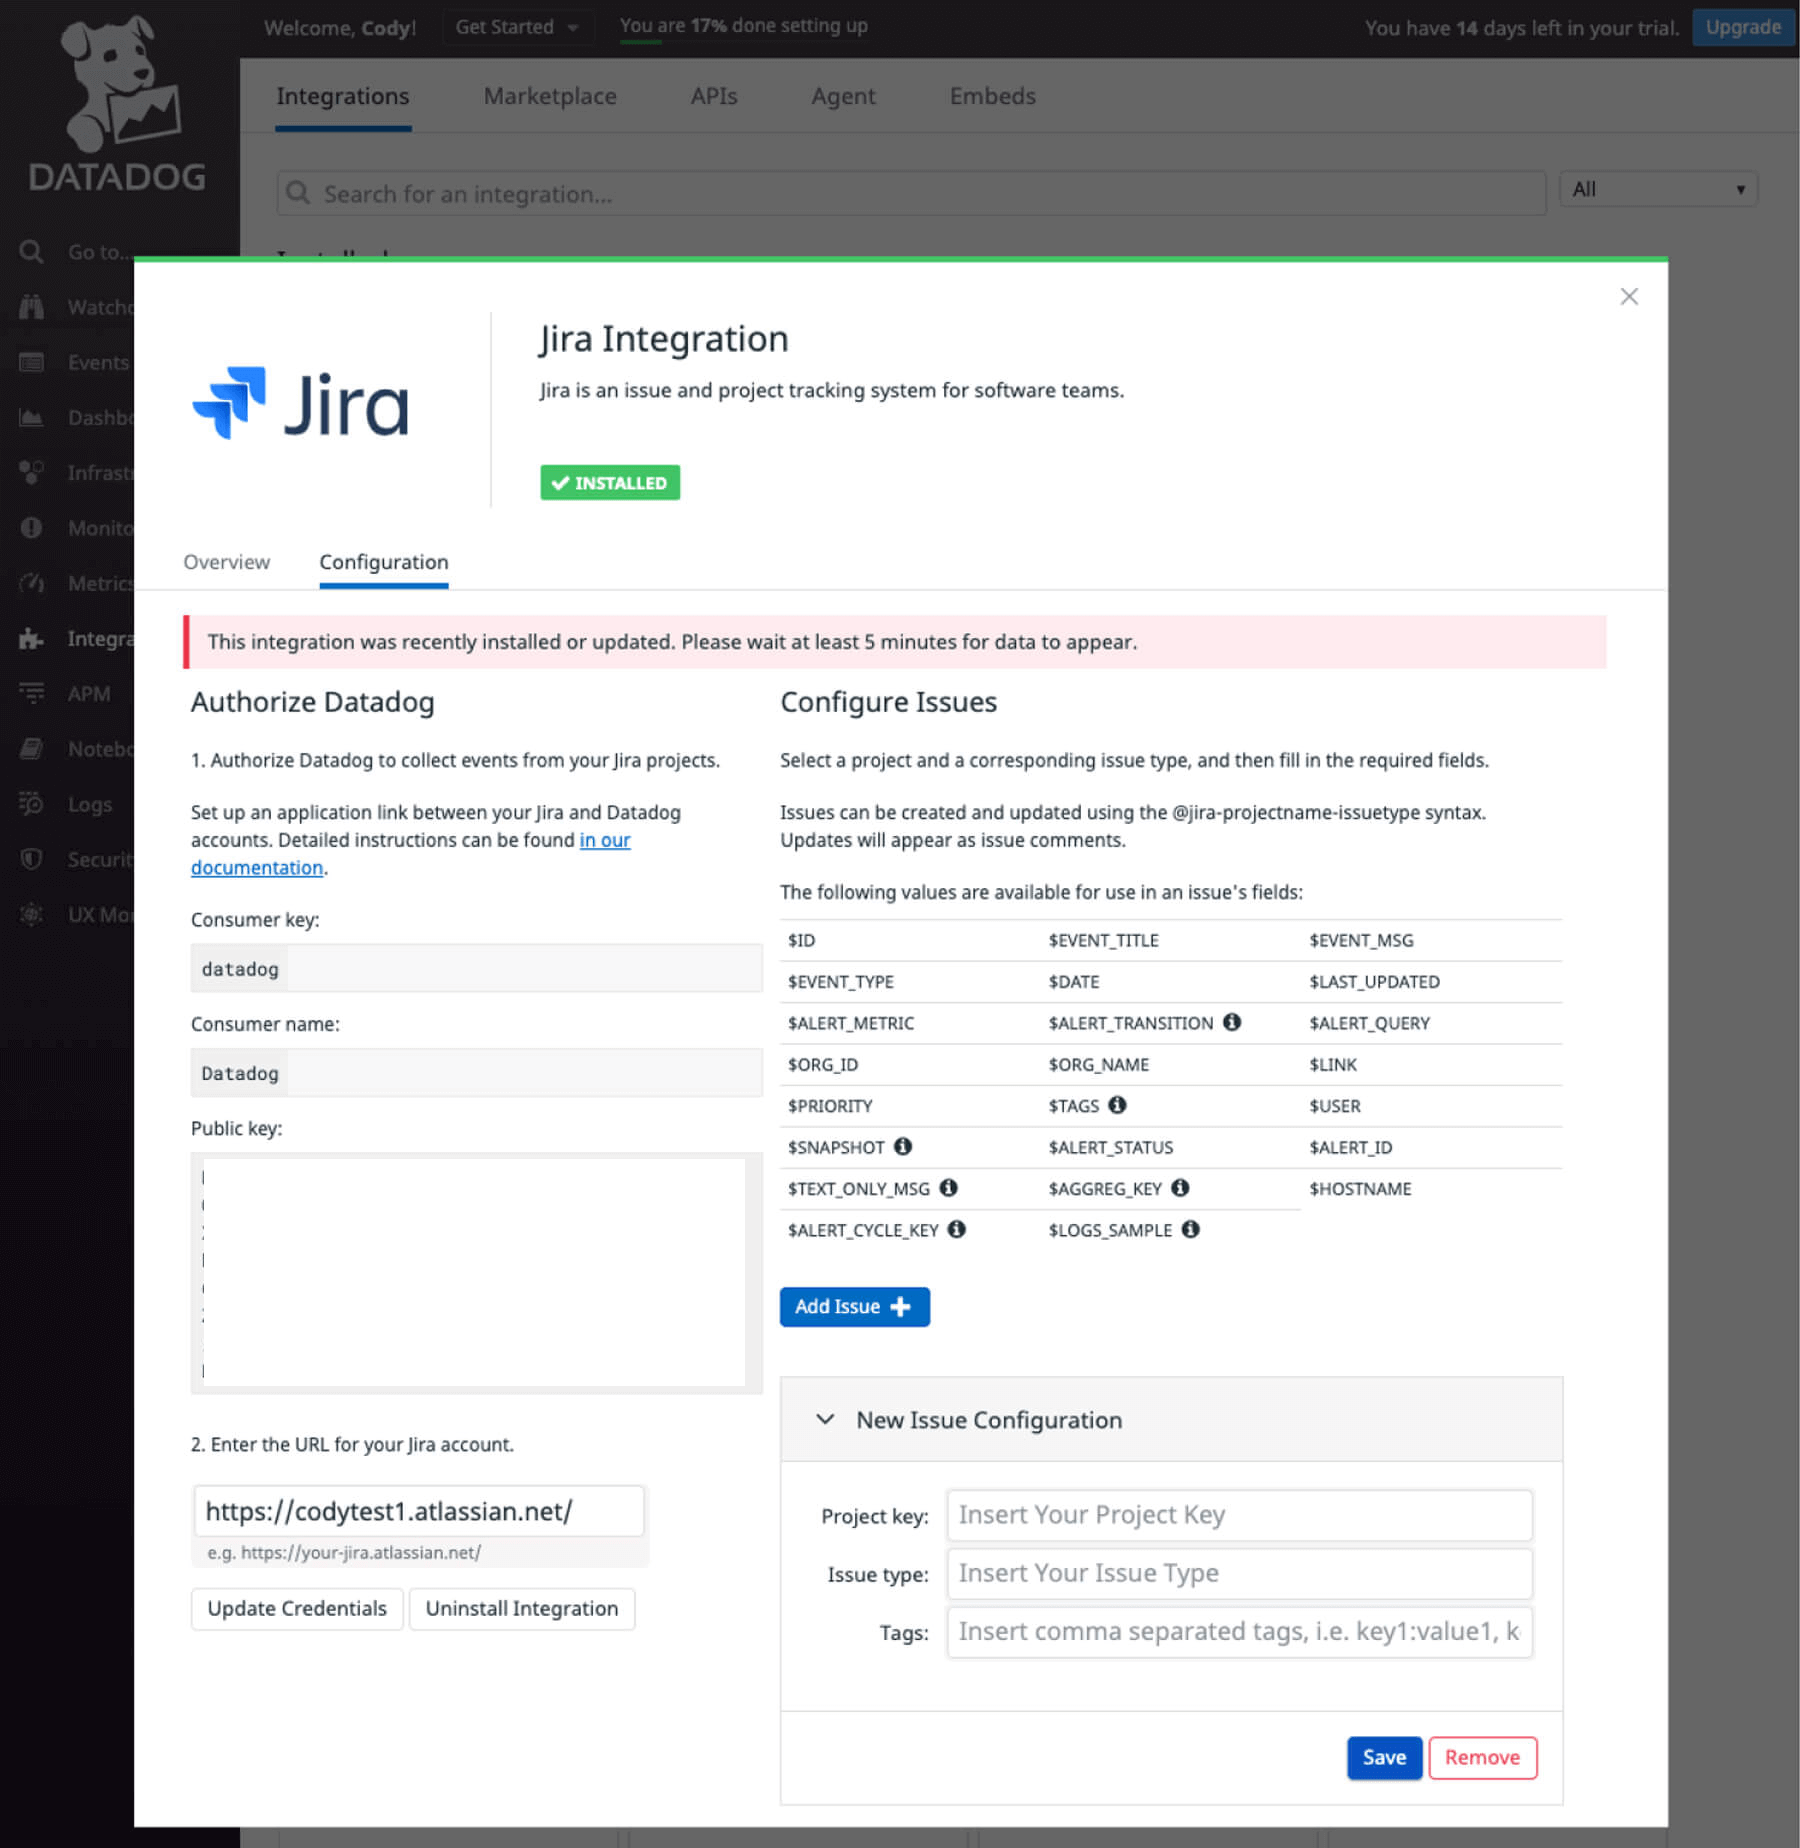
Now that Datadog and Jira are integrated, you can create custom issues within Datadog.
To begin, open up the Jira Integration tile, and click Add Issue. Then, enter a Project Key and Issue Type. Keep in mind, each issue has a unique Project ID – Issue Type combination. You can also add additional Datadog tags.
Finally, fill out the Required fields for the issue, and any Other fields.
Section 2: Automatically create issues from Datadog alerts
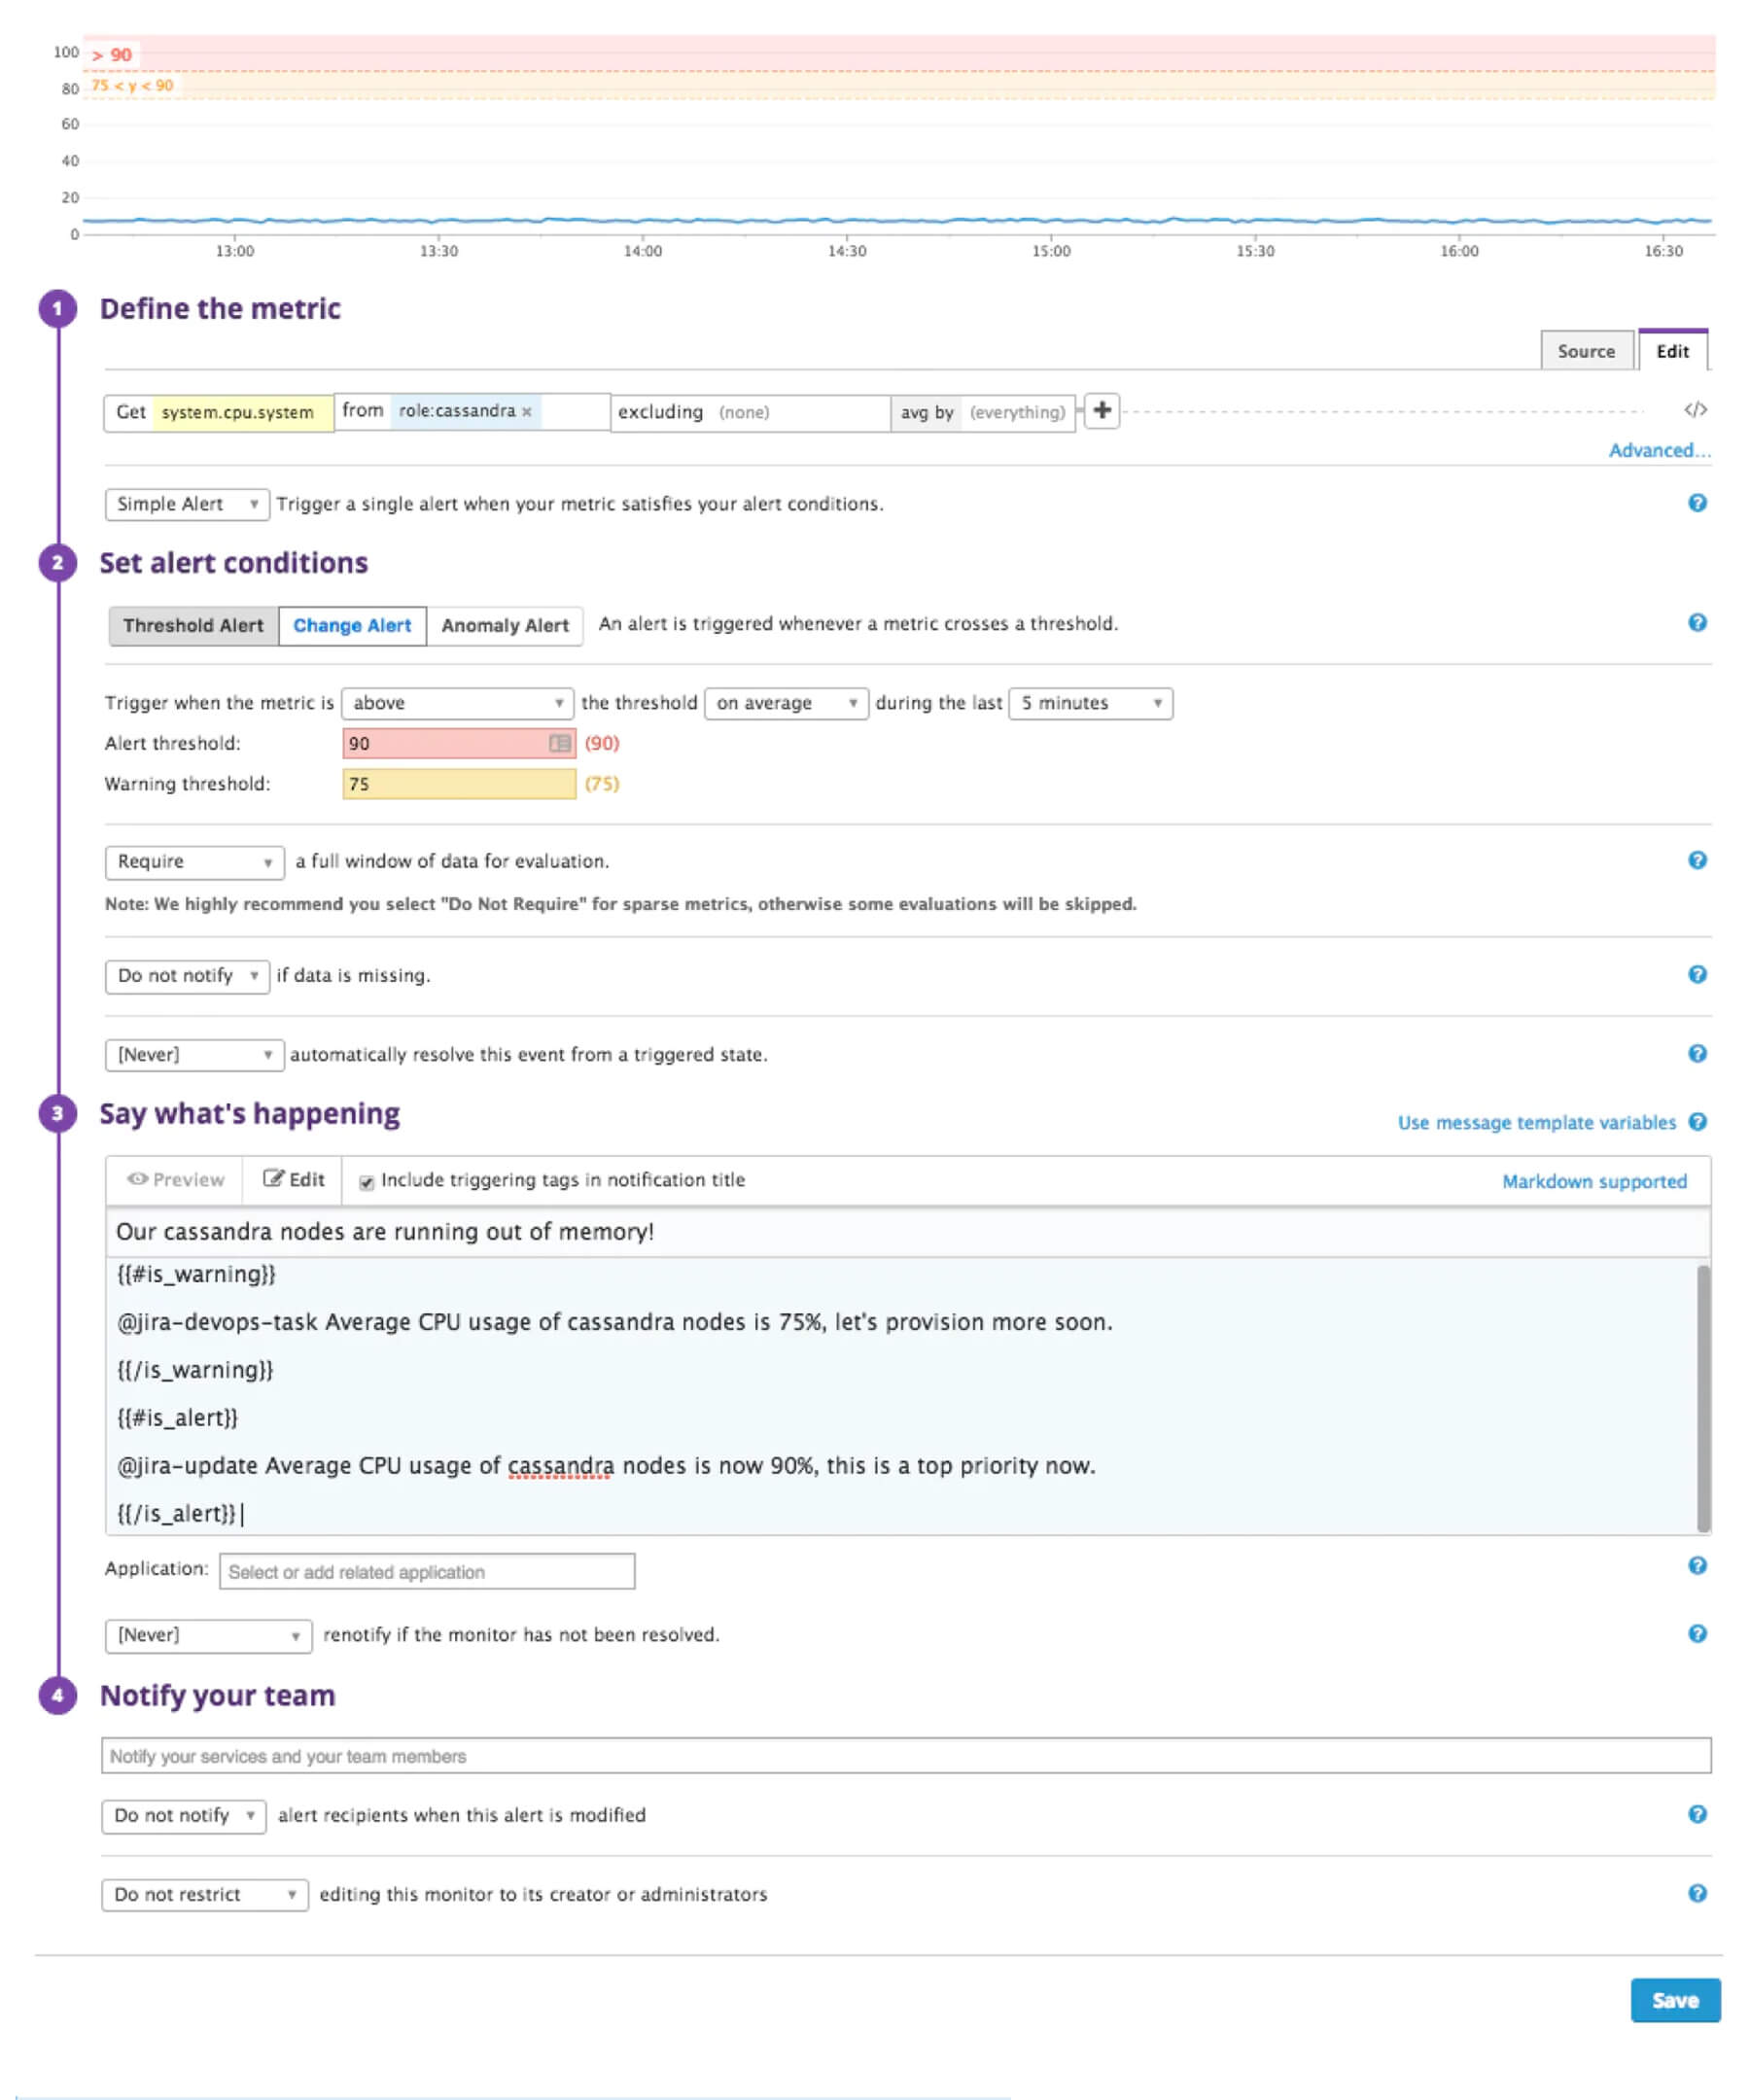
To automatically have Jira issues created within Datadog alerts, use the @jira- <project_name>-<issue_type> command within the “Say what’s happening” section of the new monitor creation process.
A new issue is created when this alert is triggered.
The @jira-update command can be used to update existing issues. This command adds a comment to the Jira issue with the text followed by the @jira-update command.
Section 3: Create issues with a declared incident
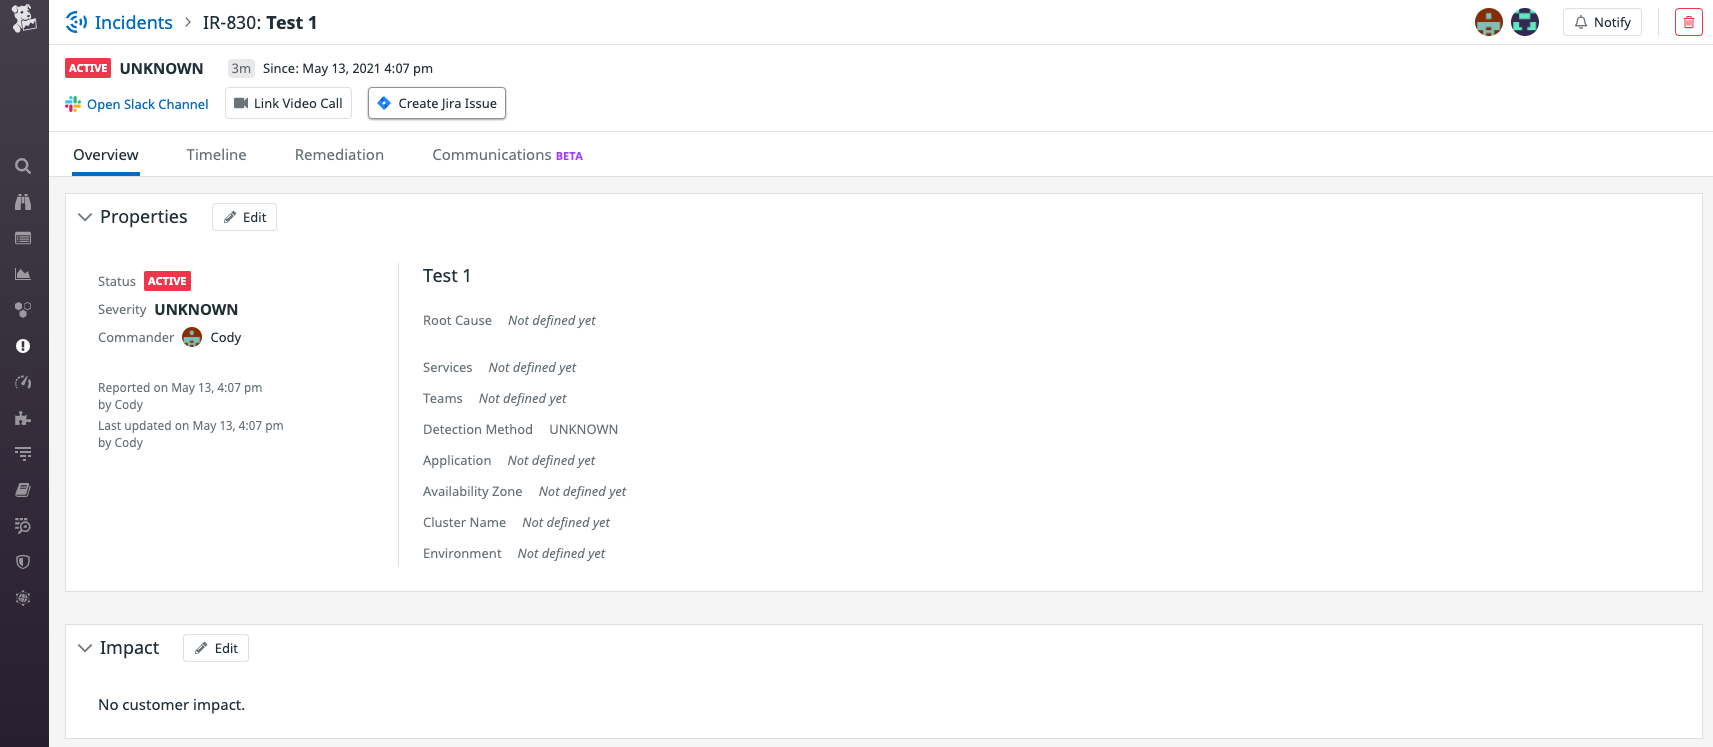
To create a Jira ticket that corresponds to Datadog Incident Management, simply click Create Jira Issue at the top.
Conclusion
Now, you have integrated Jira with Datadog and can automatically create Jira issues from triggered Datadog alerts, and associate a Jira issue with an active incident in a single click. This simplifies your incident response, by combining your monitoring and project tracking solutions.
Share this article
Next Topic
Recommended reading
Bookmark these resources to learn about types of DevOps teams, or for ongoing updates about DevOps at Atlassian.

DevOps community

DevOps learning path
