Articles
Tutorials
Interactive Guides
How to trigger automated tests with Xray and Jira

Sérgio Freire
Head of Solution Architecture and Testing Advocacy, Xray
The following is a step-by-step tutorial on how to use Xray Cloud, a continuous integration tool that triggers automated tests and provides results through an Xray Test Plan.
Time
Seven-minute read. Complete over two hours.
Audience
You’re a seasoned Xray and Jira user, you have a project in GitLab, and have automated tests set up. You want to set up an easy way to trigger automated tests in Xray so that non-technical team members can participate in automation.
Prerequisites
You’ve set up your project in GitLab. Get started with GitLab here.
You've created a Test Plan in Xray with tests. Get started with Xray for Jira here.
You have an active Jira project with the GitLab application installed and configured. Get started with Jira here.
Why is test automation important?
Test automation reduces manual efforts through repeatable and stable processes, increases testing ROI, accelerates testing and feedback, and ultimately reduces business expenses.
Step 1: Generate an API key
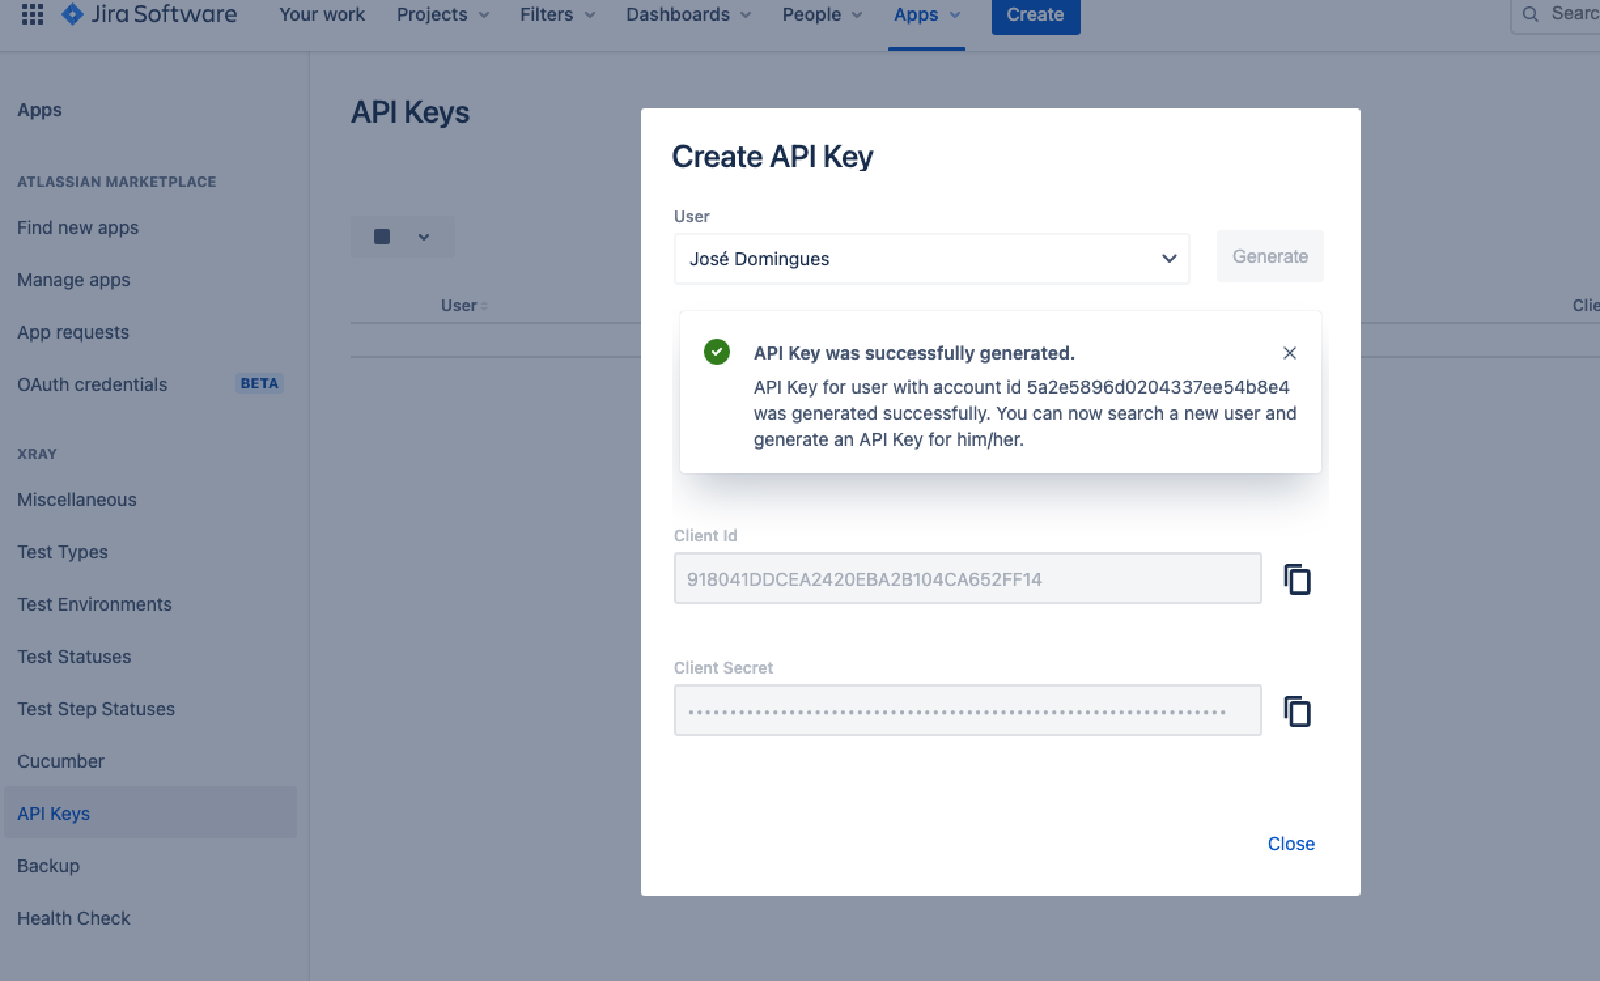
First, go to the Xray API settings and generate an API Key. Then, save the client ID and client secret code.
Step 2: Create a GitLab token
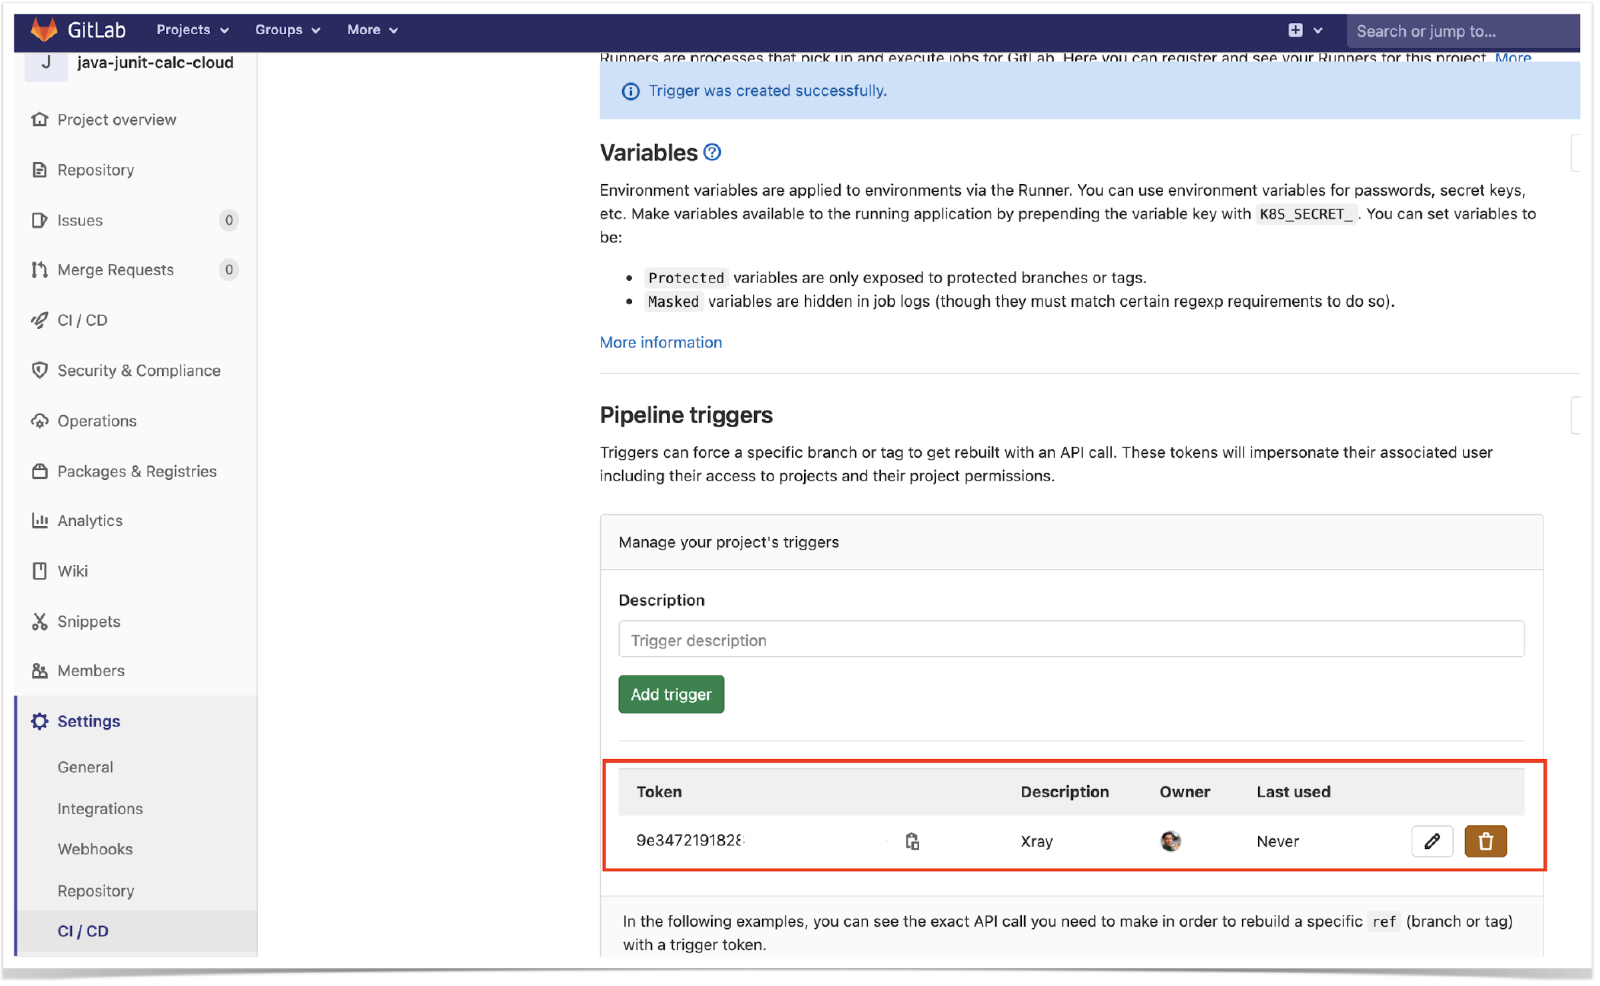
From GitLab, go to Settings then CI/CD. Under the Pipeline triggers section, create a trigger and name it. This creates a trigger token.
Tip: You can easily replicate this process for other frameworks including Jenkins, Robot Framework, and Bamboo.
Step 3: Complete the connection with Xray
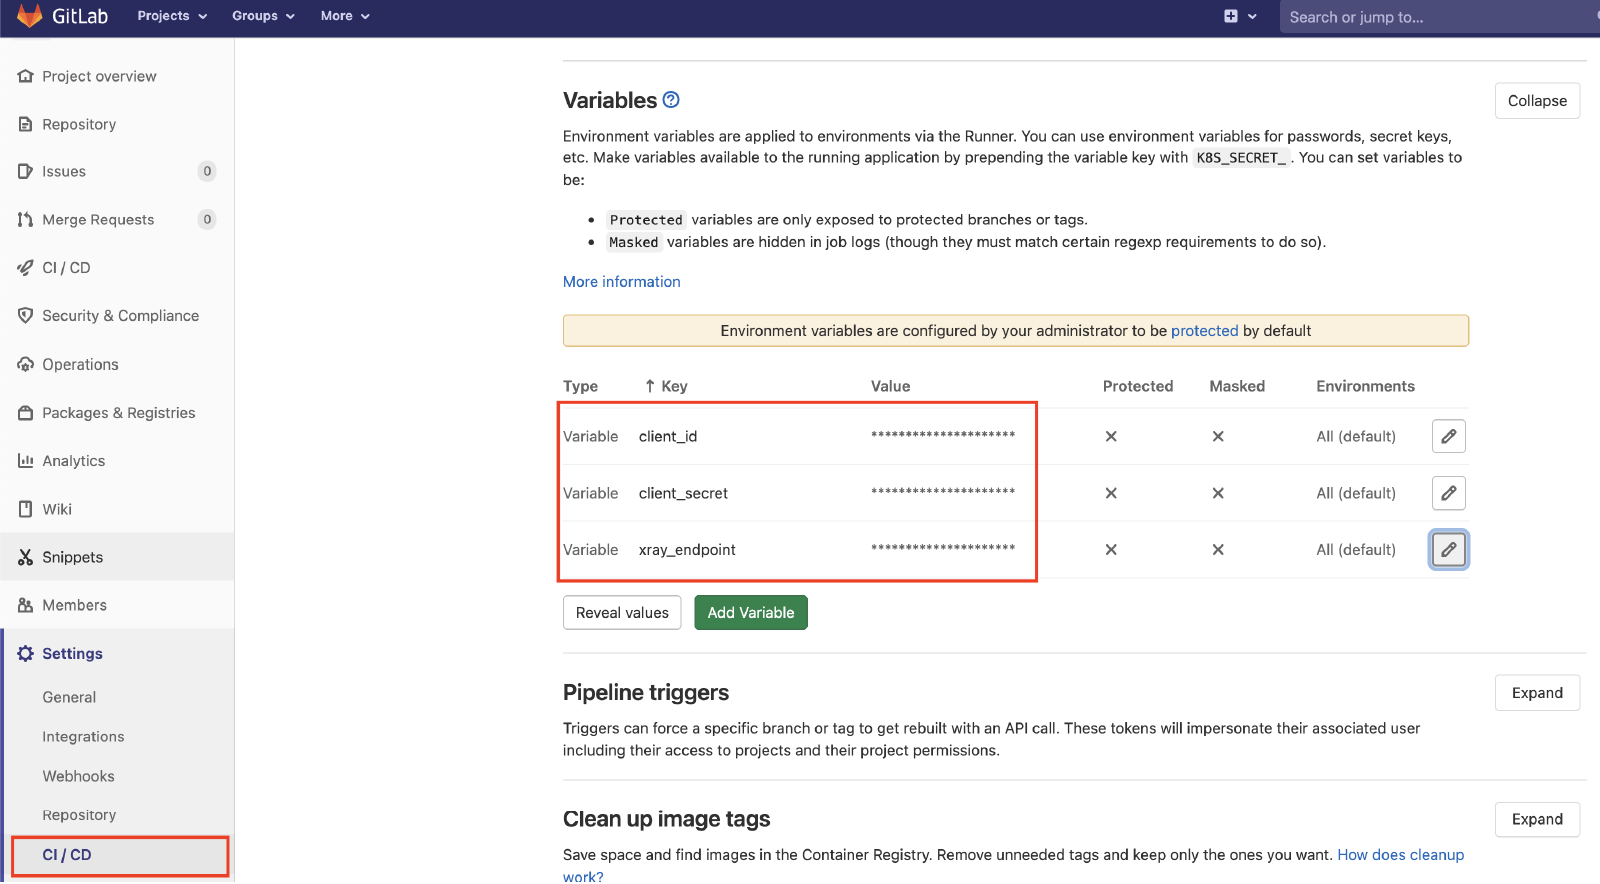
You’ll need to define Xray's endpoint base URL and the API key credentials. To do this, go to the Variables section to add three variables: two variables for the Client ID and the Xray secret code, and one variable for the endpoint.
Next, in your GitLab repository that contains the project's code and tests, create a pipeline configuration file.
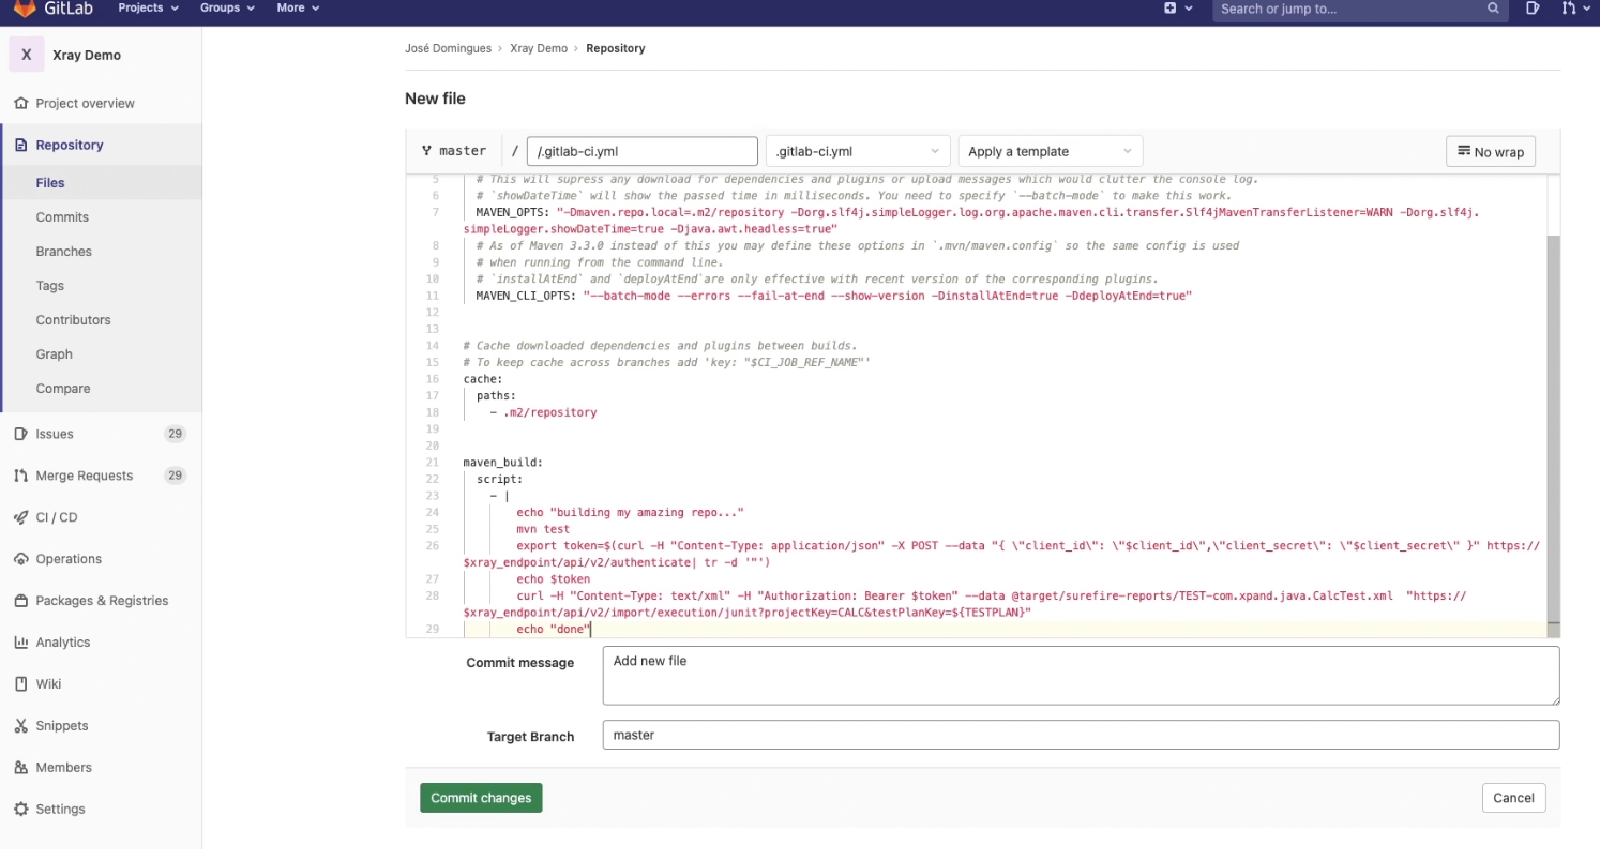
In this example, the pipeline will be triggered using GitLab's API. It will receive the Test Plan issue key as an input parameter. It will then run the build, including the automated tests, and report the results back to Xray using the "curl" utility.
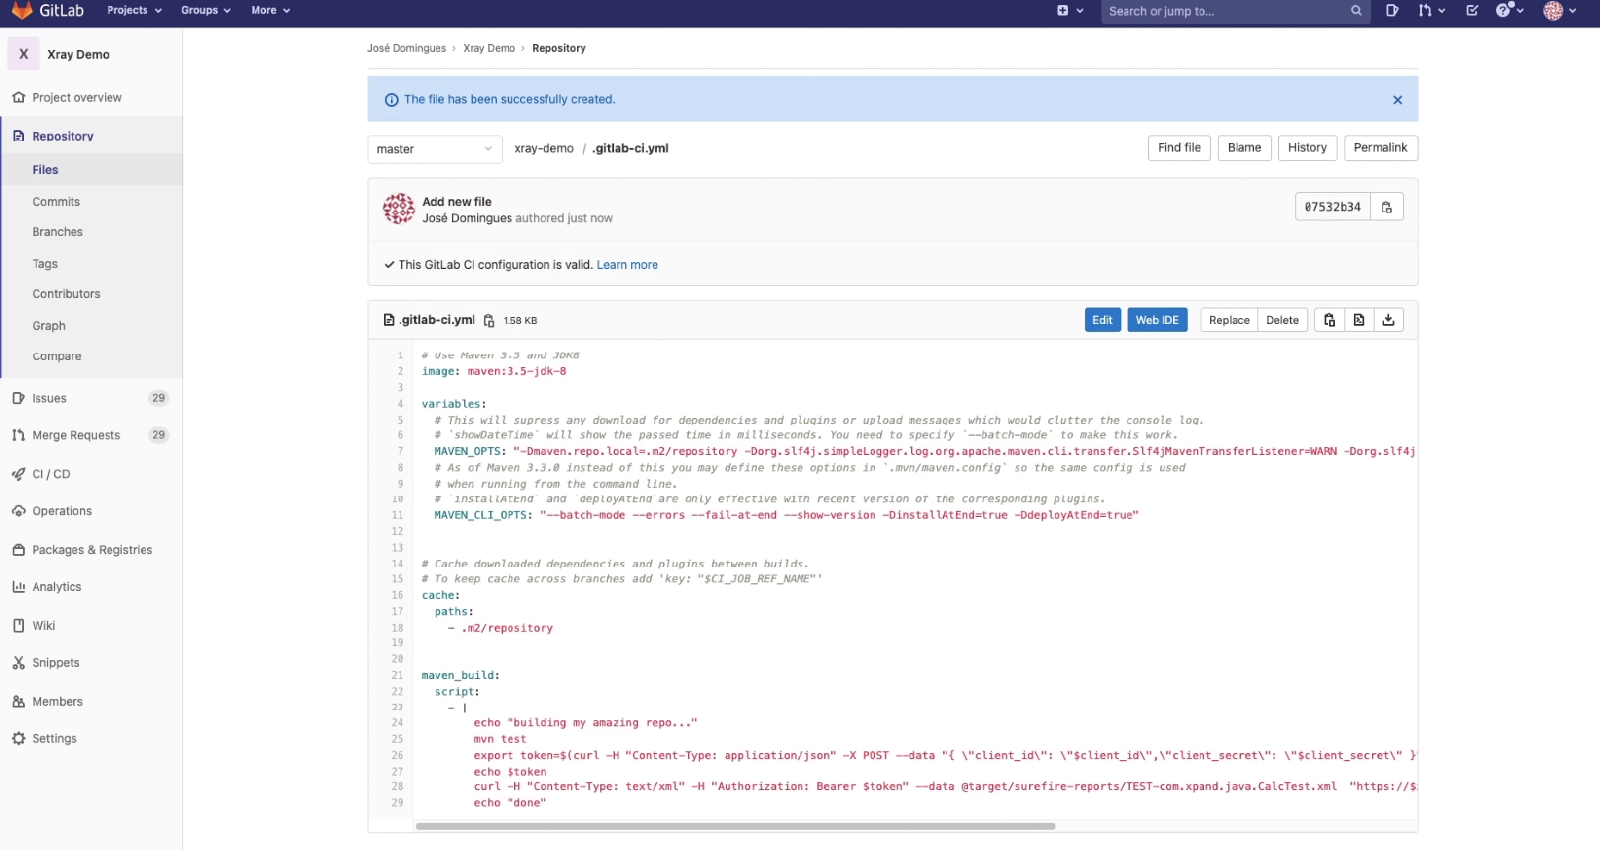
Step 4: Create the trigger with Automation for Jira
1. In Jira settings, under Automation, create a new rule and define the "When" (meaning when it should be triggered ). Set it for "Manual trigger."

2. Next, define the condition so that this rule can only be executed from the Test Plan issue.
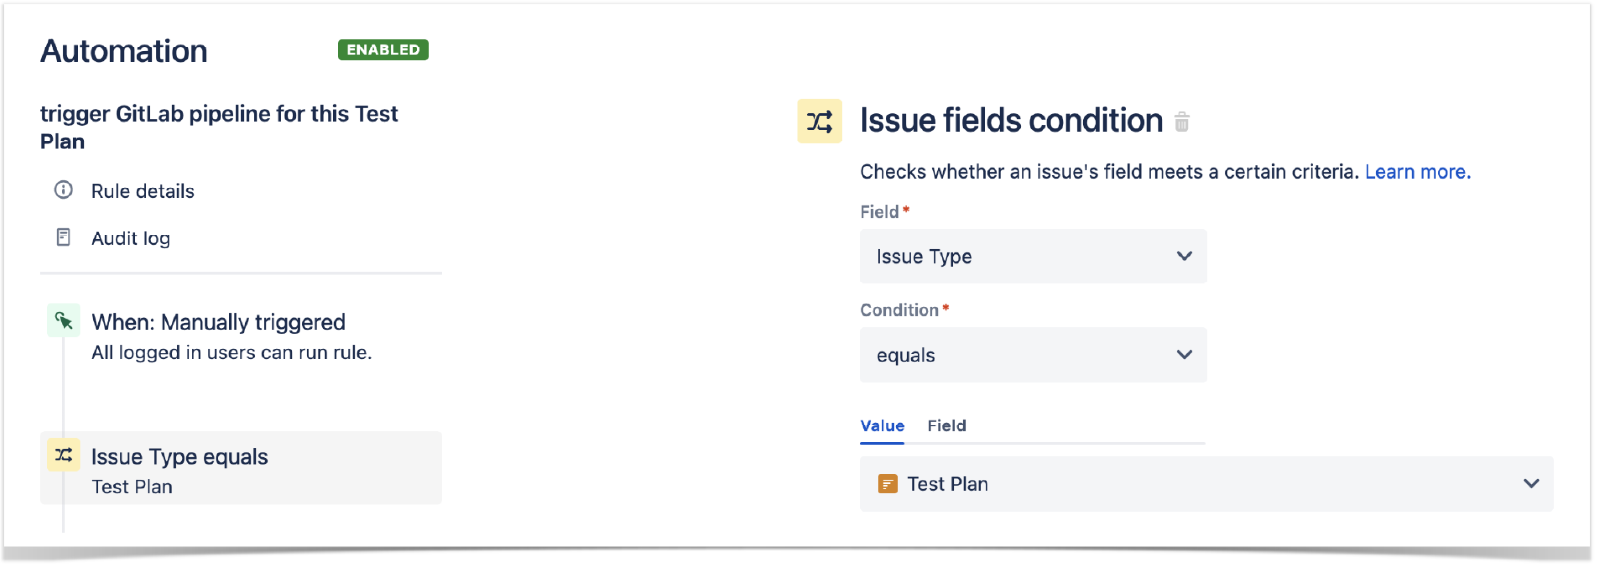
3. Define an action (the "Then"), set it as "Send web request," and configure it with the URL of the GitLab project.
4. Set the "Content-Type" header to "Multipart form data"
5. Lastly, in Custom Data, insert the token data that was created previously.
6. Click save to publish the rule.
Step 5: Run the trigger
Go back to your Test Plan screen and run the trigger. Your tests will be executed and show as passed or failing.
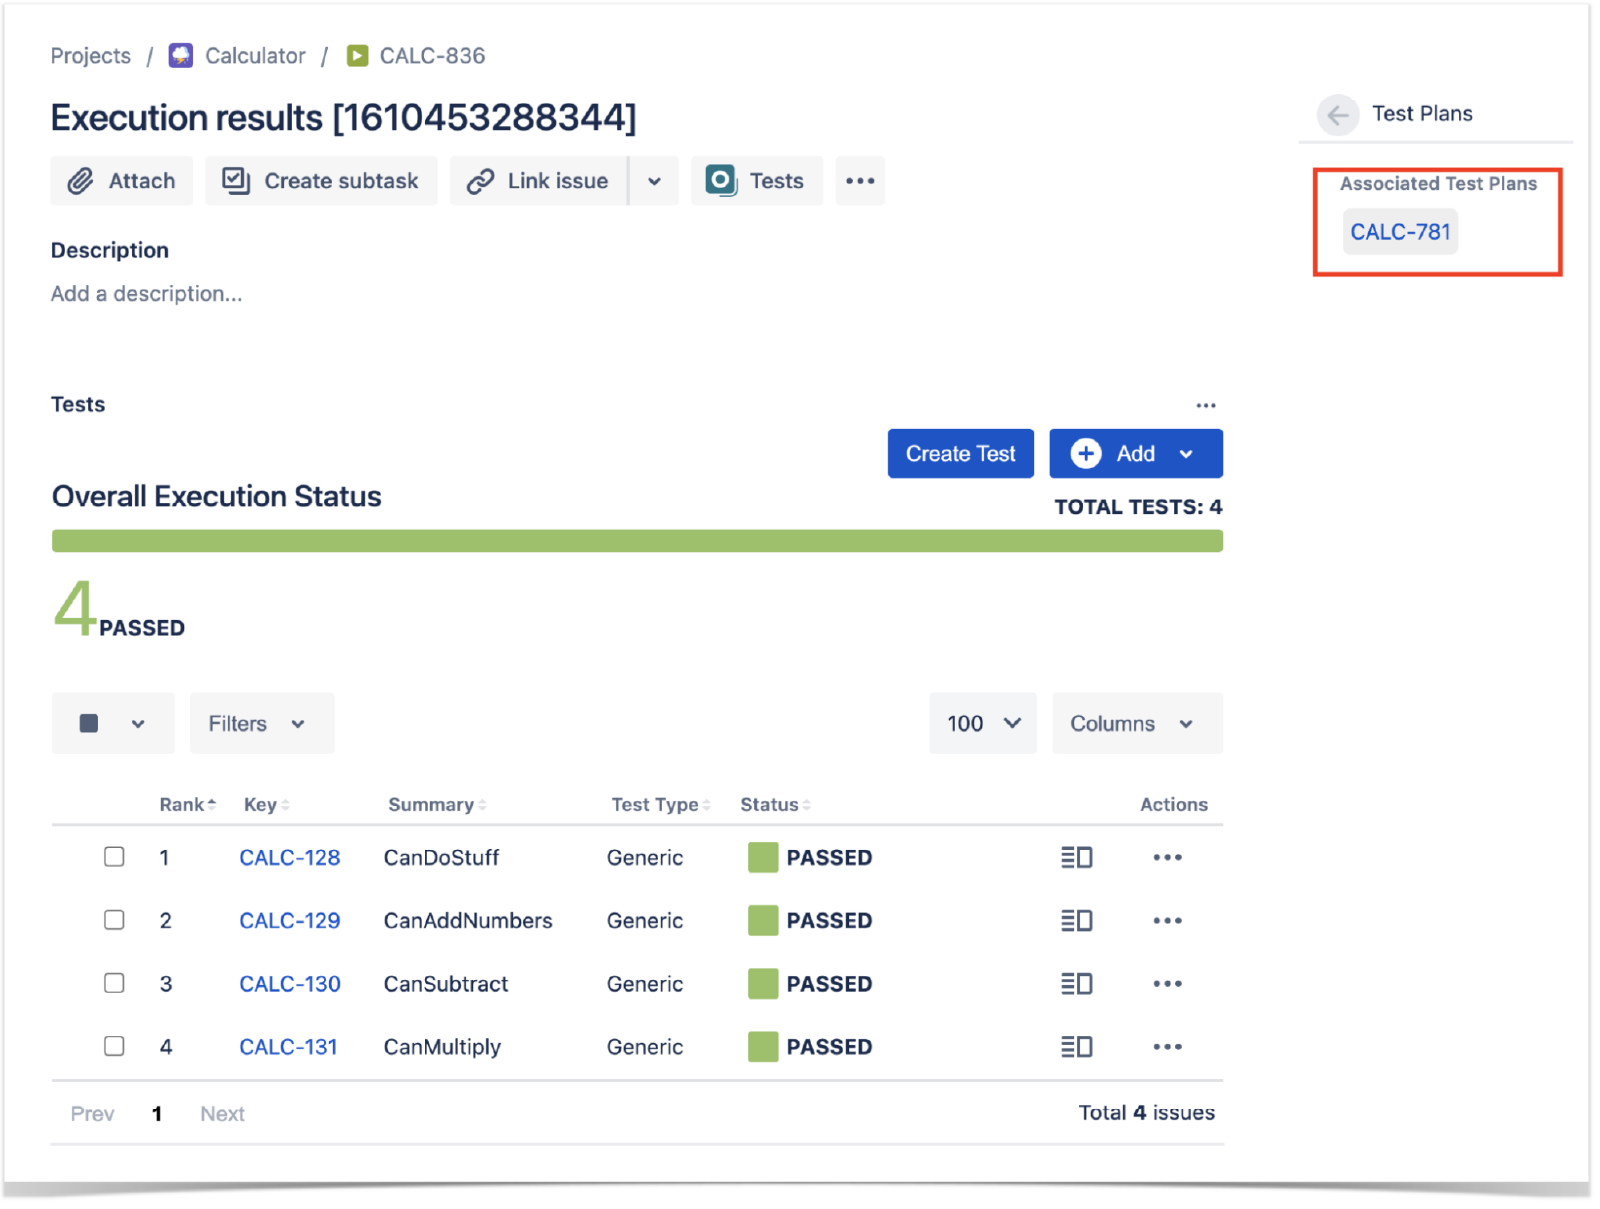
And you're done. This is an easy way to trigger test automation and visualize all of your results in Xray.
This is just one of the many ways Xray centralizes all your testing activities and allows all team members of a software development project to participate in improving quality.
Want to learn more?
For more detailed information on working with automation, check out Xray’s documentation.
Share this article
Next Topic
Recommended reading
Bookmark these resources to learn about types of DevOps teams, or for ongoing updates about DevOps at Atlassian.

DevOps community

DevOps learning path
